Mobilizations
A crew on one job needs a machine that's idle on another. Mobilizations are how the office moves owned equipment between yards, jobs, and sites — coordinated, dispatched, and recorded in one place.
#Why this exists
Heavy civil contractors own a lot of iron. On any given week, some of it is working and some of it is sitting at a yard or a job that's wound down. When a new need shows up — a Ticket from the field, a fresh Equipment request — the right answer is often "we already own one of those, two hours away."
Without Gearflow, that answer doesn't surface. The dispatcher who'd notice it is on the phone with a rental yard. The operator with the idle dozer doesn't know there's a job that wants it. The freight call to move it is its own thread of phone tag and emails. Every step is a separate conversation.
A mobilization is the one record that holds those conversations together. Dispatch picks the asset, picks the origin and destination, picks (or doesn't) a hauler to do the move, and the whole thing — RFQs, PO, driver, truck number, delivery — sits on one page. The next person to ask about that piece of equipment can see what's happening with it.
#Mobilization vs. Equipment request
The two surfaces look almost identical: same right-side detail panel, same Sourcing section, same multi-vendor RFQ mechanics. They differ on what's actually being procured.
| What's being procured | Equipment request: a unit (rental or rental-purchase). Mobilization: a move. |
|---|---|
| The asset | Equipment request: doesn't exist yet — the vendor brings it. Mobilization: already in the customer's fleet. |
| The vendor | Equipment request: rental yards (United, Sunbelt, Herc). Mobilization: haulers and freight companies. Optional — the customer's own truck and driver can do the move. |
| Terminal state | Equipment request: Called Off (rental returned). Mobilization: Received (asset arrived at destination). |
If you're talking about renting or buying iron from a third party, that's an Equipment request. If you're talking about moving iron the customer already owns, that's a Mobilization. The two flows hand off to each other — it's worth being precise about which side of the handoff you're on.
#What you're looking at
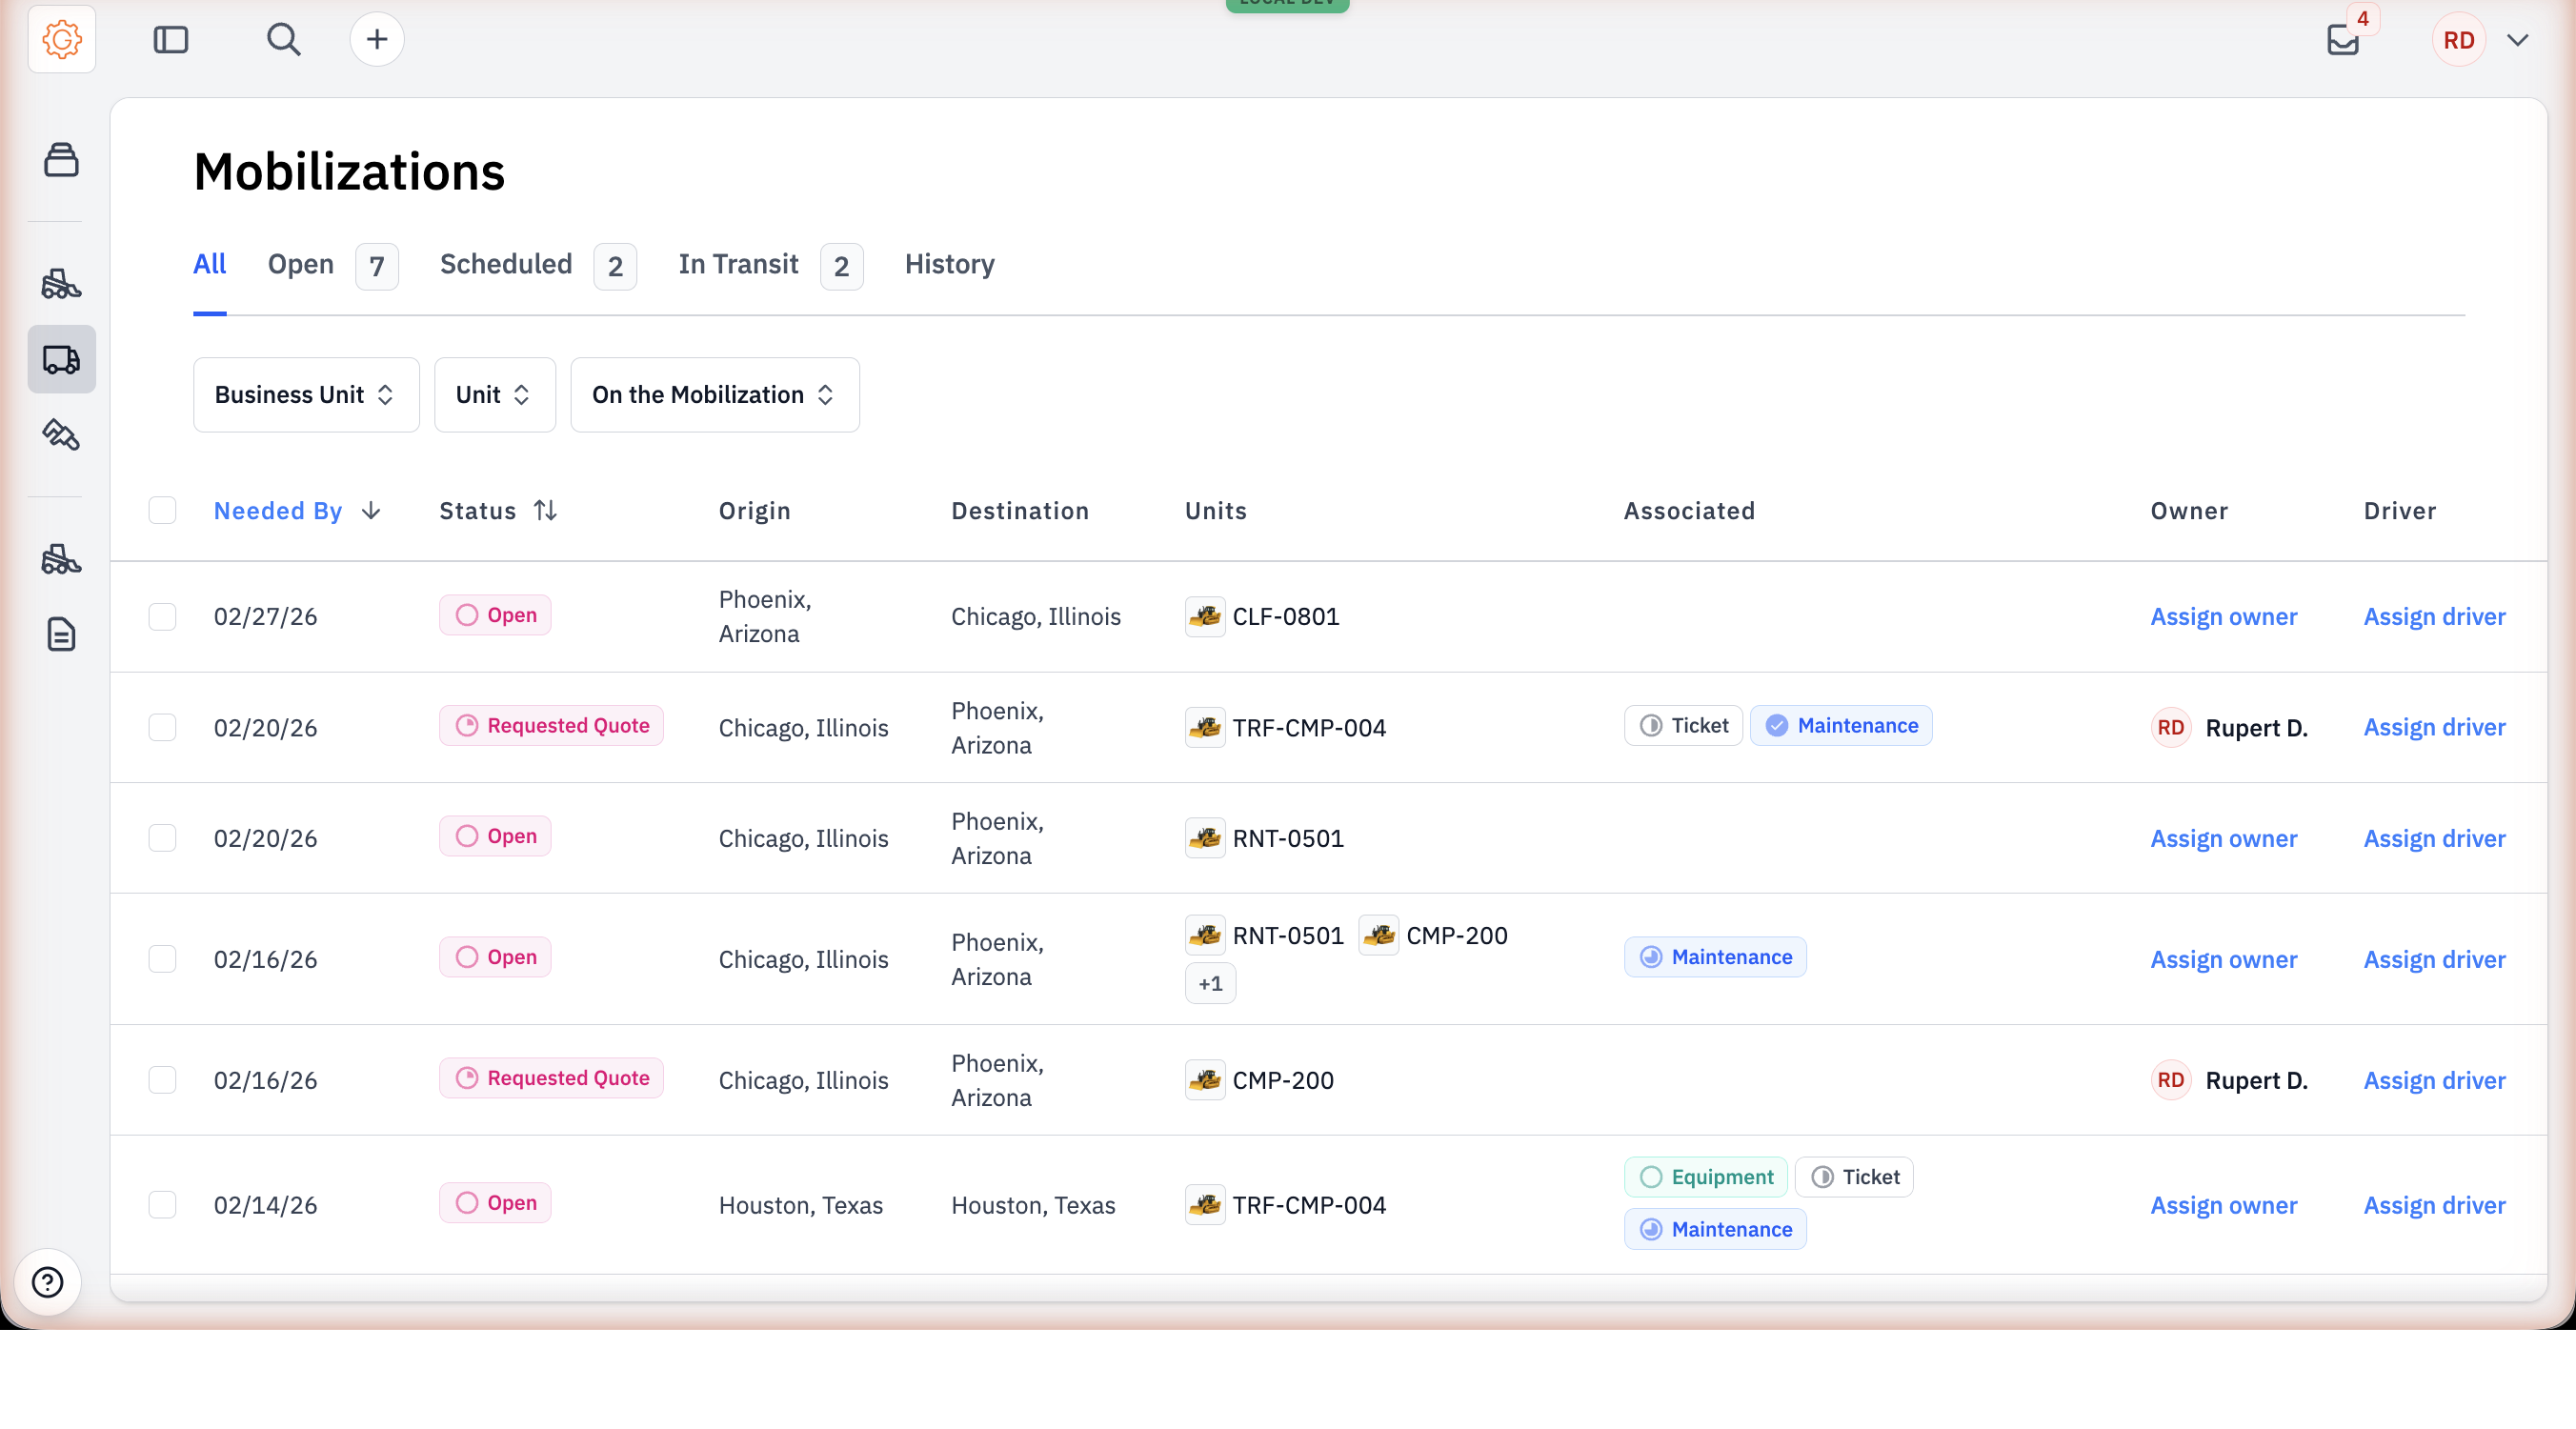
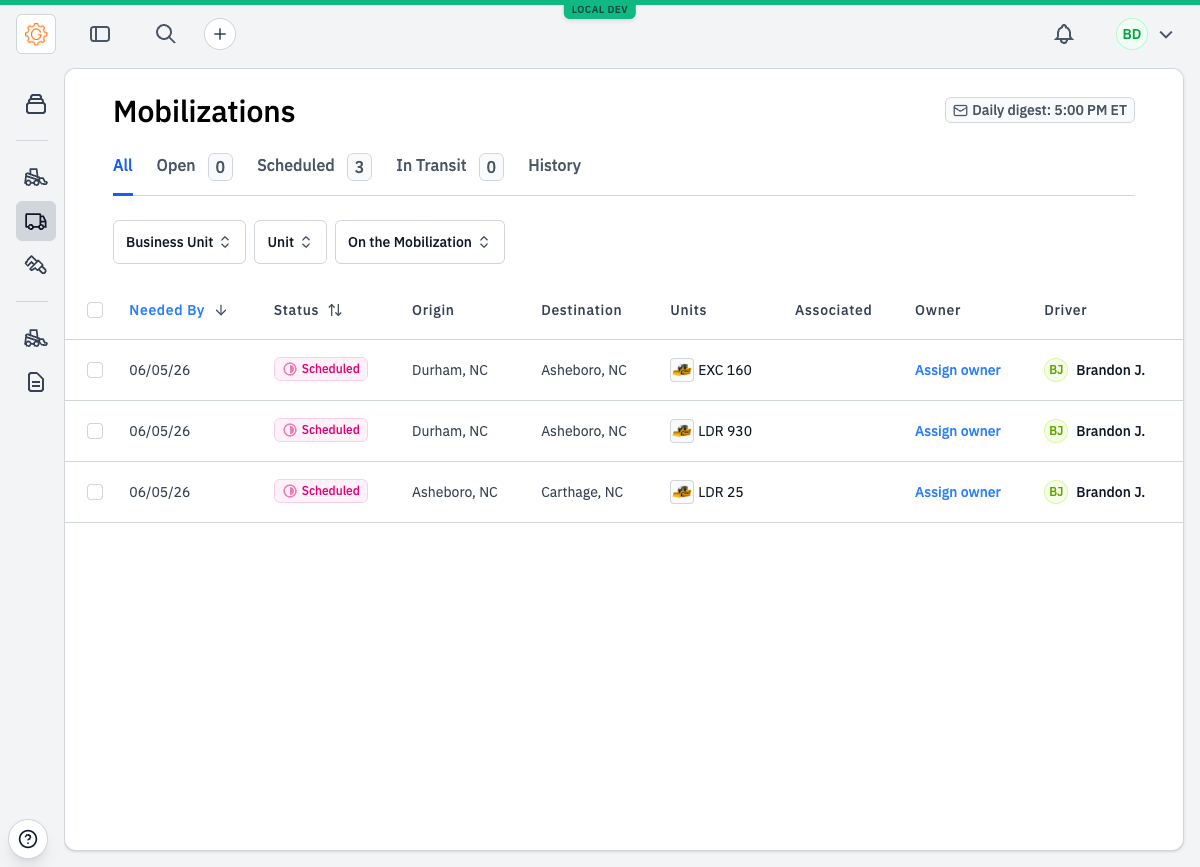
Mobilizations live under the Mobilizations tab in the left navigation. Each row is one move — the assets being moved, the origin and destination, the status, the owner, and the driver.
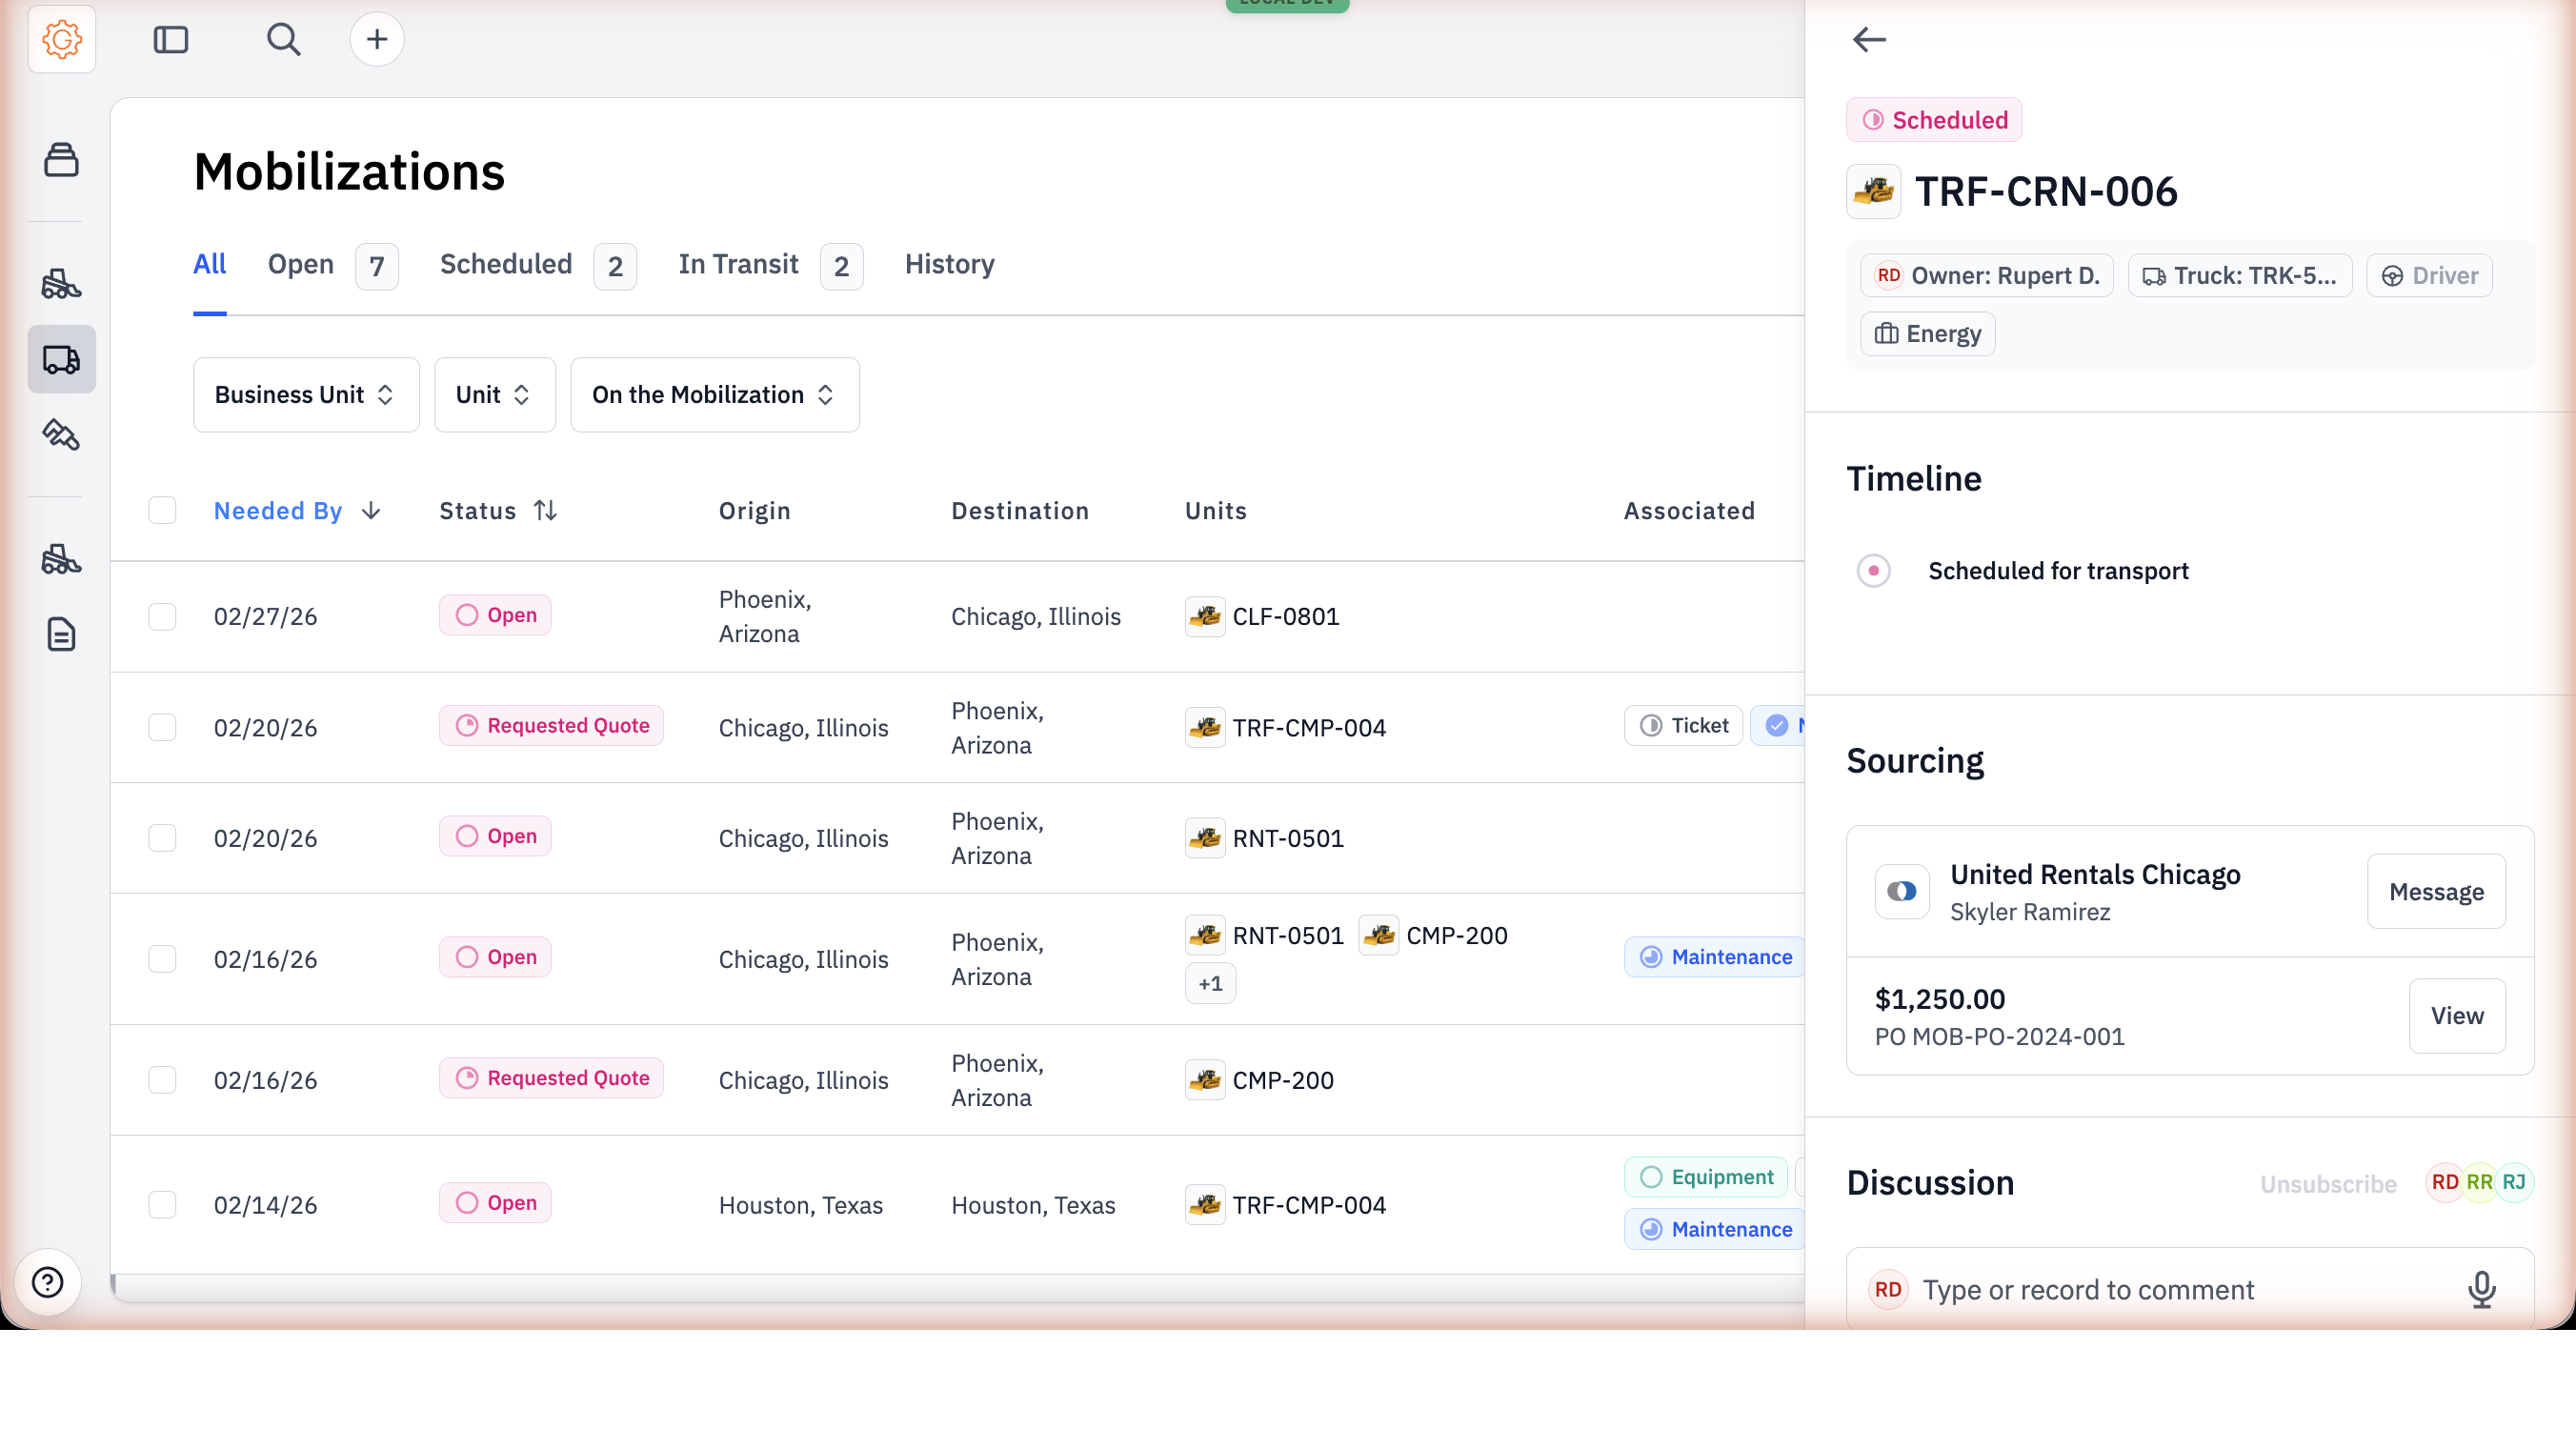
Open a mobilization from the list and a detail panel slides in from the right.
#Priority: triage the day's moves
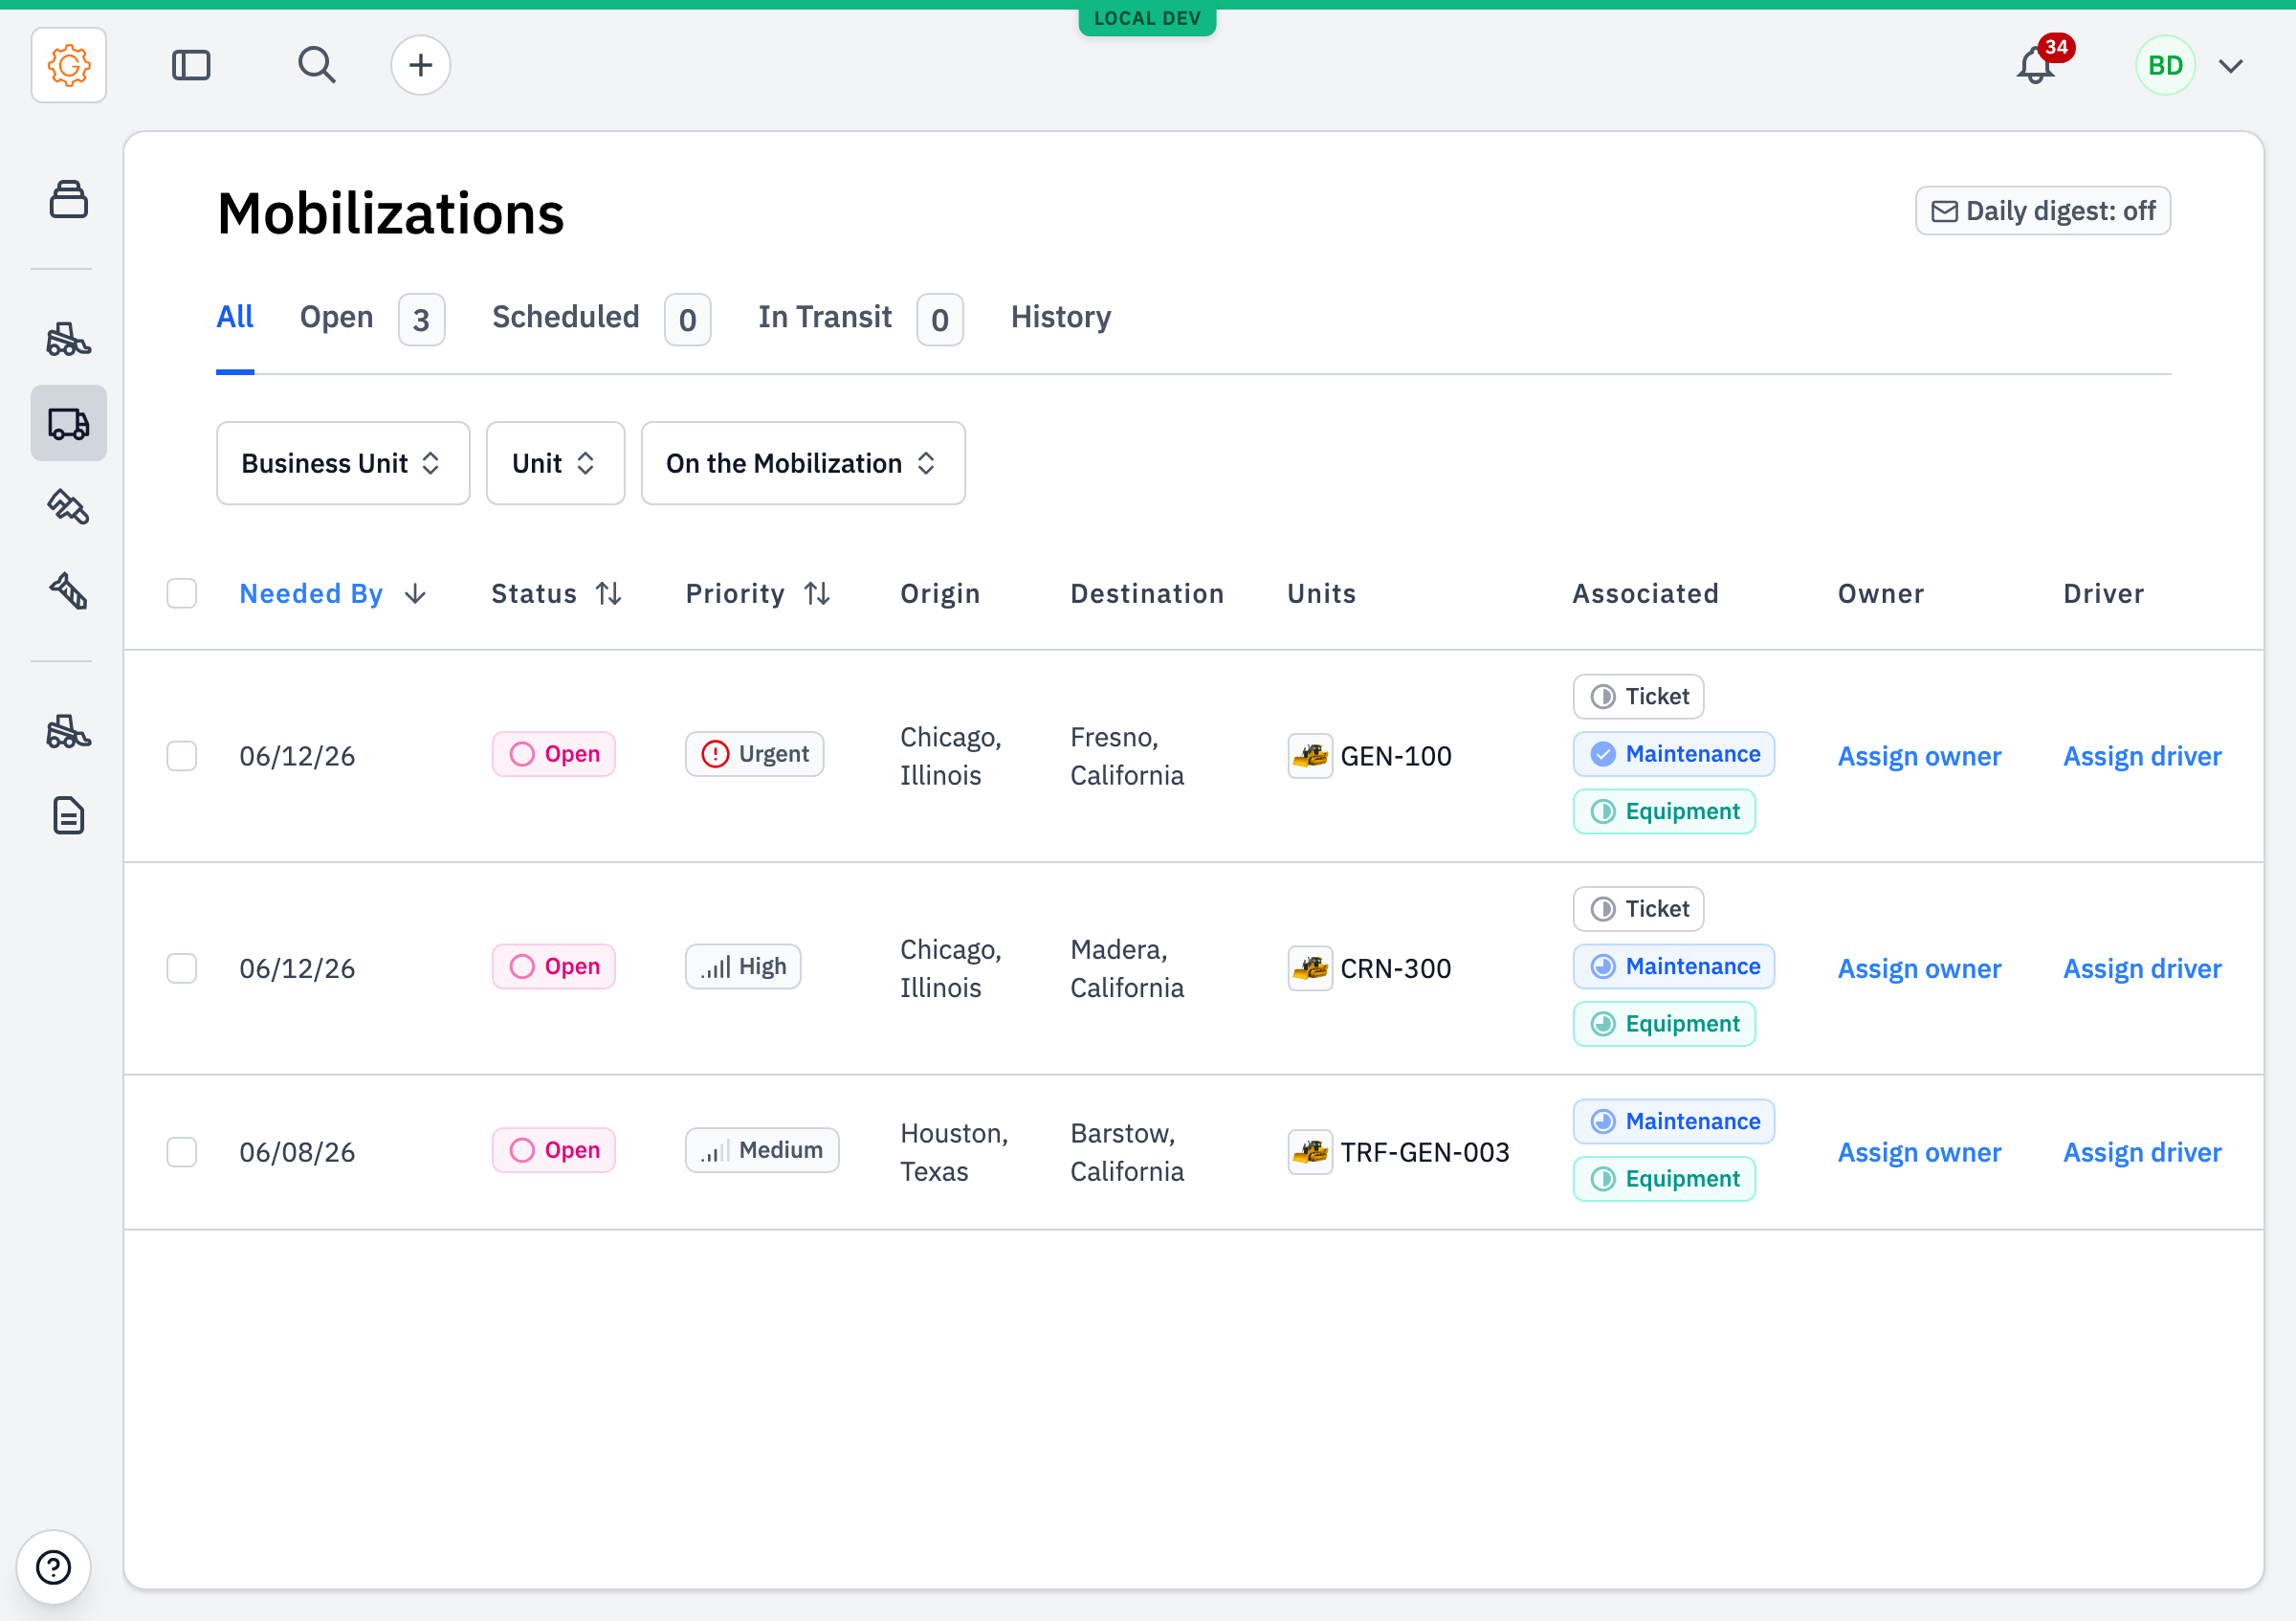
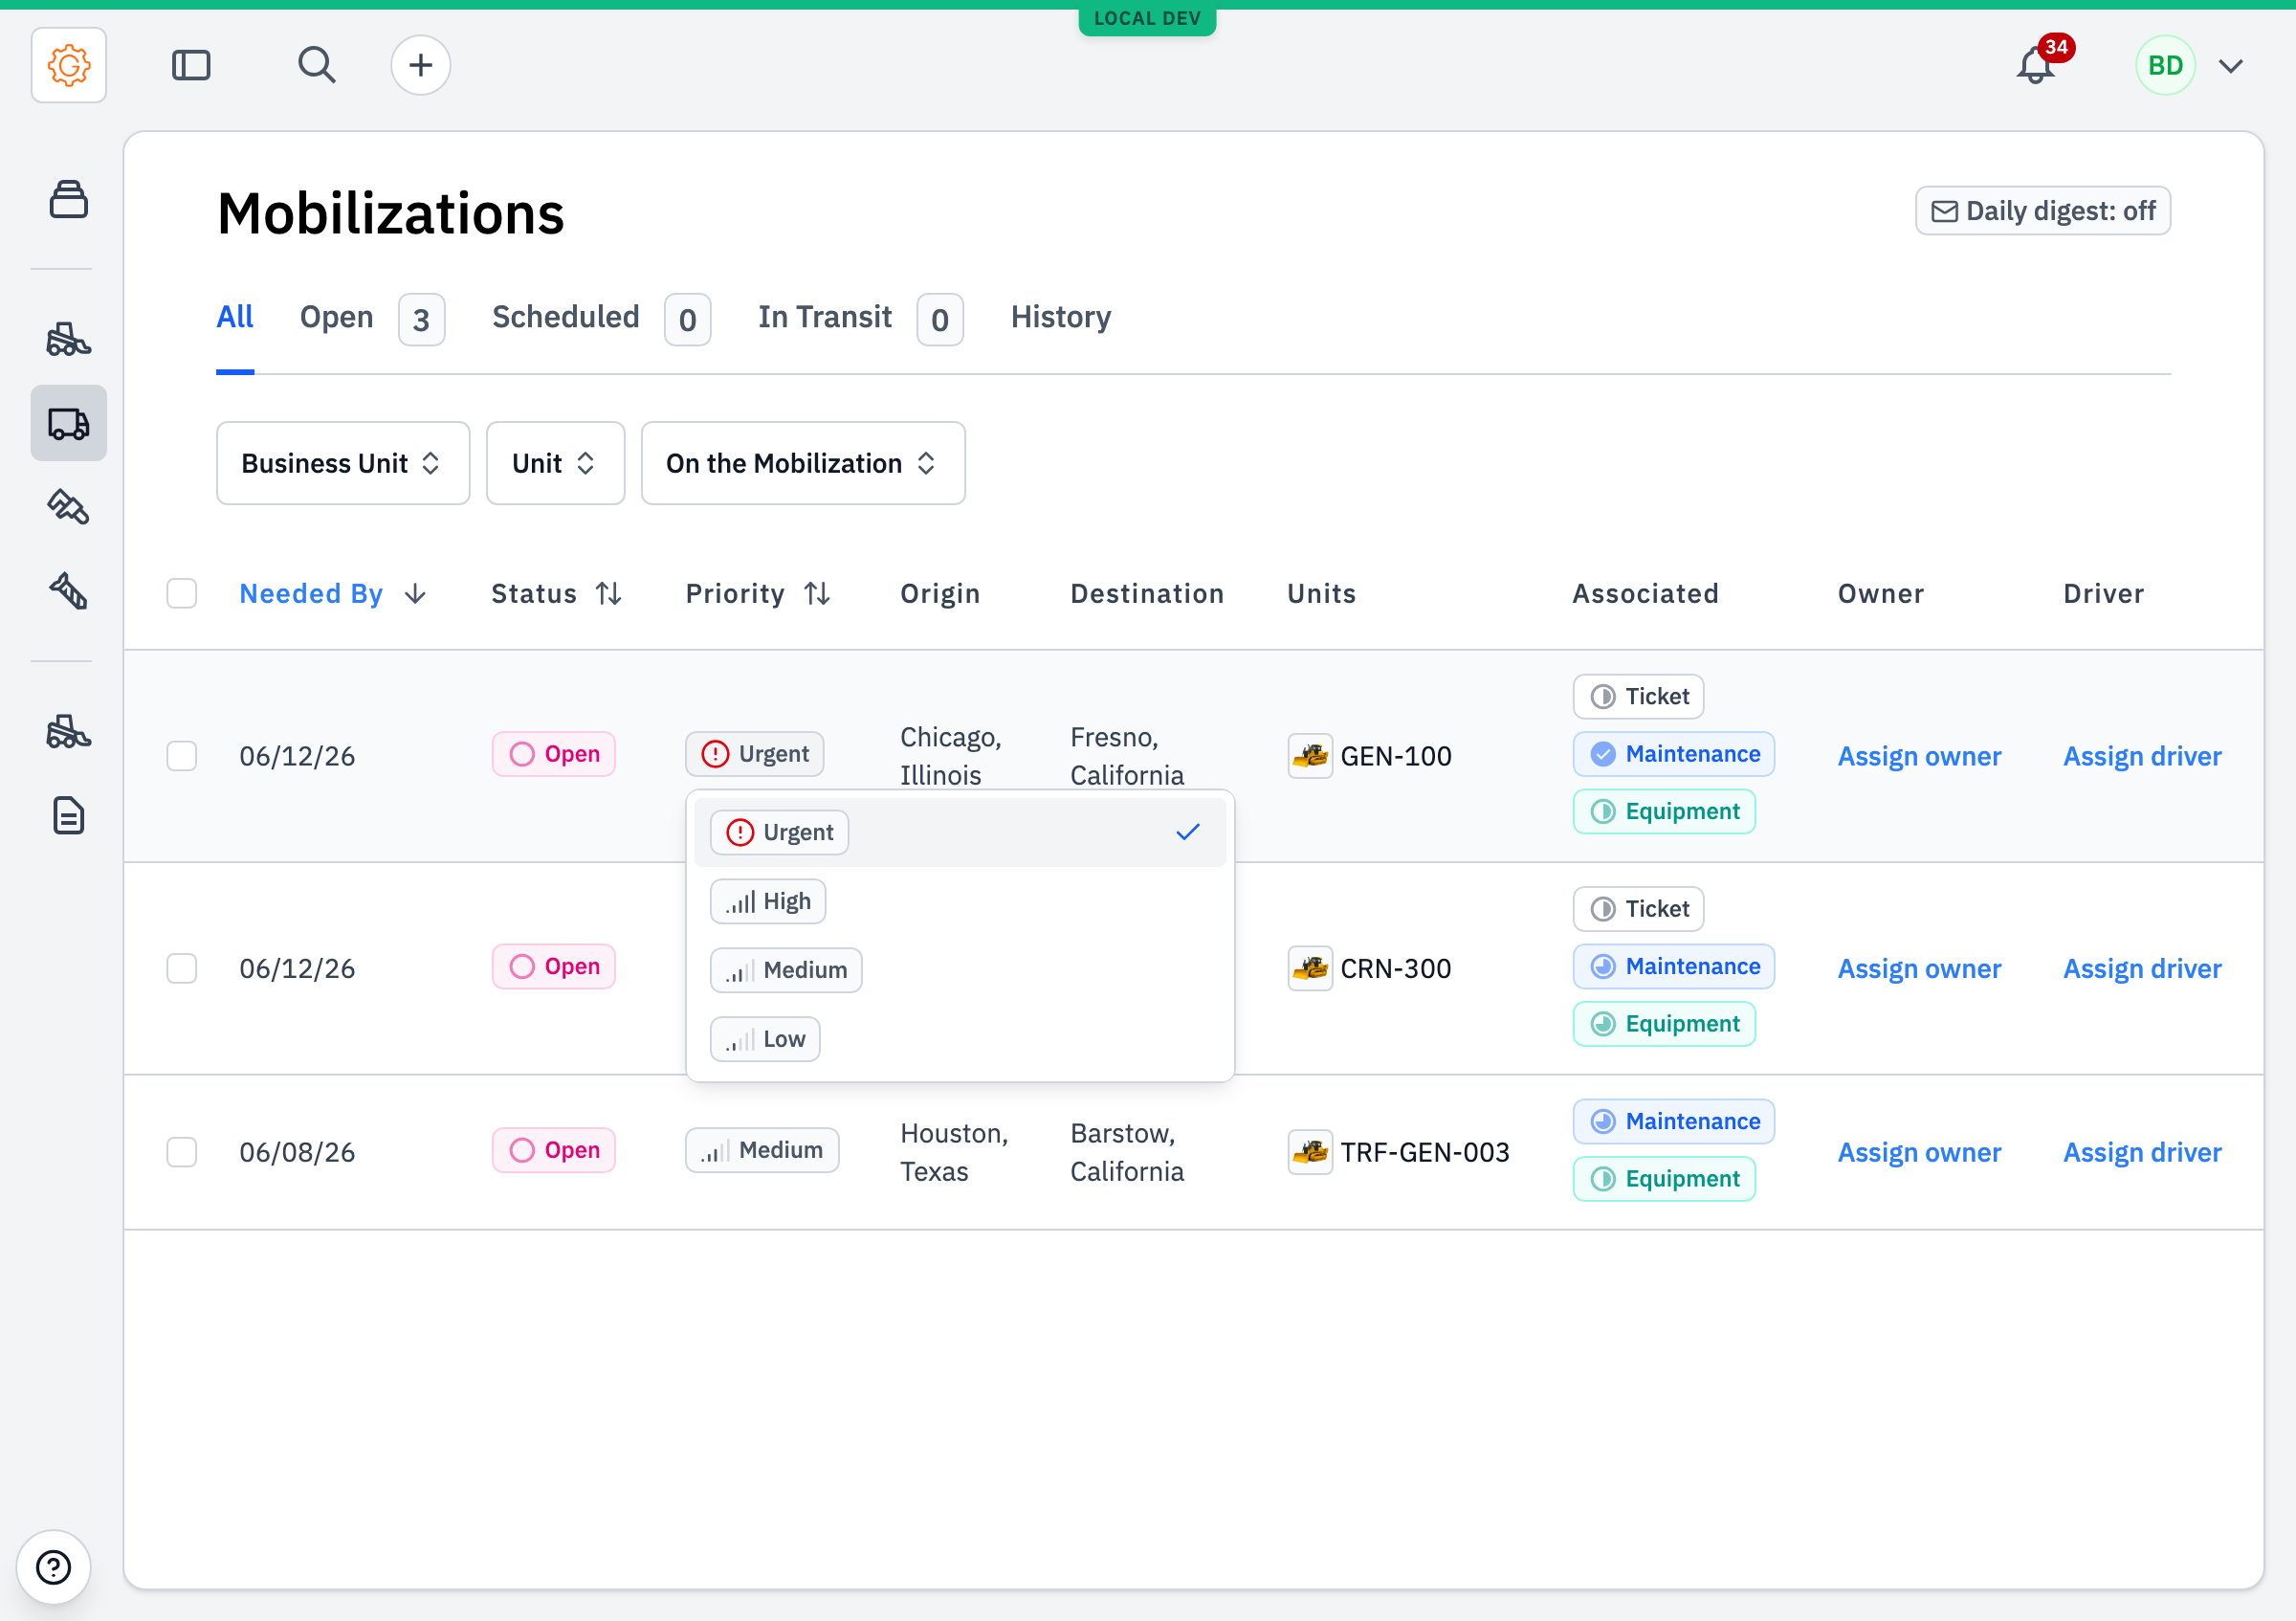
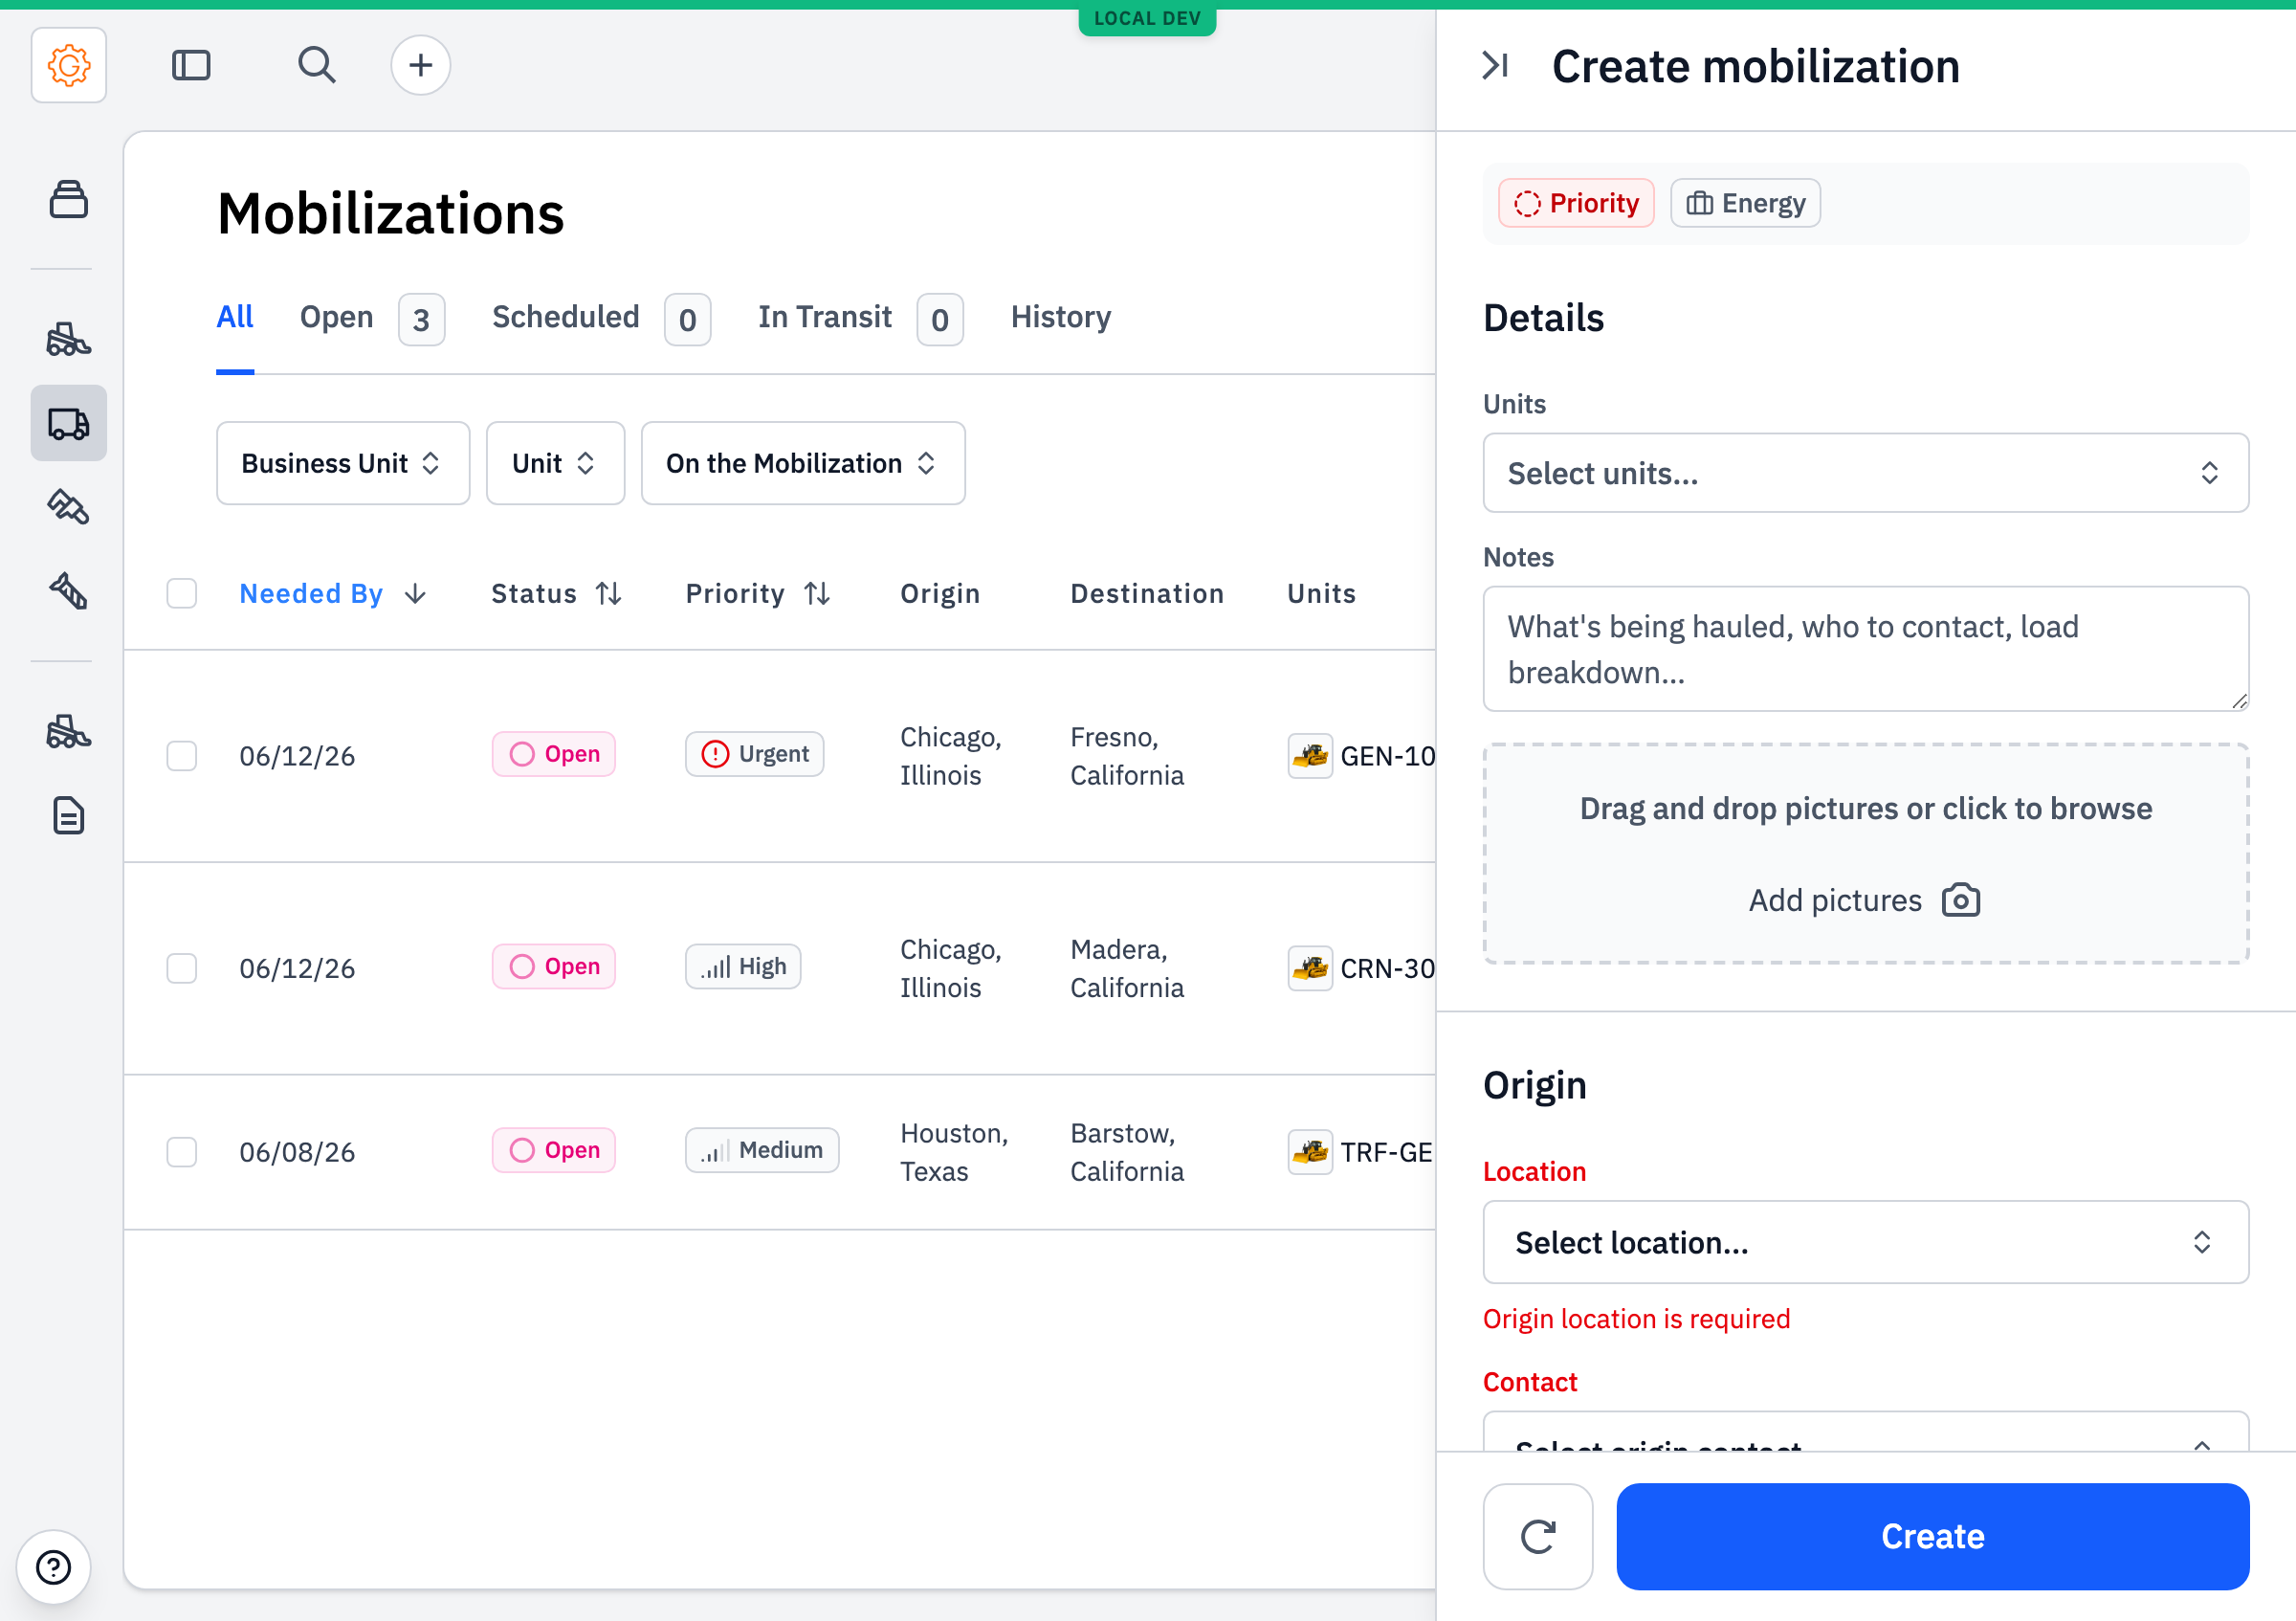
On a busy week a single driver might have six moves on the board and only get to four. Priority tells dispatch and drivers which moves matter most. Every mobilization carries one — Urgent, High, Medium, or Low — shown as a sortable column on the list and as a badge on the detail panel.
Priority is editable in place — click the badge on any row and pick a new level without opening the move.
A priority is required when a move is created — the form won't submit without one, so no move ever lands on the board unranked.
#Lifecycle
Open is the moment a dispatcher creates the mobilization — the move is on the books but no hauler is lined up. Requested Quote means RFQs have gone to one or more haulers and the office is waiting on prices. Scheduled means a quote has been accepted, a PO sent to the hauler, and the move is committed but hasn't started. In Transit is the asset on the road — driver and truck number are on the record by this point. Received is the asset at destination. There's also a Canceled state for moves that are abandoned along the way.
#Walkthrough
#Step 1: Create the mobilization
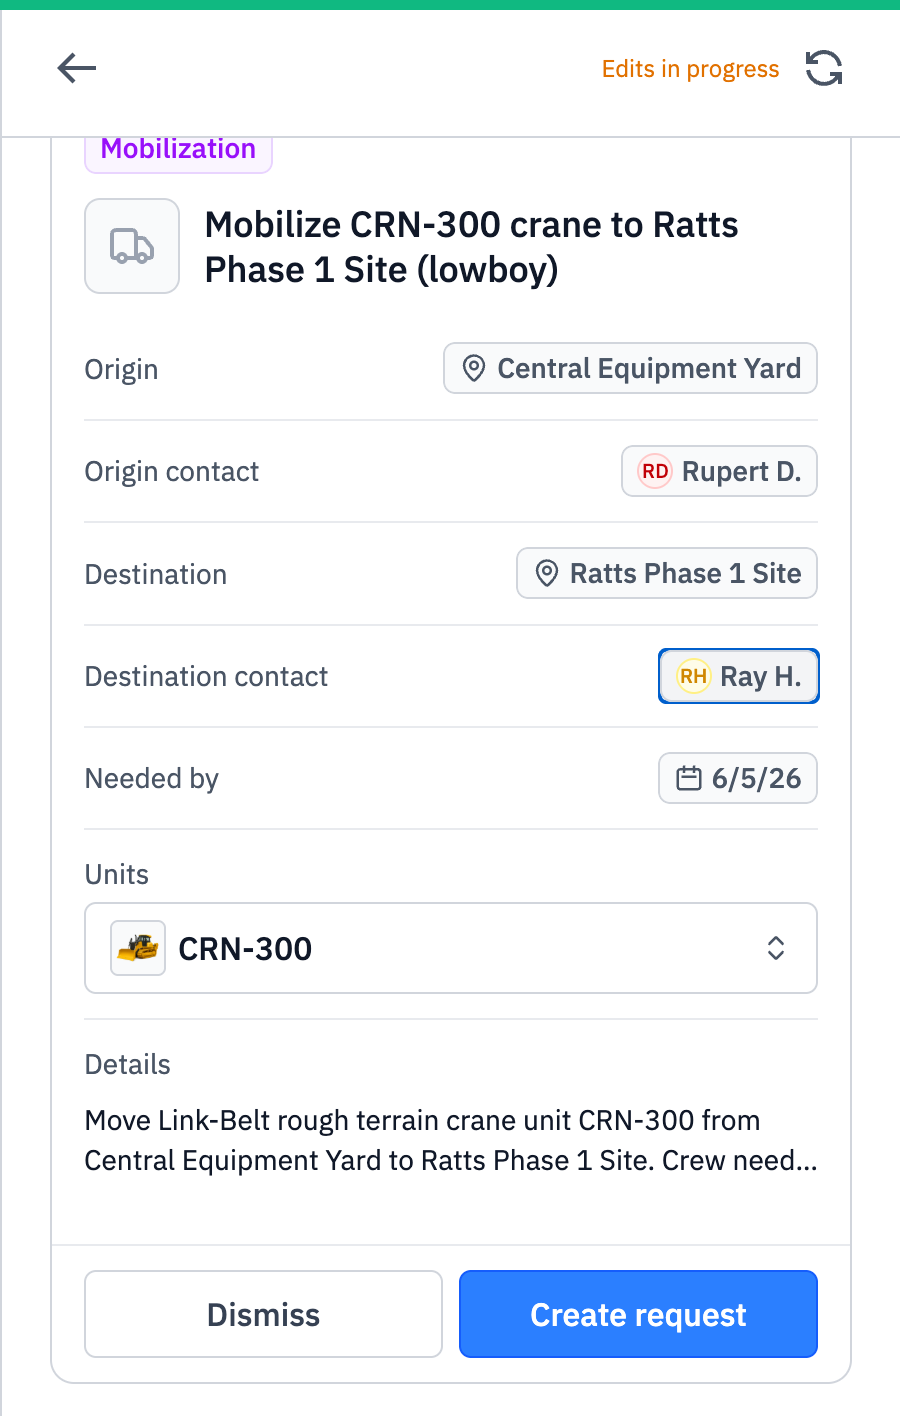
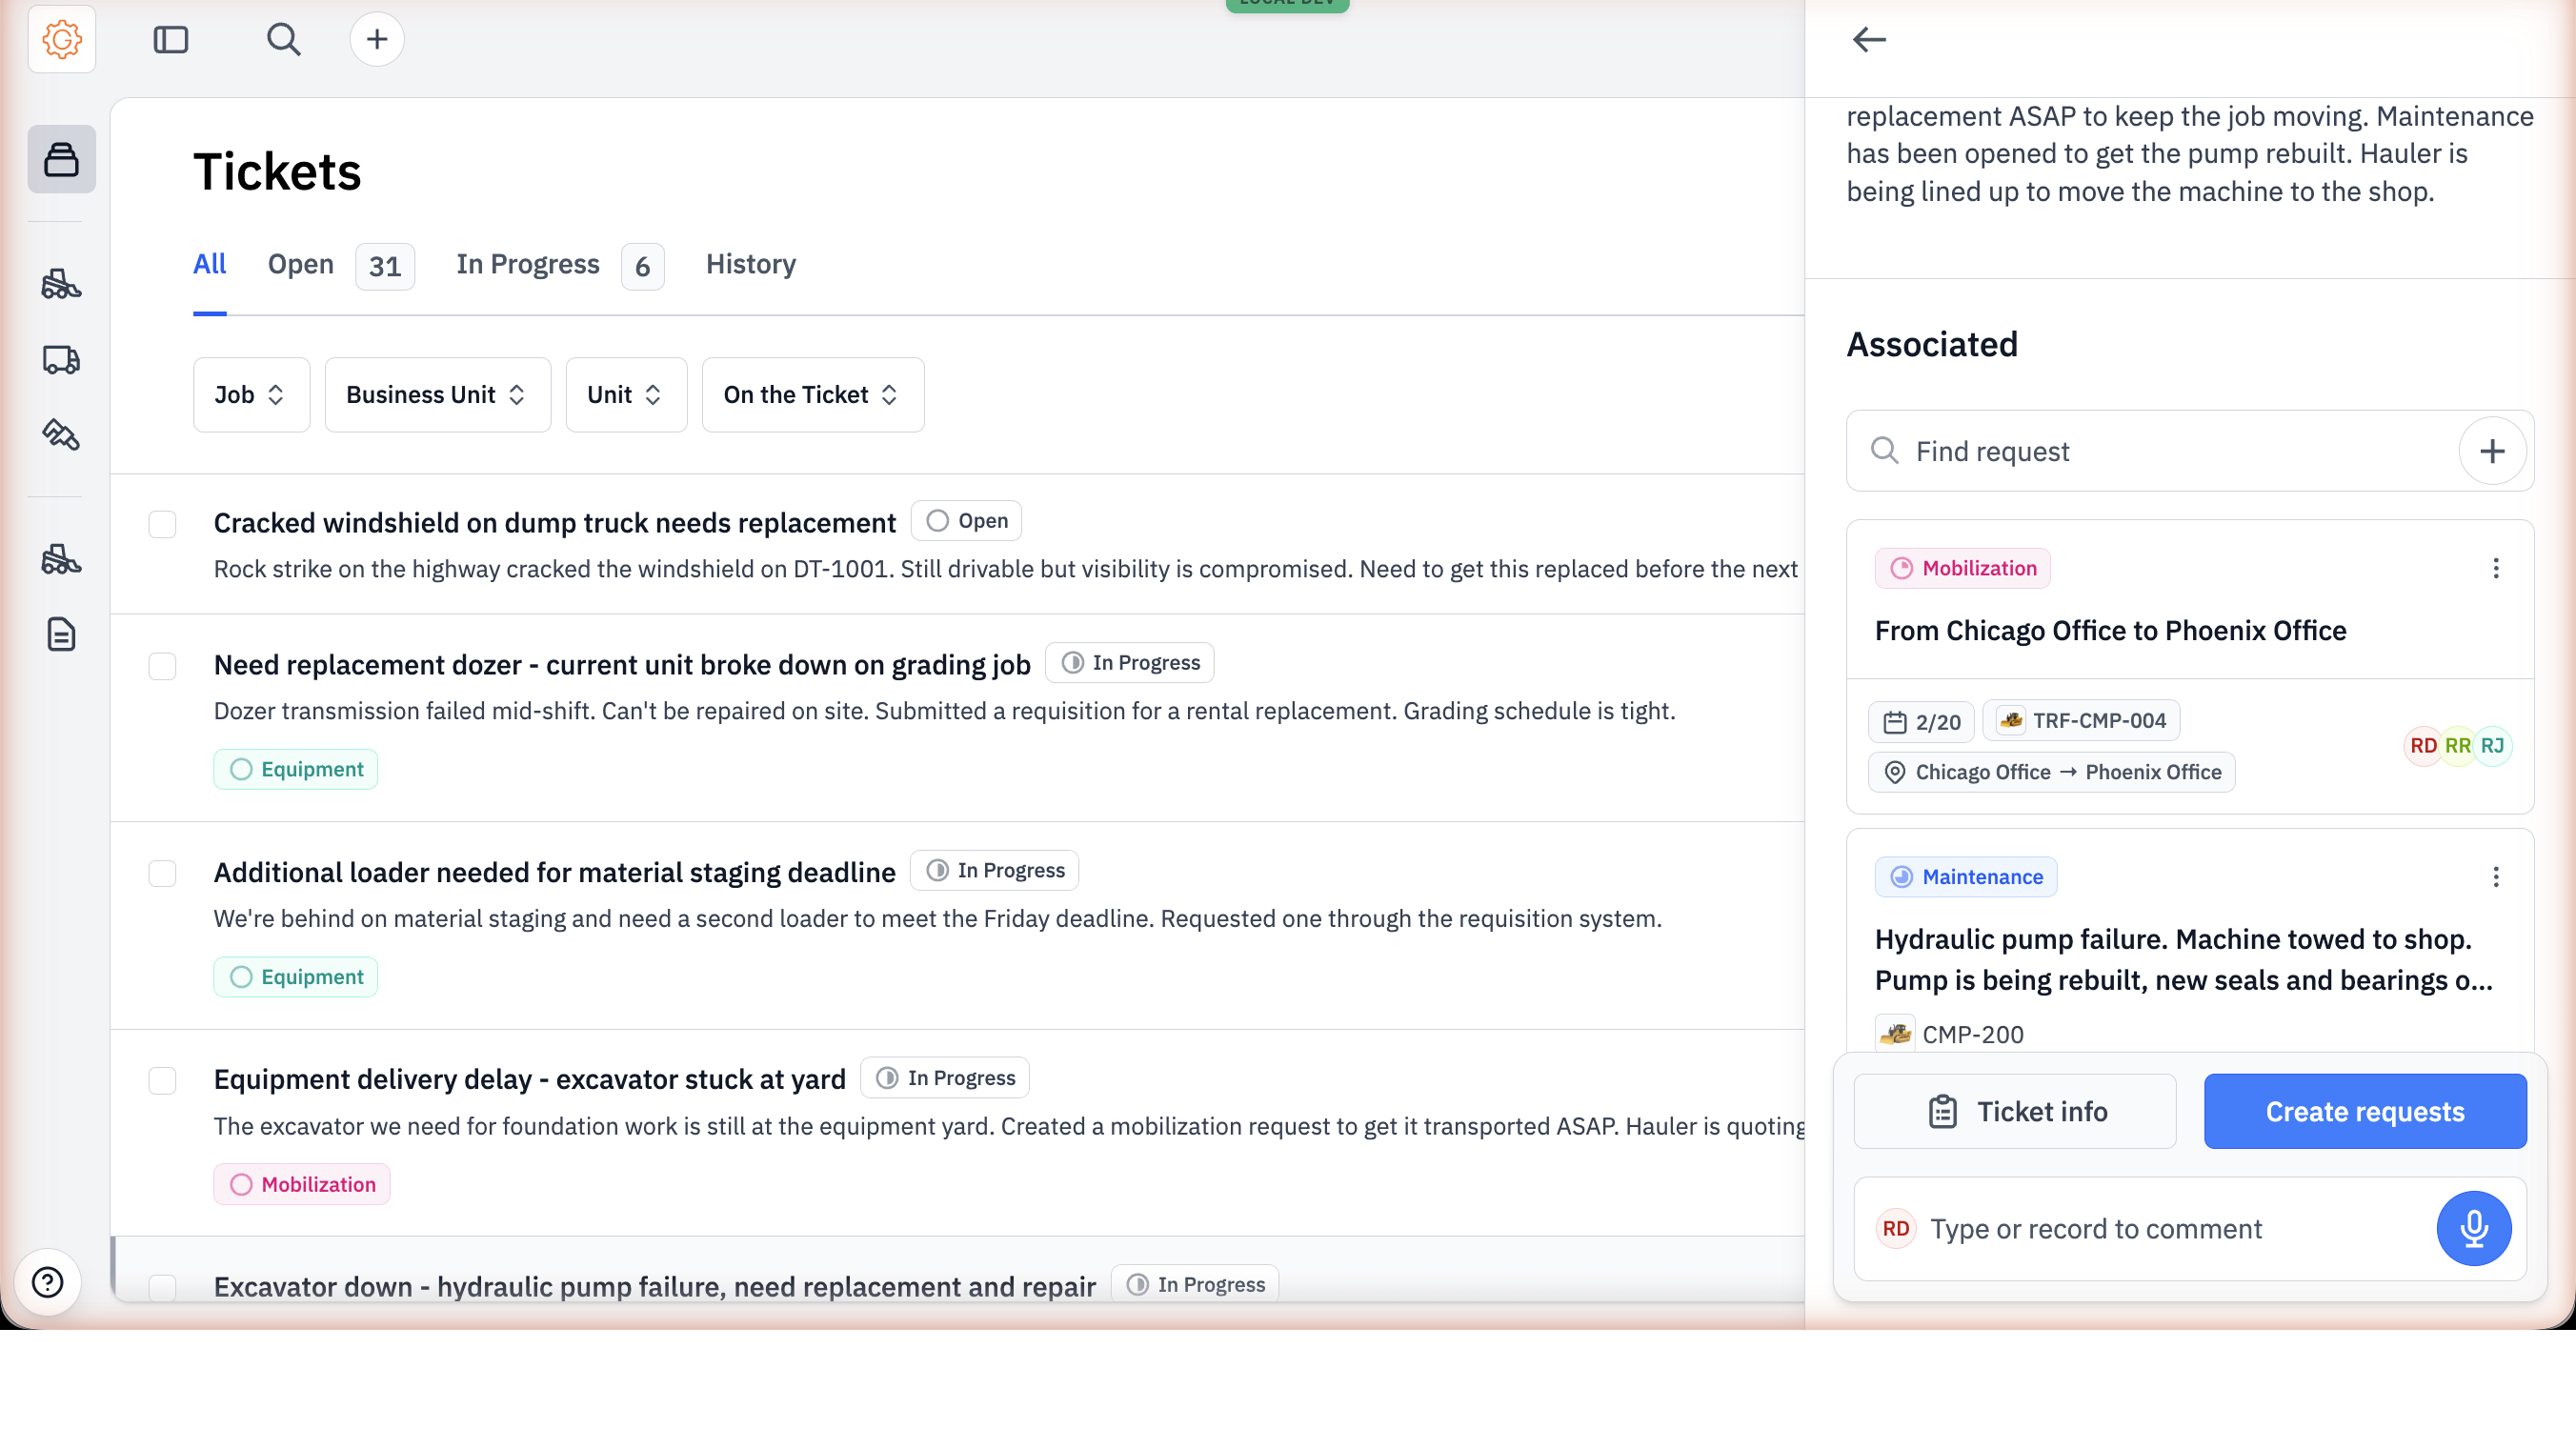
Mobilizations get created two ways. Most commonly, the AI suggests one as part of a Ticket — a "loader needed at Stillwater" ticket that the AI reads as "we own a CAT 982M sitting at the yard, mobilize it" rather than "rent one". The dispatcher accepts the suggested request and the form pre-fills.
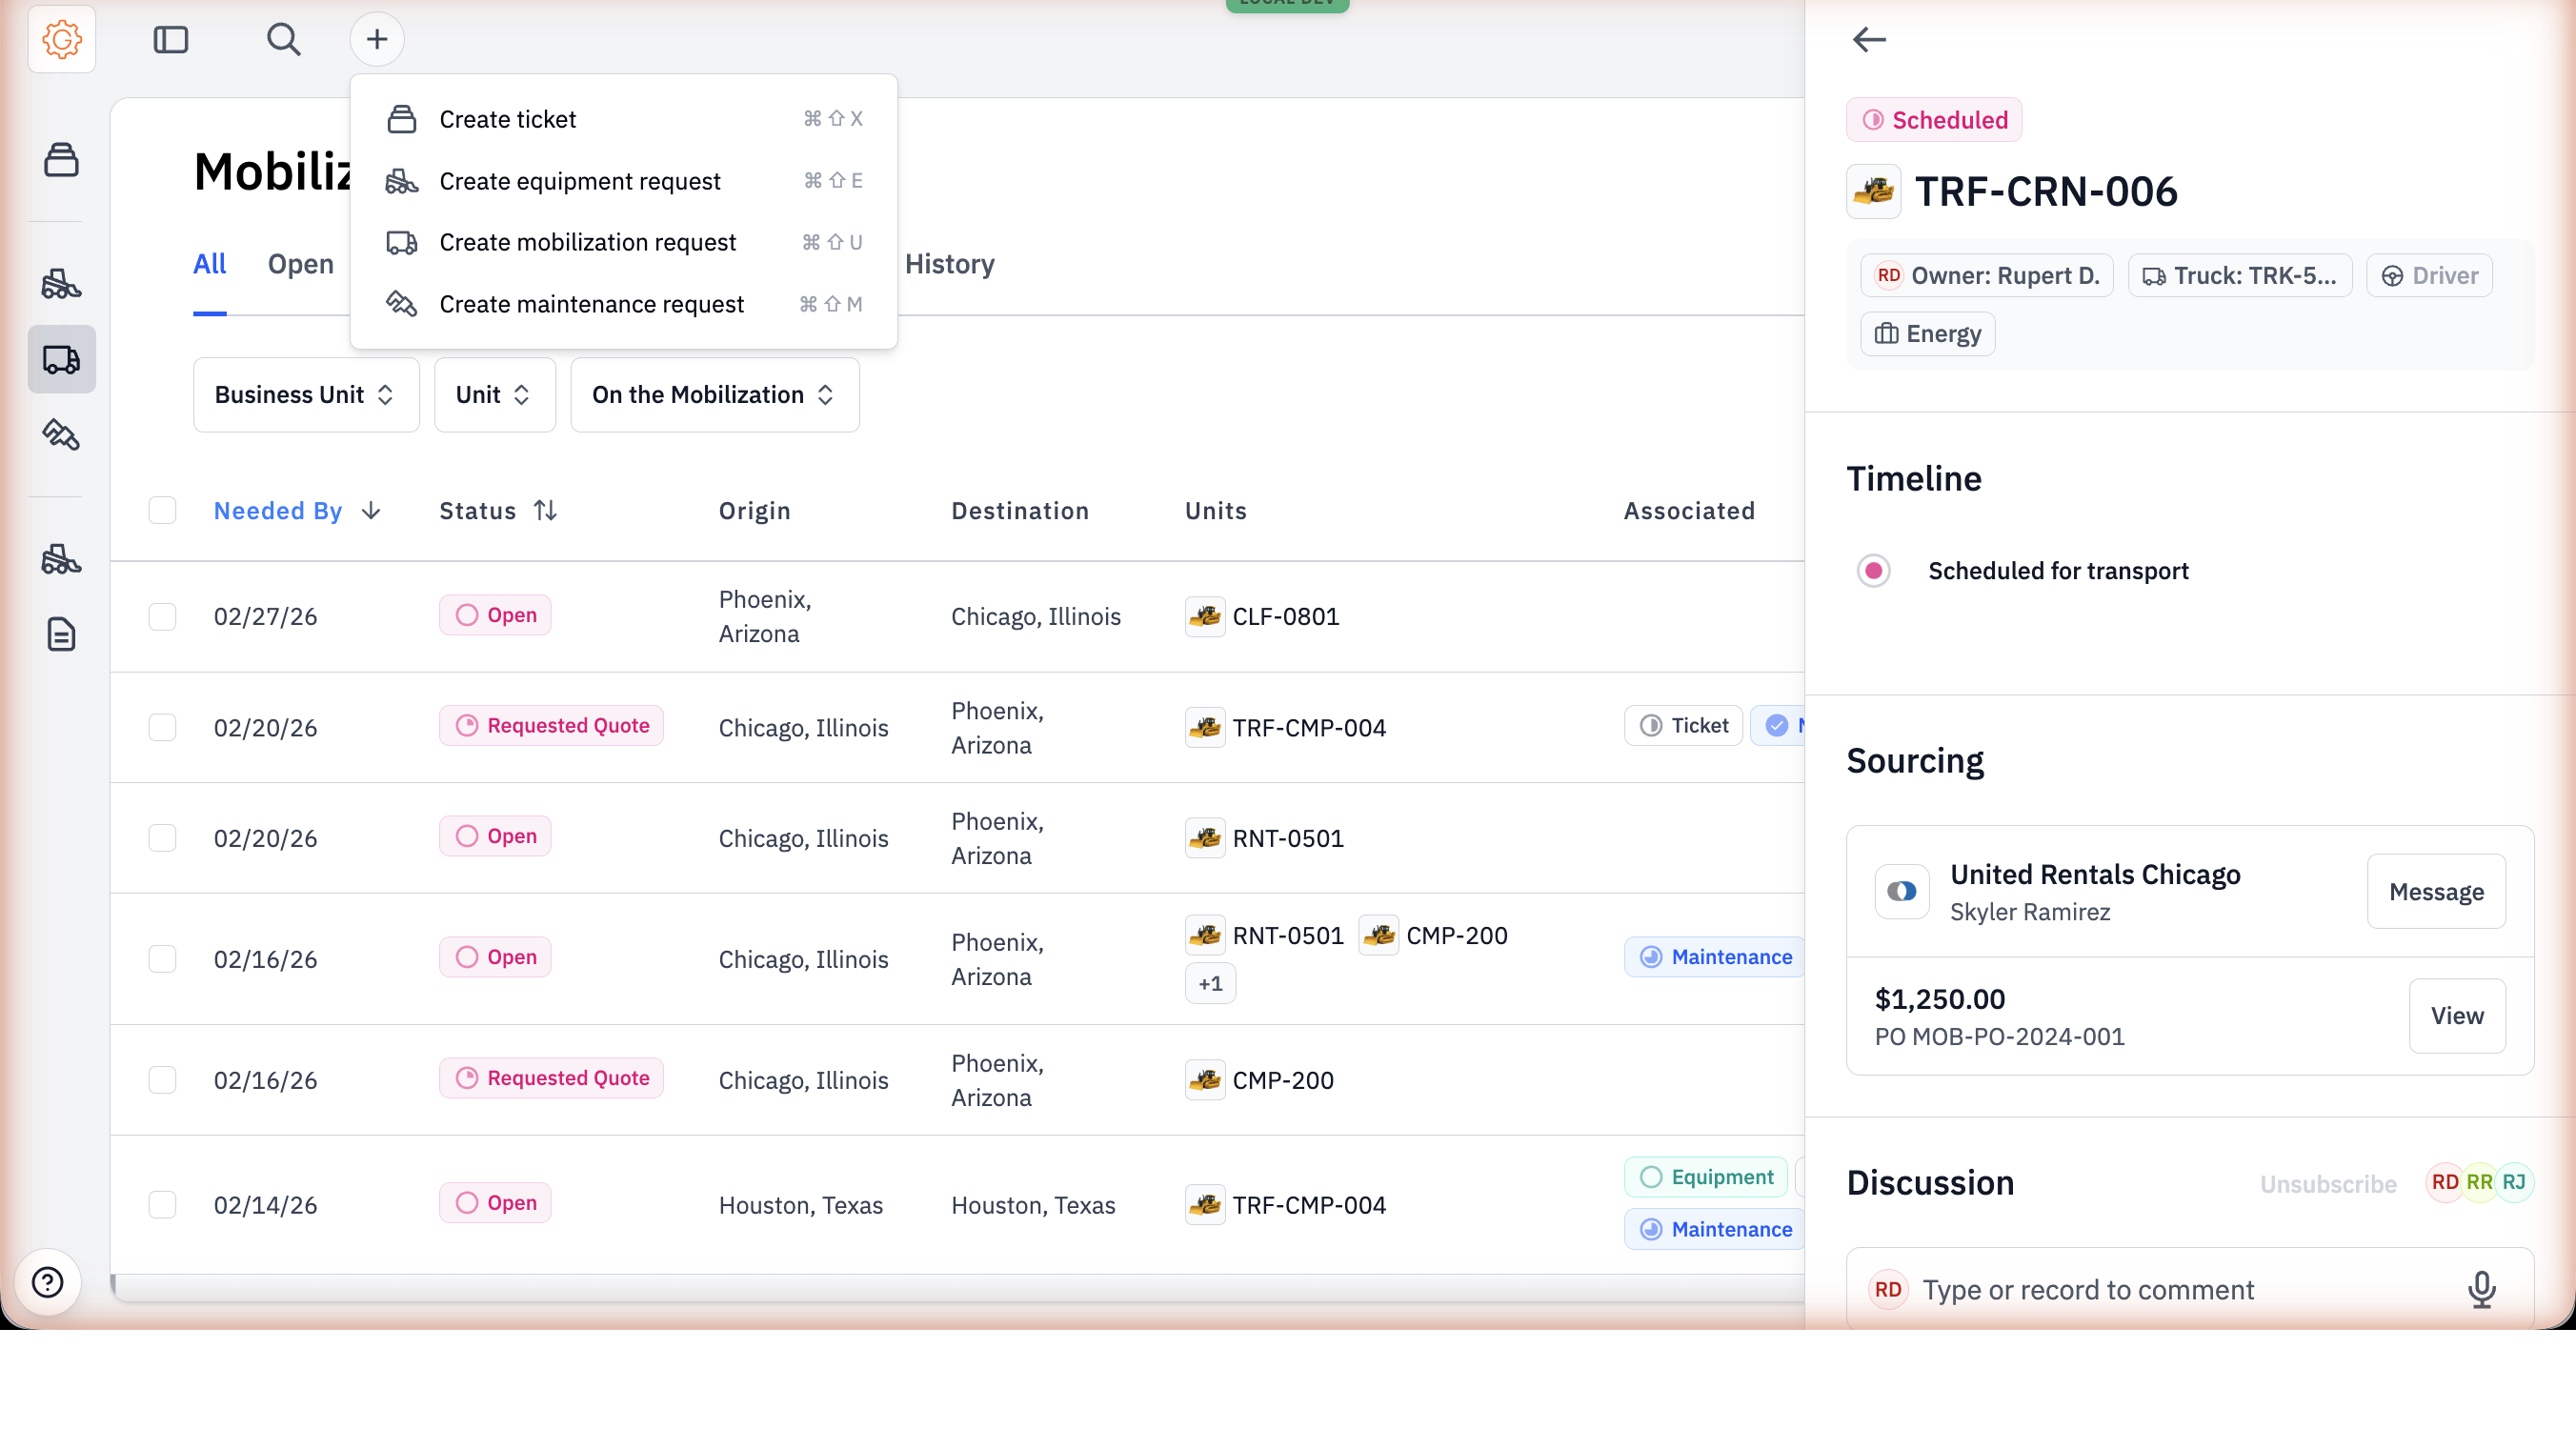
The other way is direct. Hit the + in the top header and pick Create mobilization request.
The form collects the same fields whether it came from a Ticket or directly:
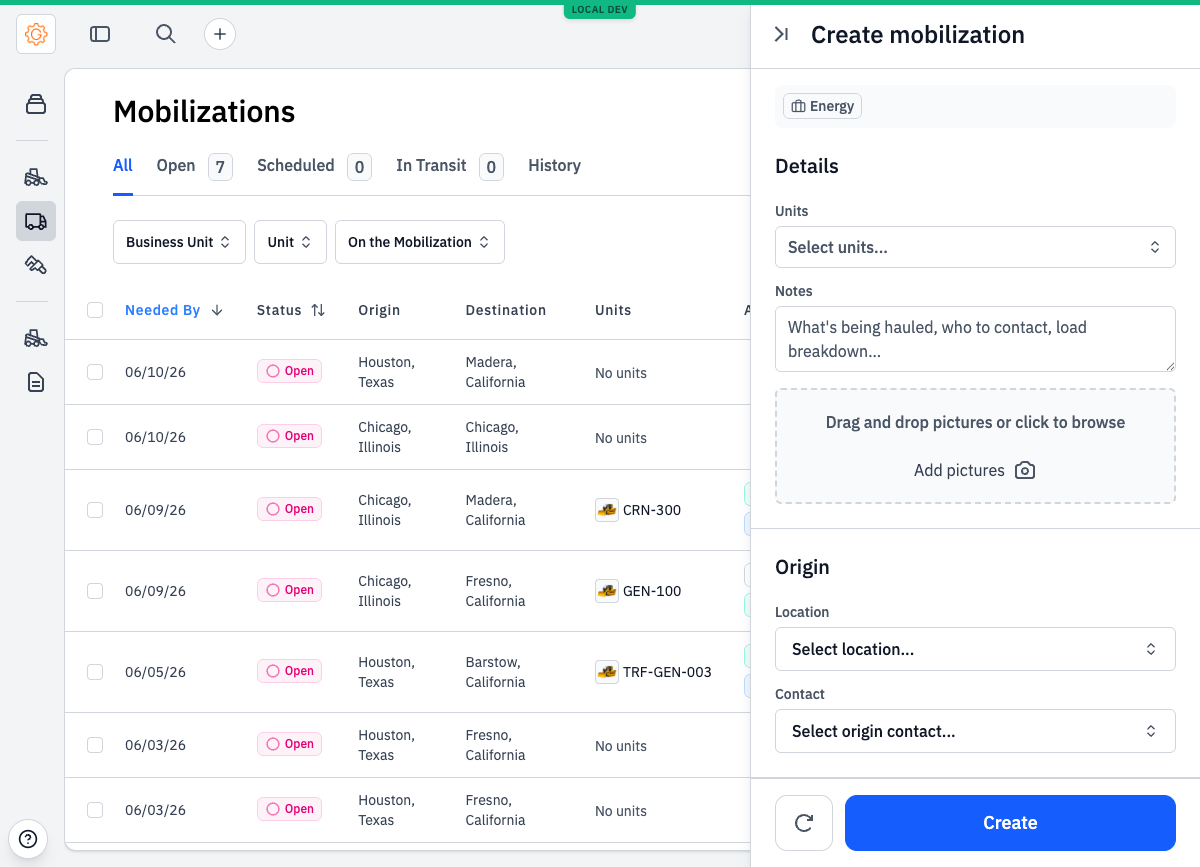
- The units to move — one or many. The picker is the customer's fleet, not a generic catalog.
- The origin — location and contact. The contact is whoever's at the pickup end (often a yard manager or the operator on a wrap-up job).
- The destination — location and contact. Usually the destination job's superintendent or foreman.
- The needed-by date.
- The business unit that owns the spend.
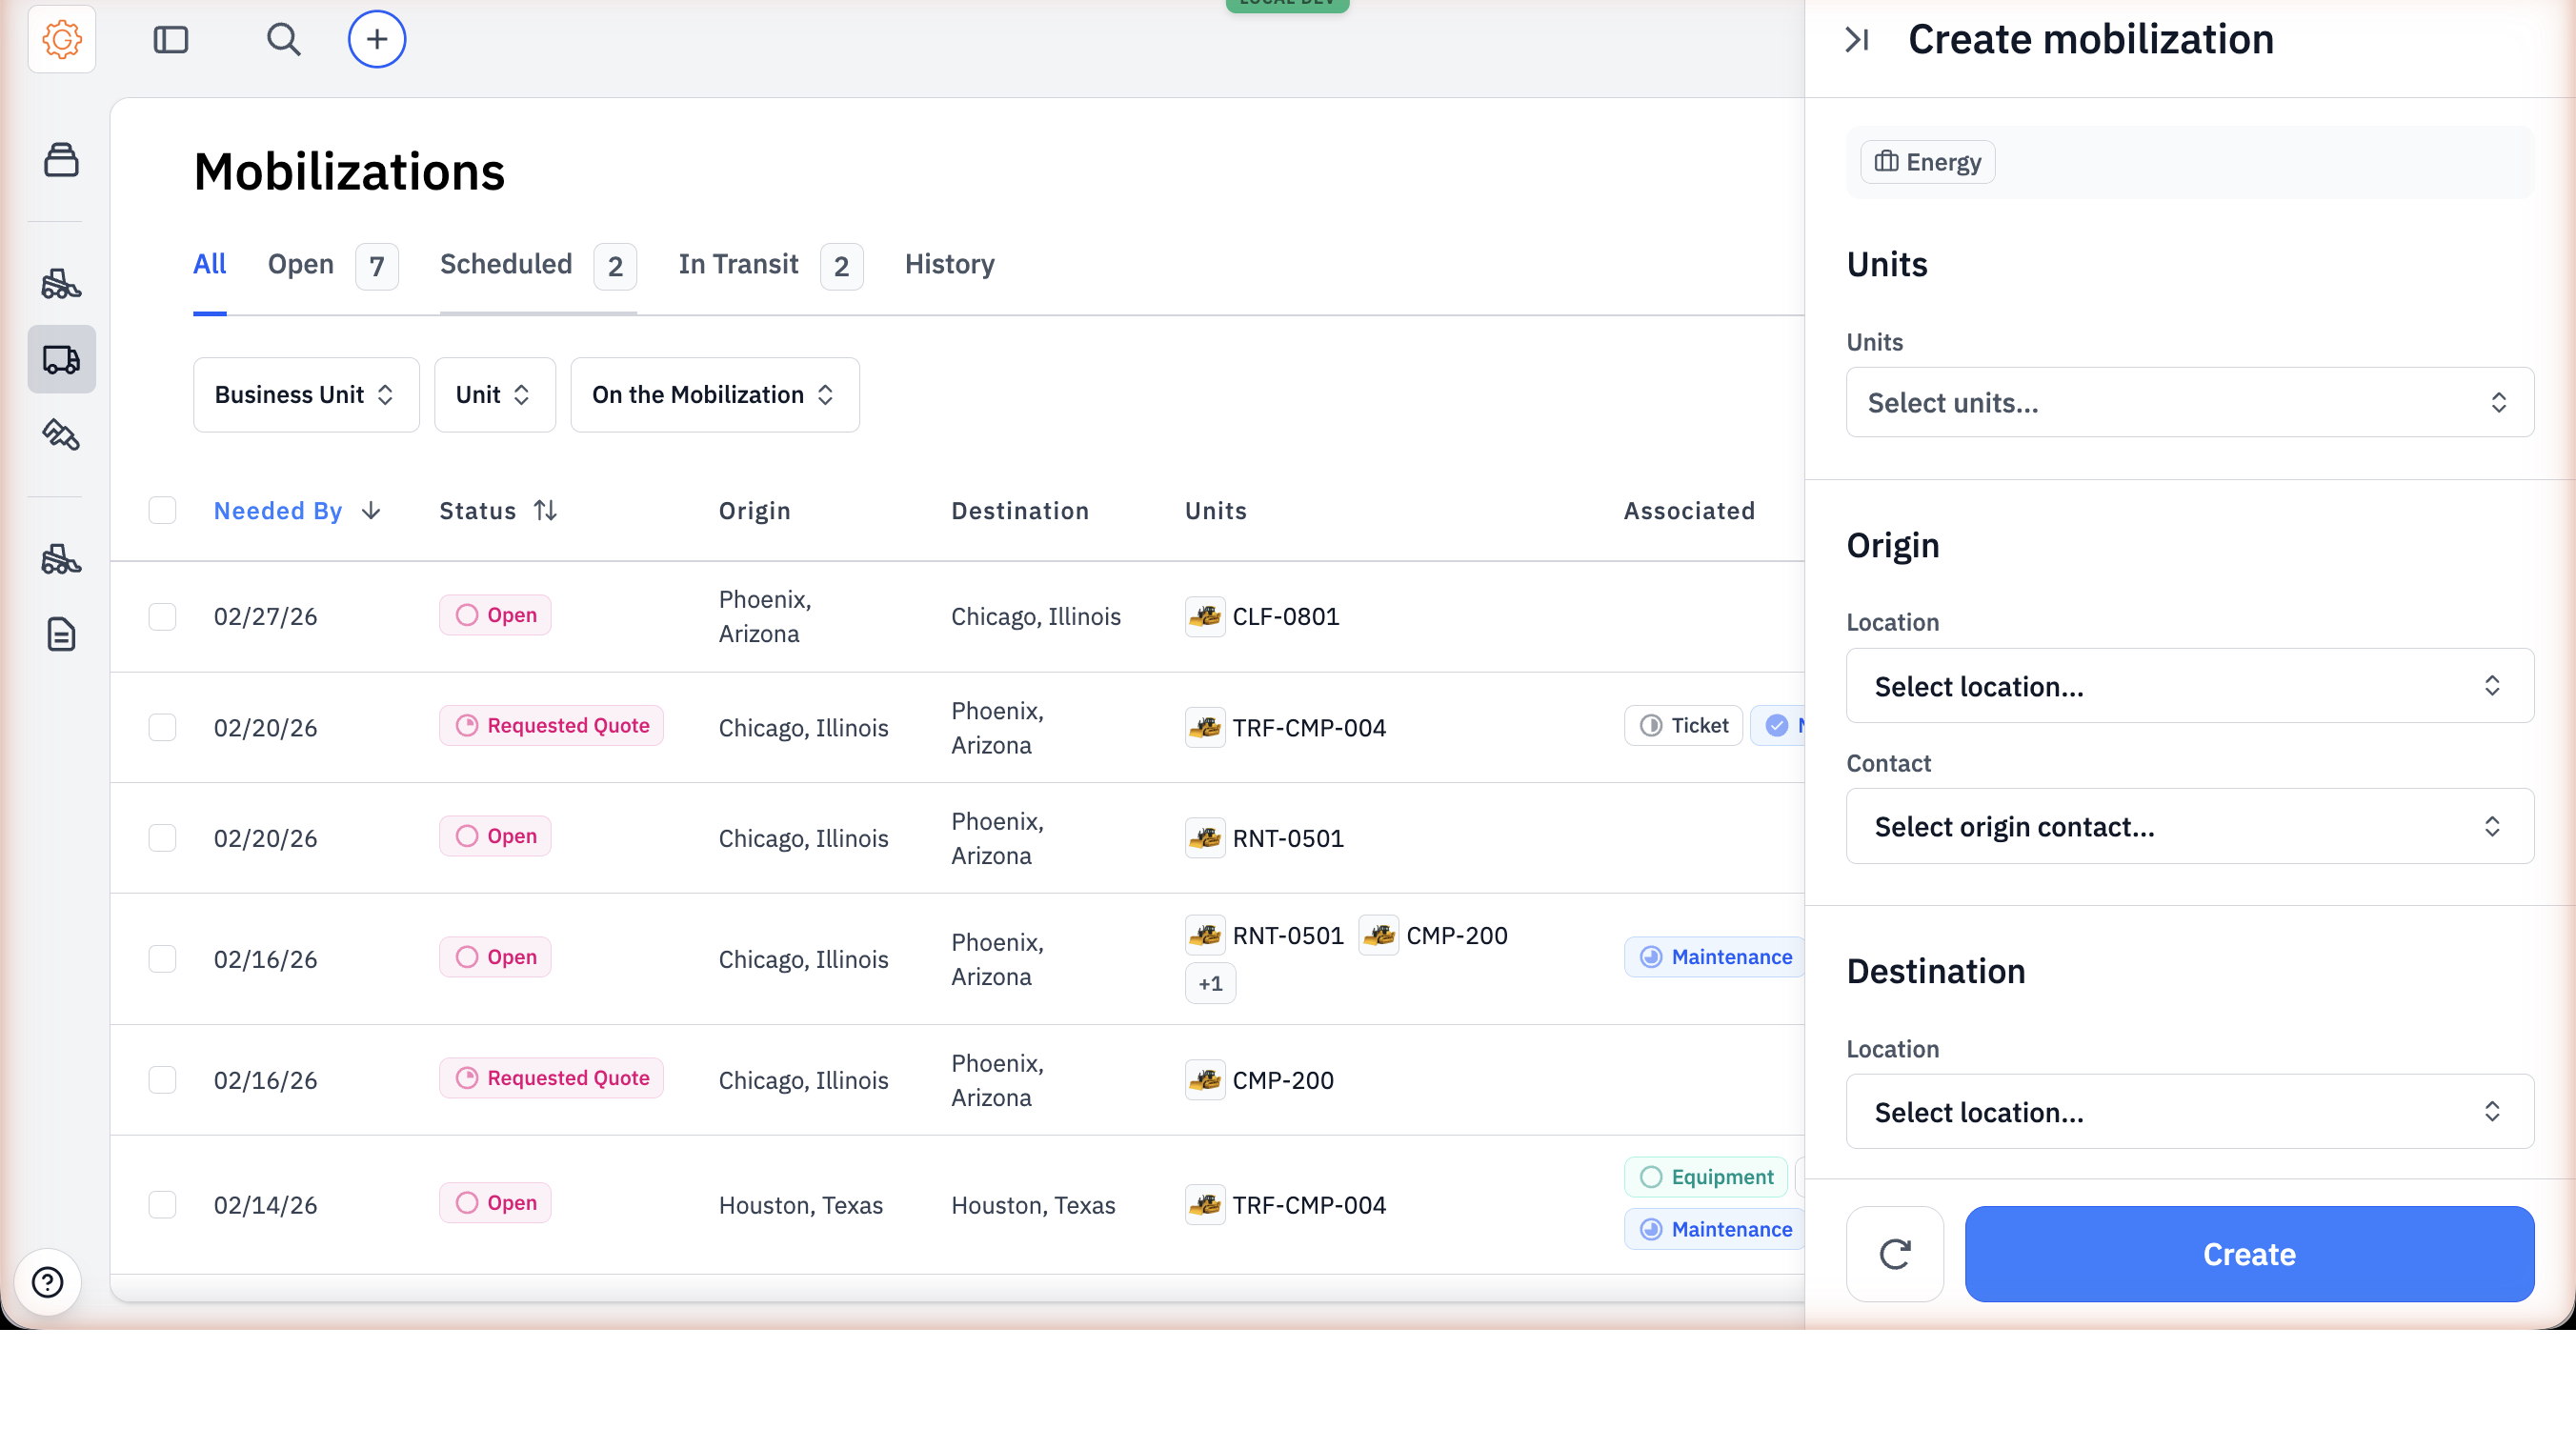
Submit and the mobilization lands in Open. If dispatch is doing the move with their own truck, that's most of the work — they assign a driver, set a truck number, and march the status forward manually as the move happens.
#Moving materials, not just units
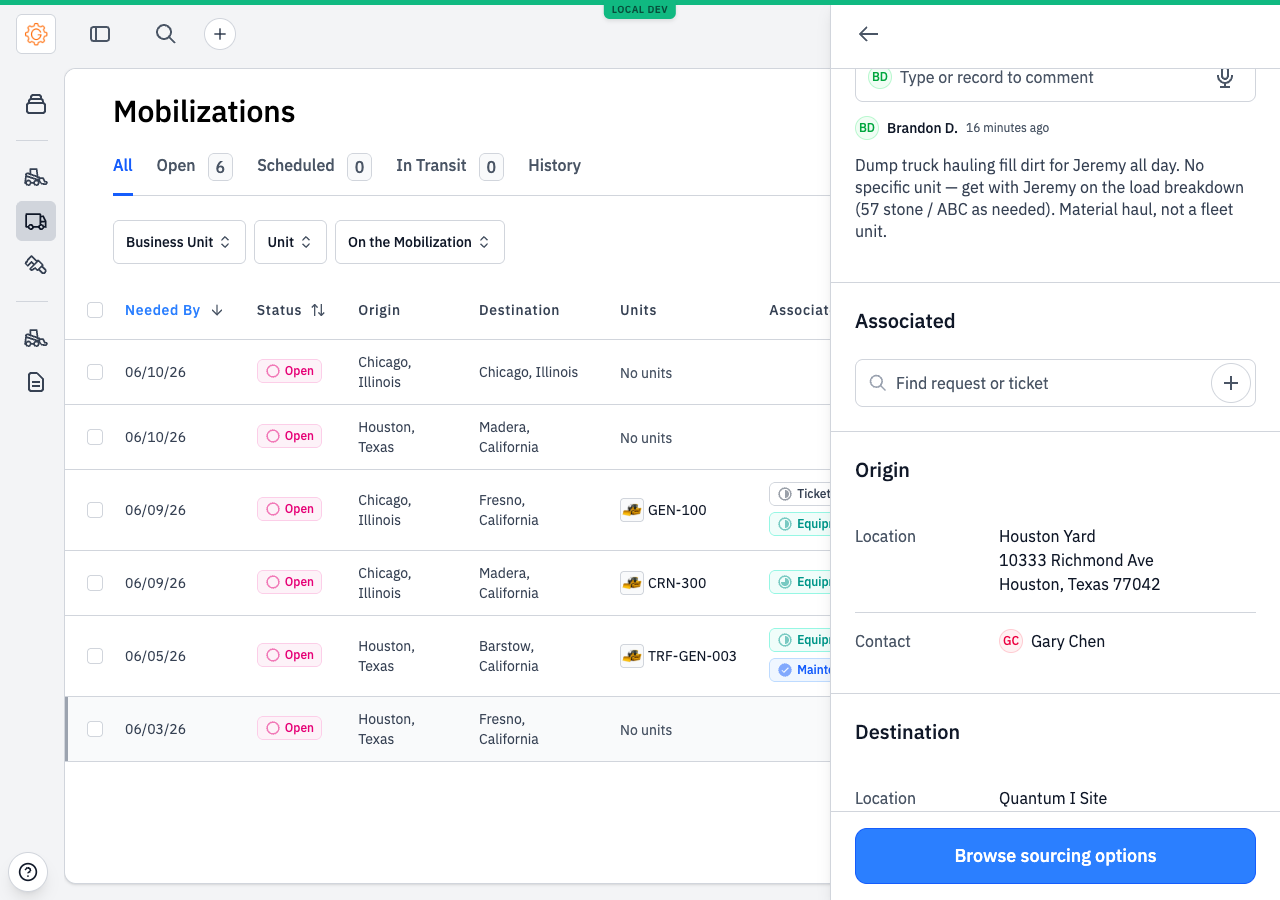
Not every move is a machine. A dump truck hauling fill dirt all day, a load of shoring, a pallet of parts — these have no fleet asset to attach. A mobilization can be created with no units at all: leave the Units picker empty and describe the load in Notes instead.
Whatever you write in Notes posts as the first message in the move's discussion thread, so the load breakdown lives right where the driver, dispatcher, and contacts are already talking.
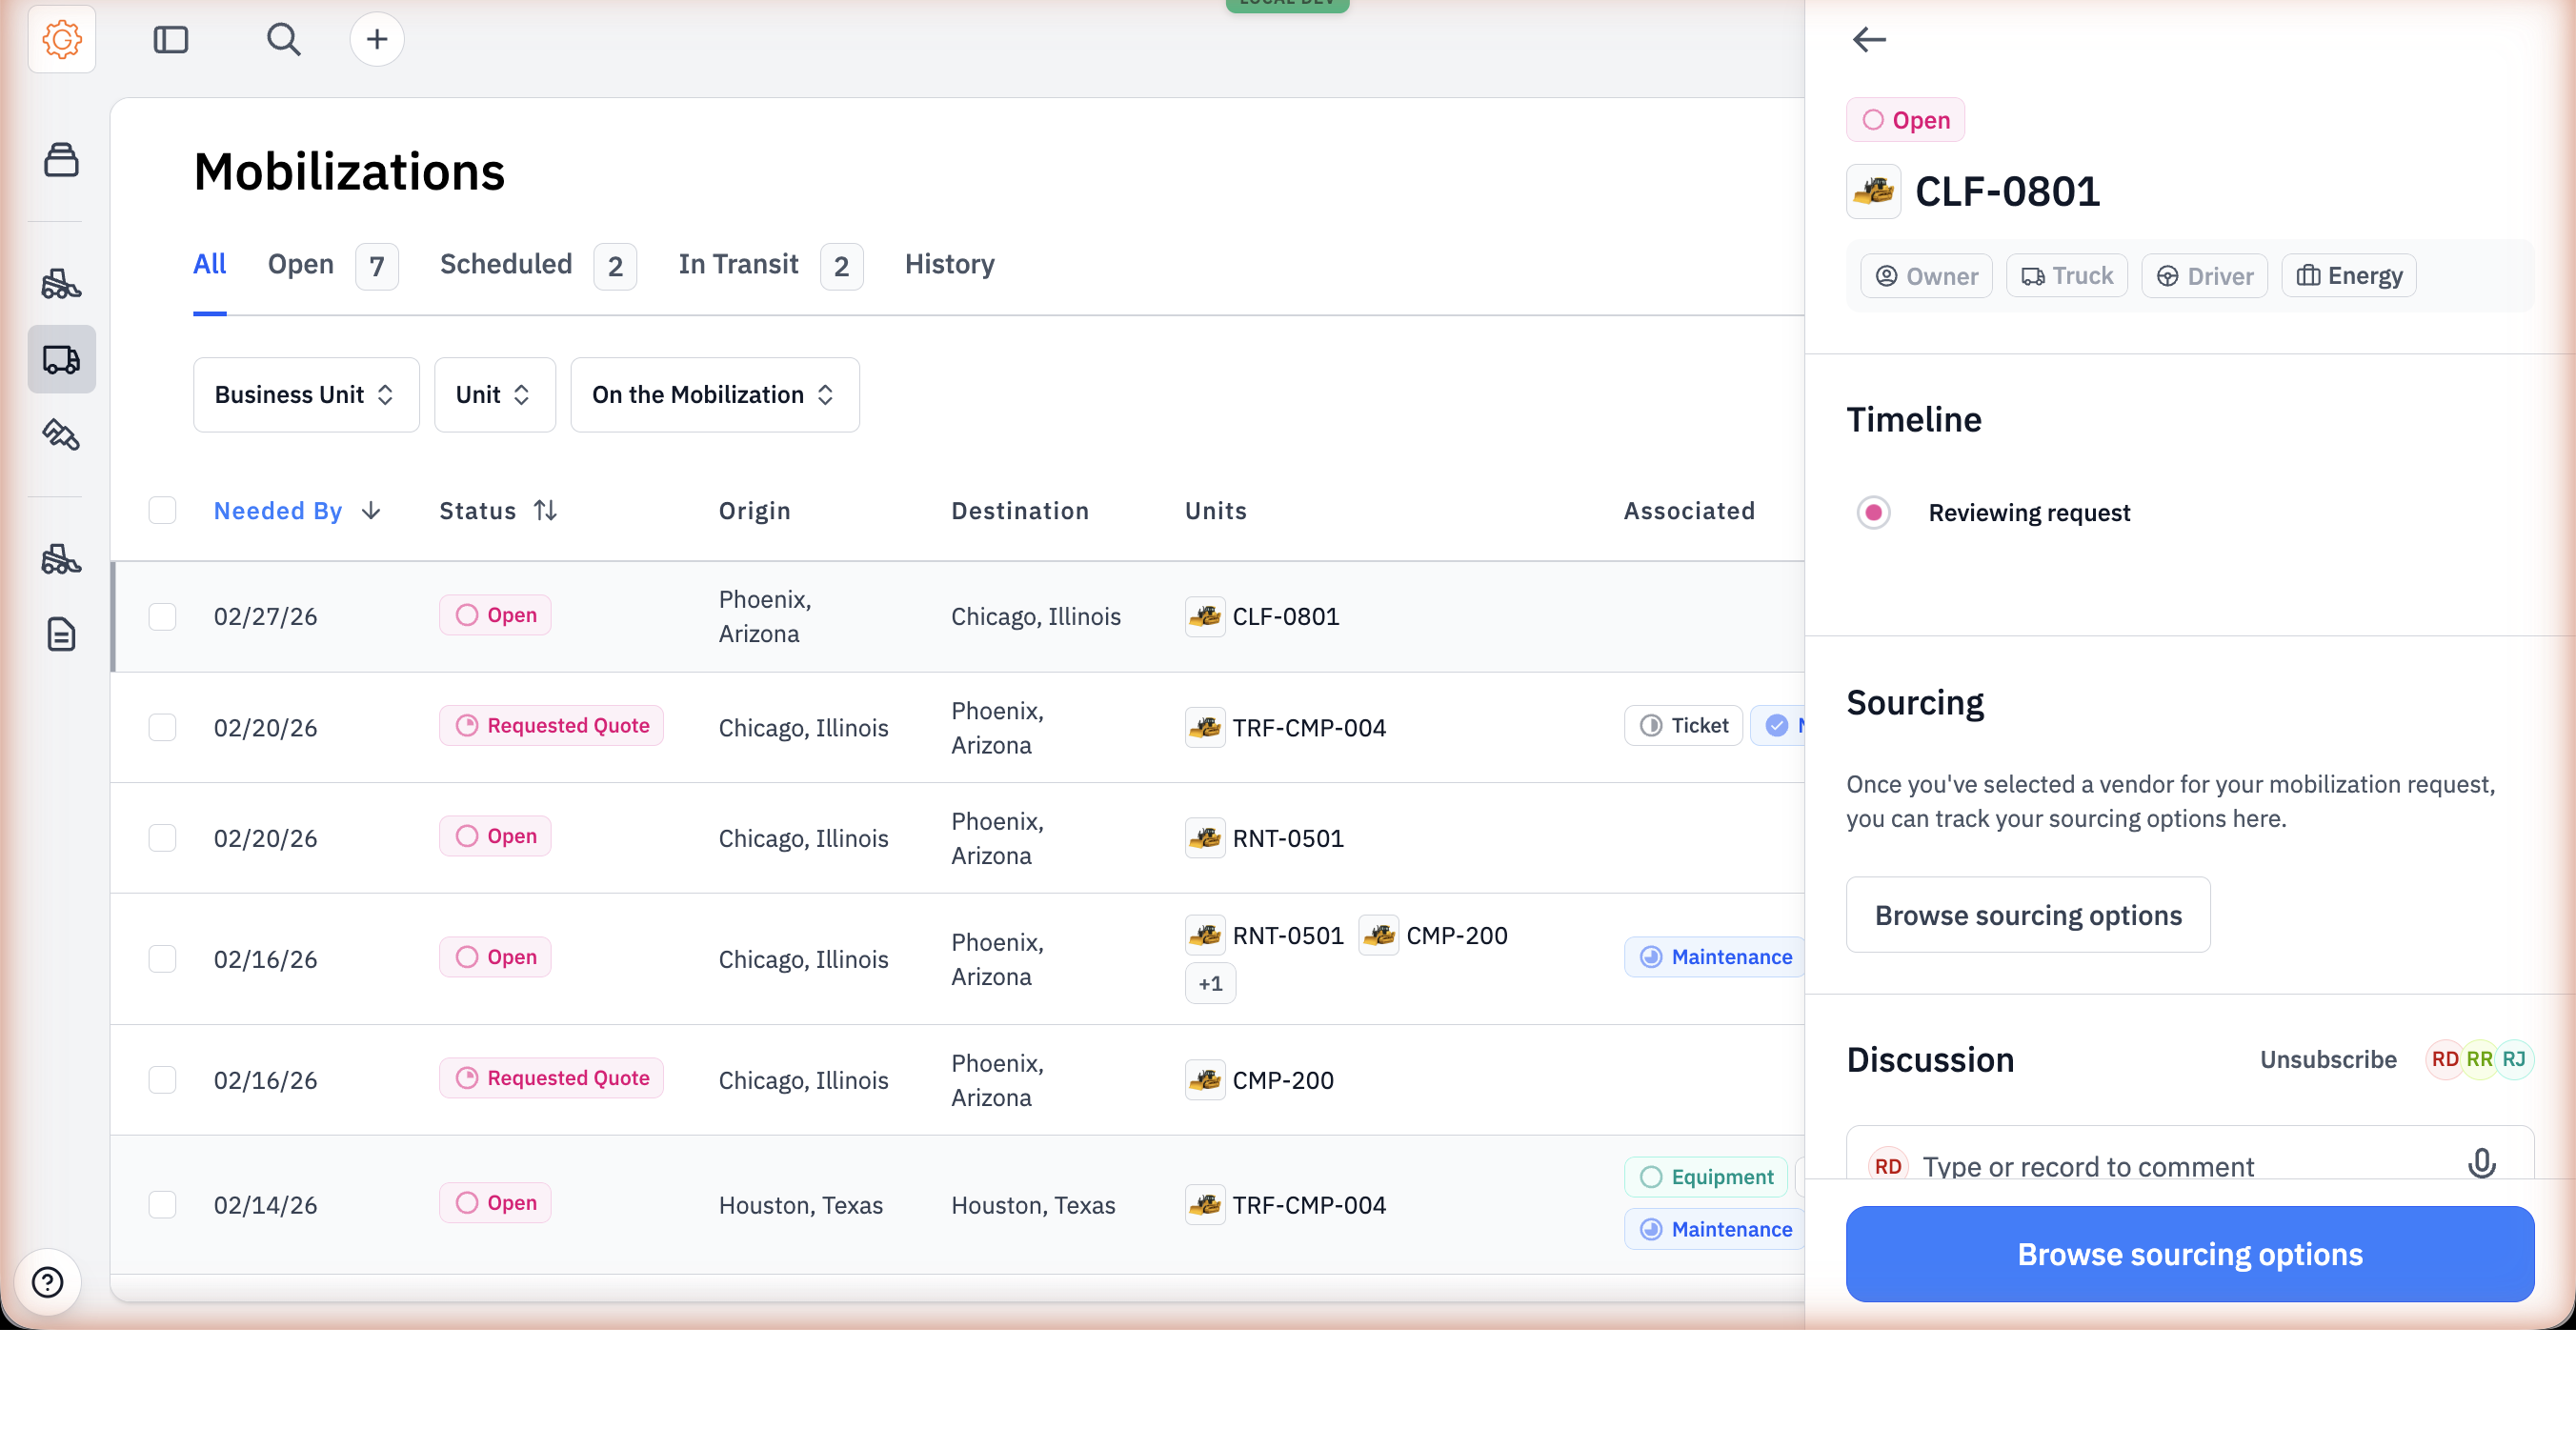
#Step 2 (optional): Source a hauler
If the customer needs a third-party hauler, the dispatcher hits Browse sourcing options from the mobilization detail.
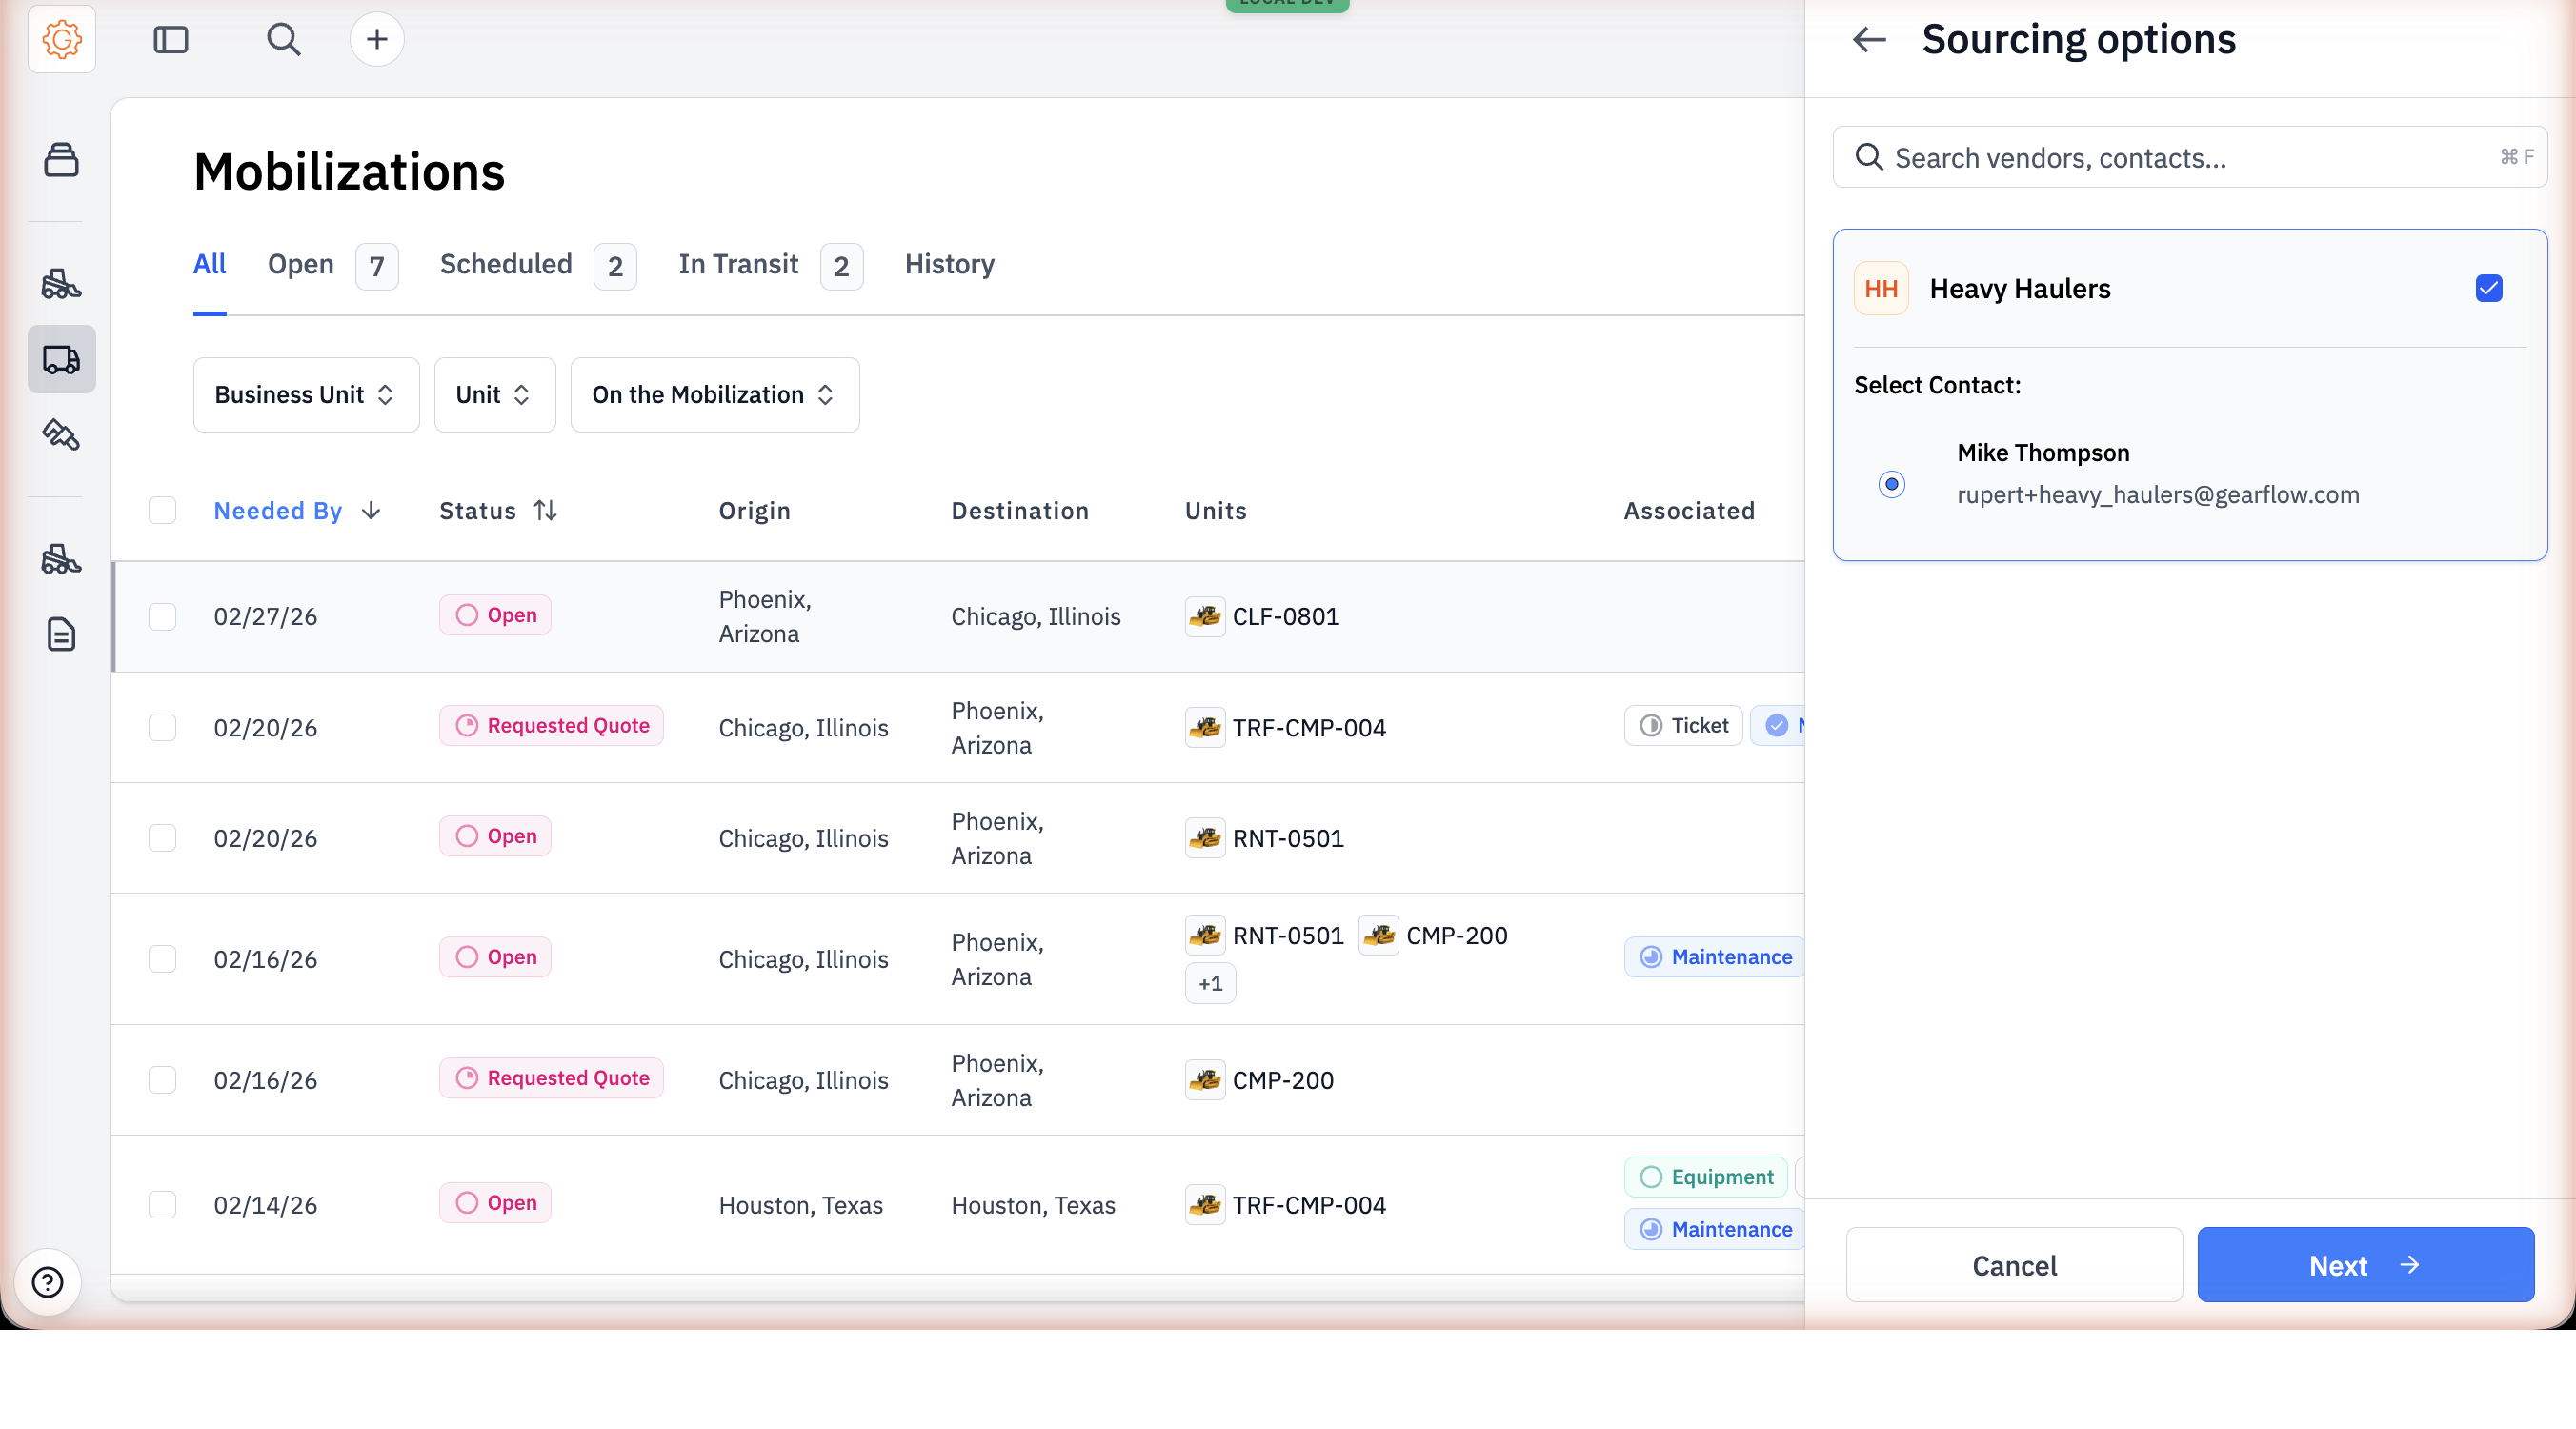
That opens a hauler list filtered to vendors who provide mobilization services. Pick the haulers, pick a contact at each, click Next.
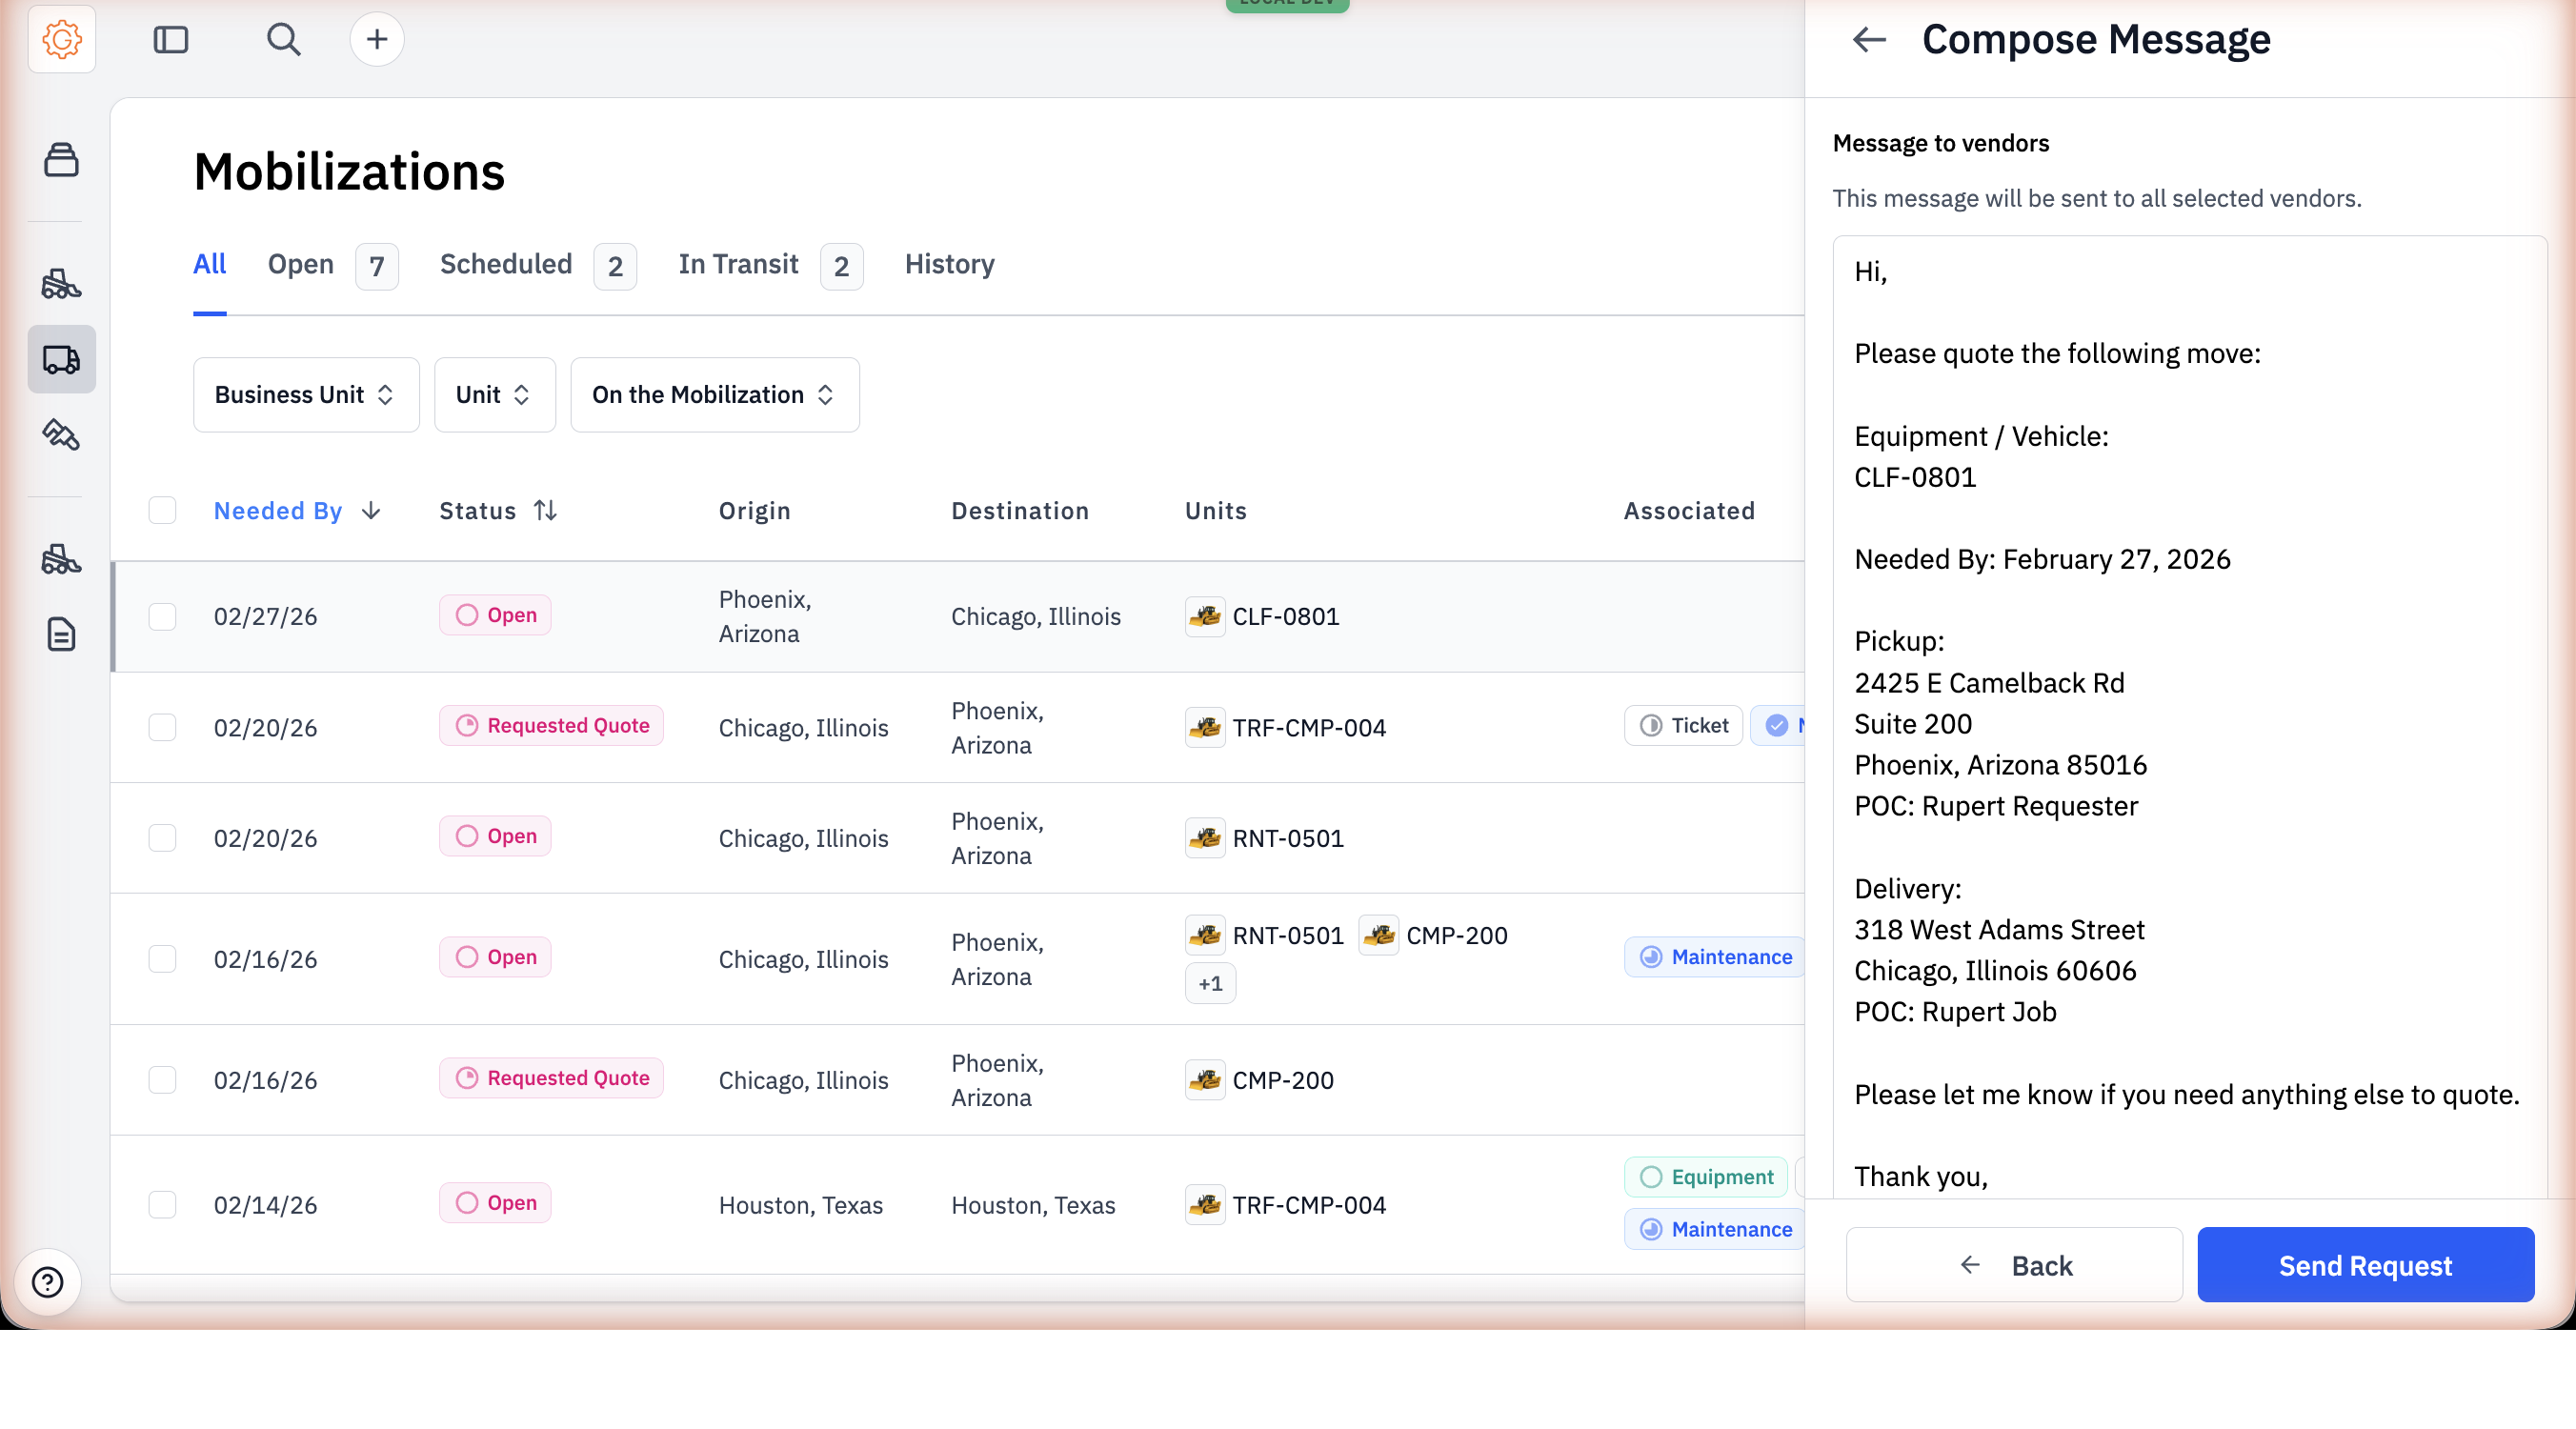
The next step is the email Gearflow will send. It auto-generates from the mobilization details — assets, addresses on both ends, both contacts, needed-by date. Edit if needed.
#Step 3: Compare and accept
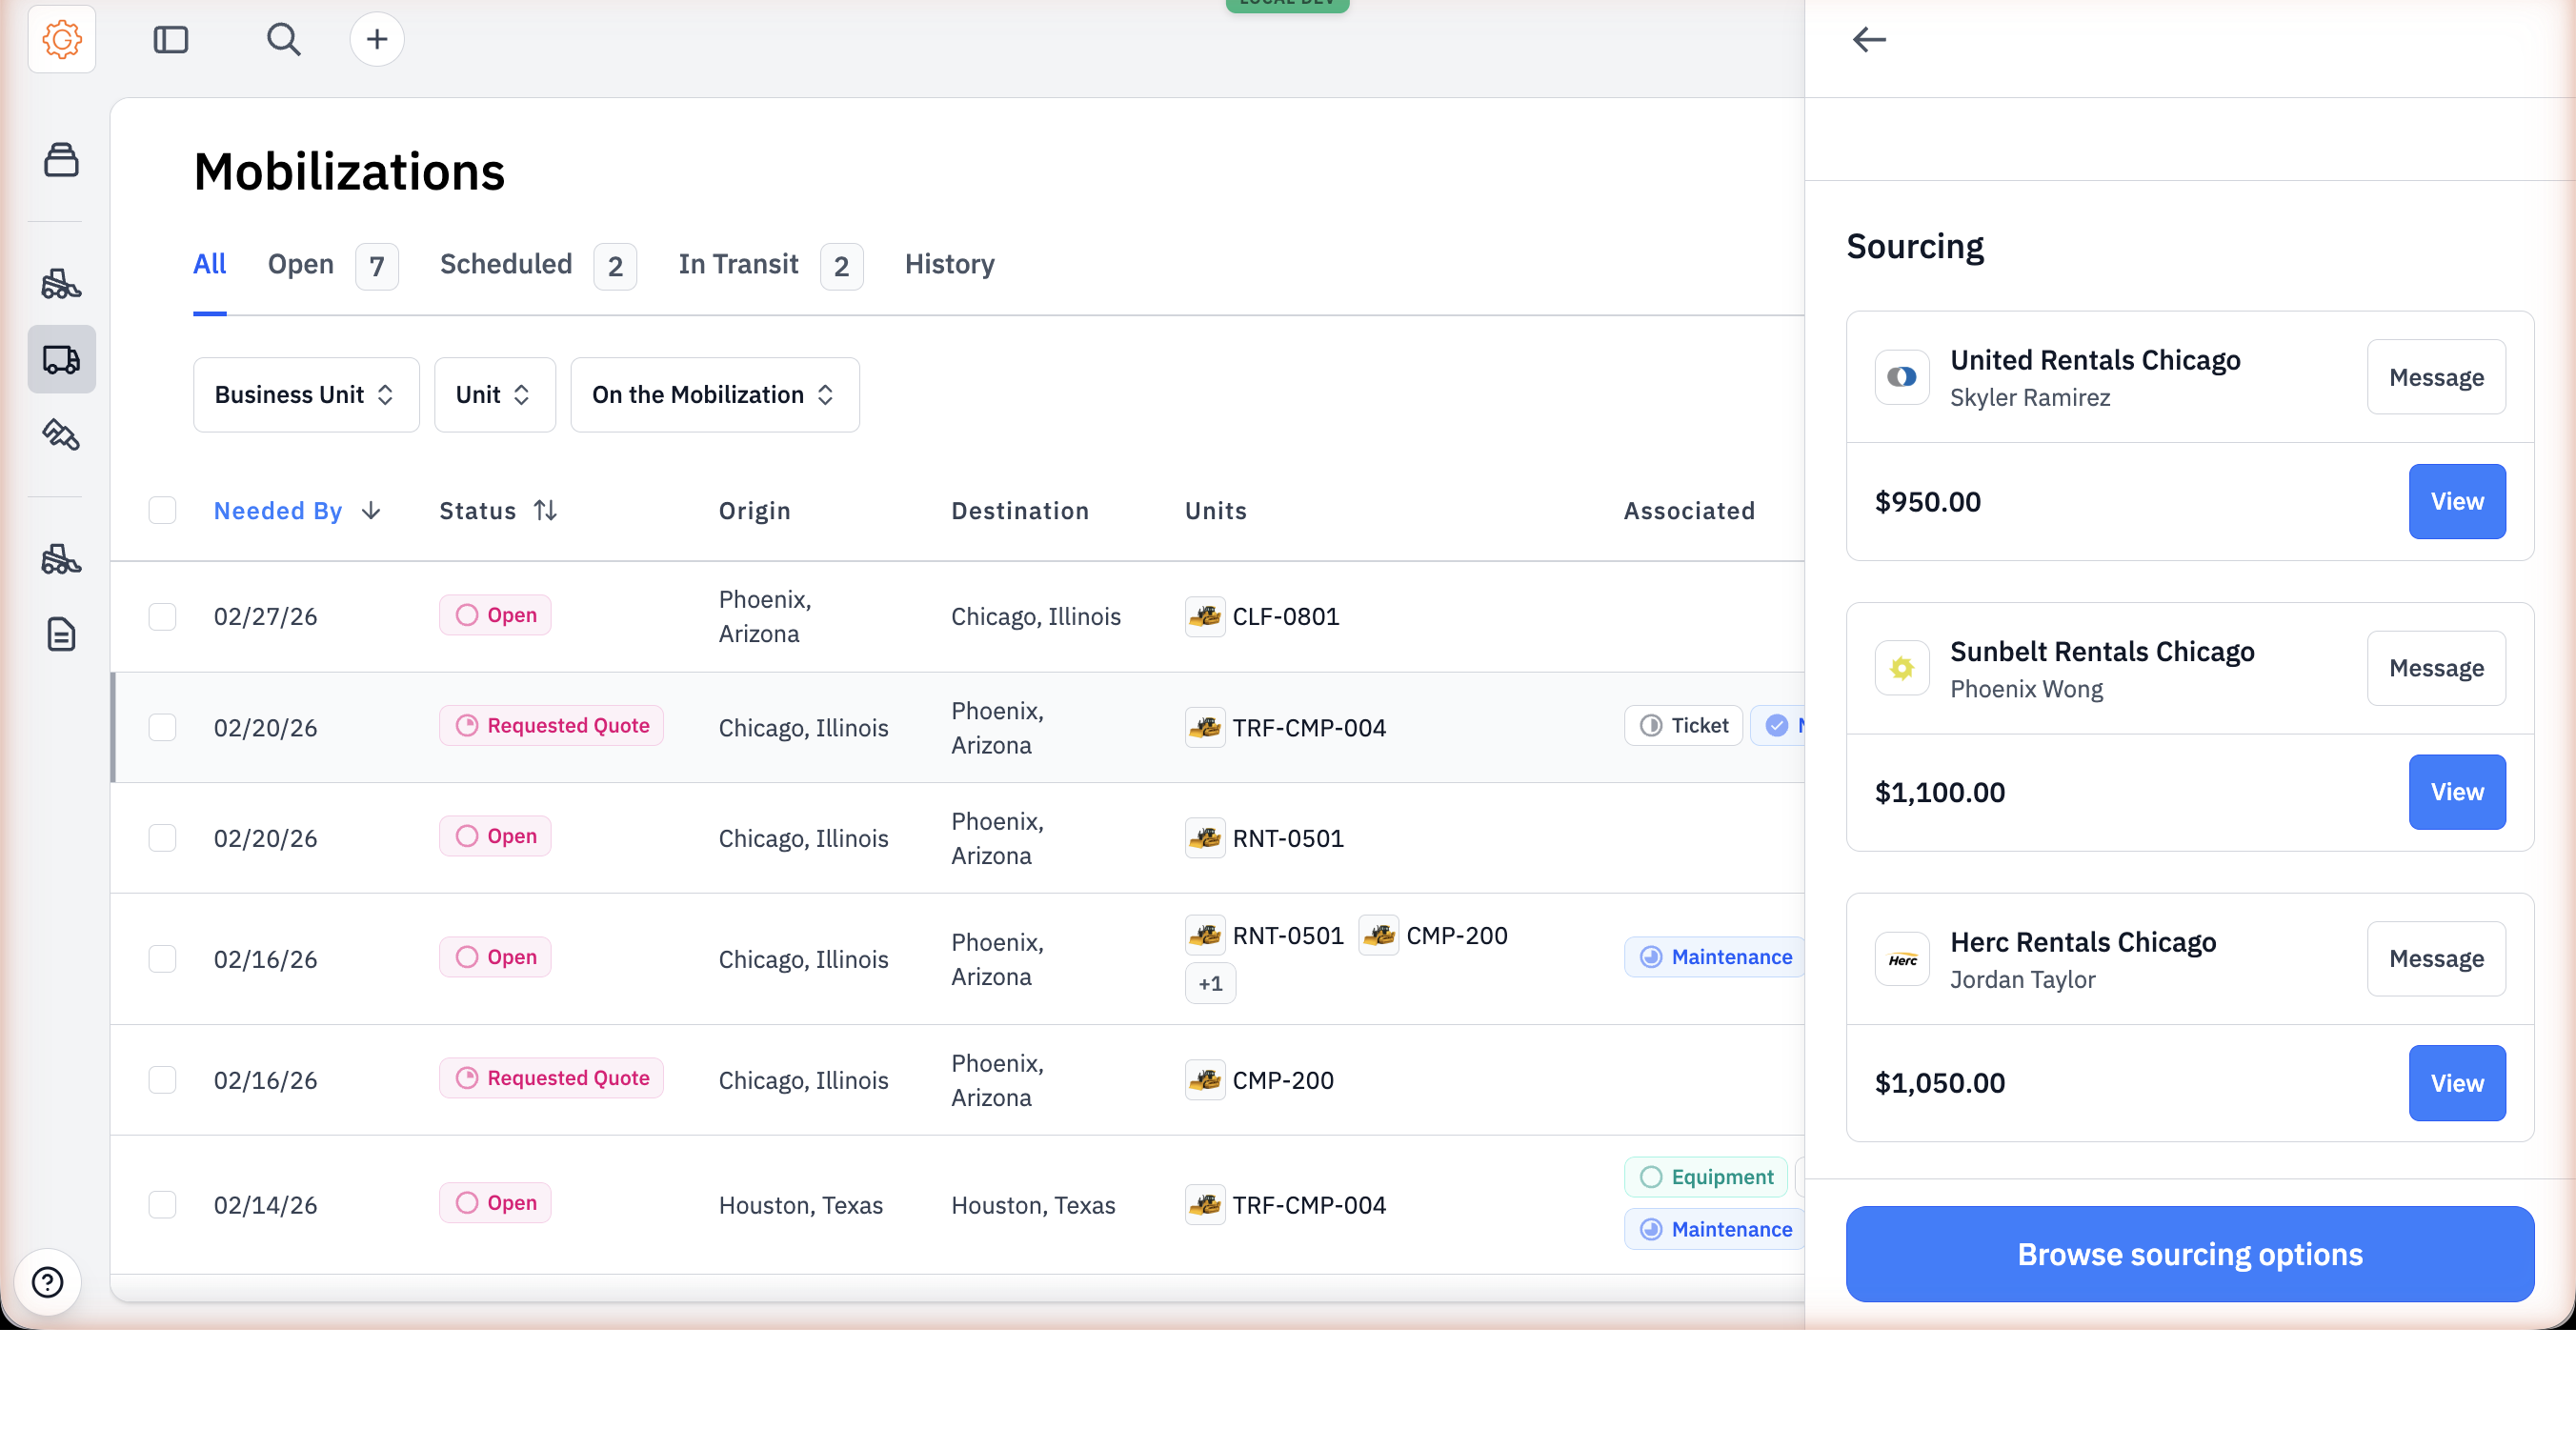
As haulers reply with prices, dispatch logs each quote on the mobilization. Three quotes show as three side-by-side rows in Sourcing — the same comparison shape Equipment requests use.
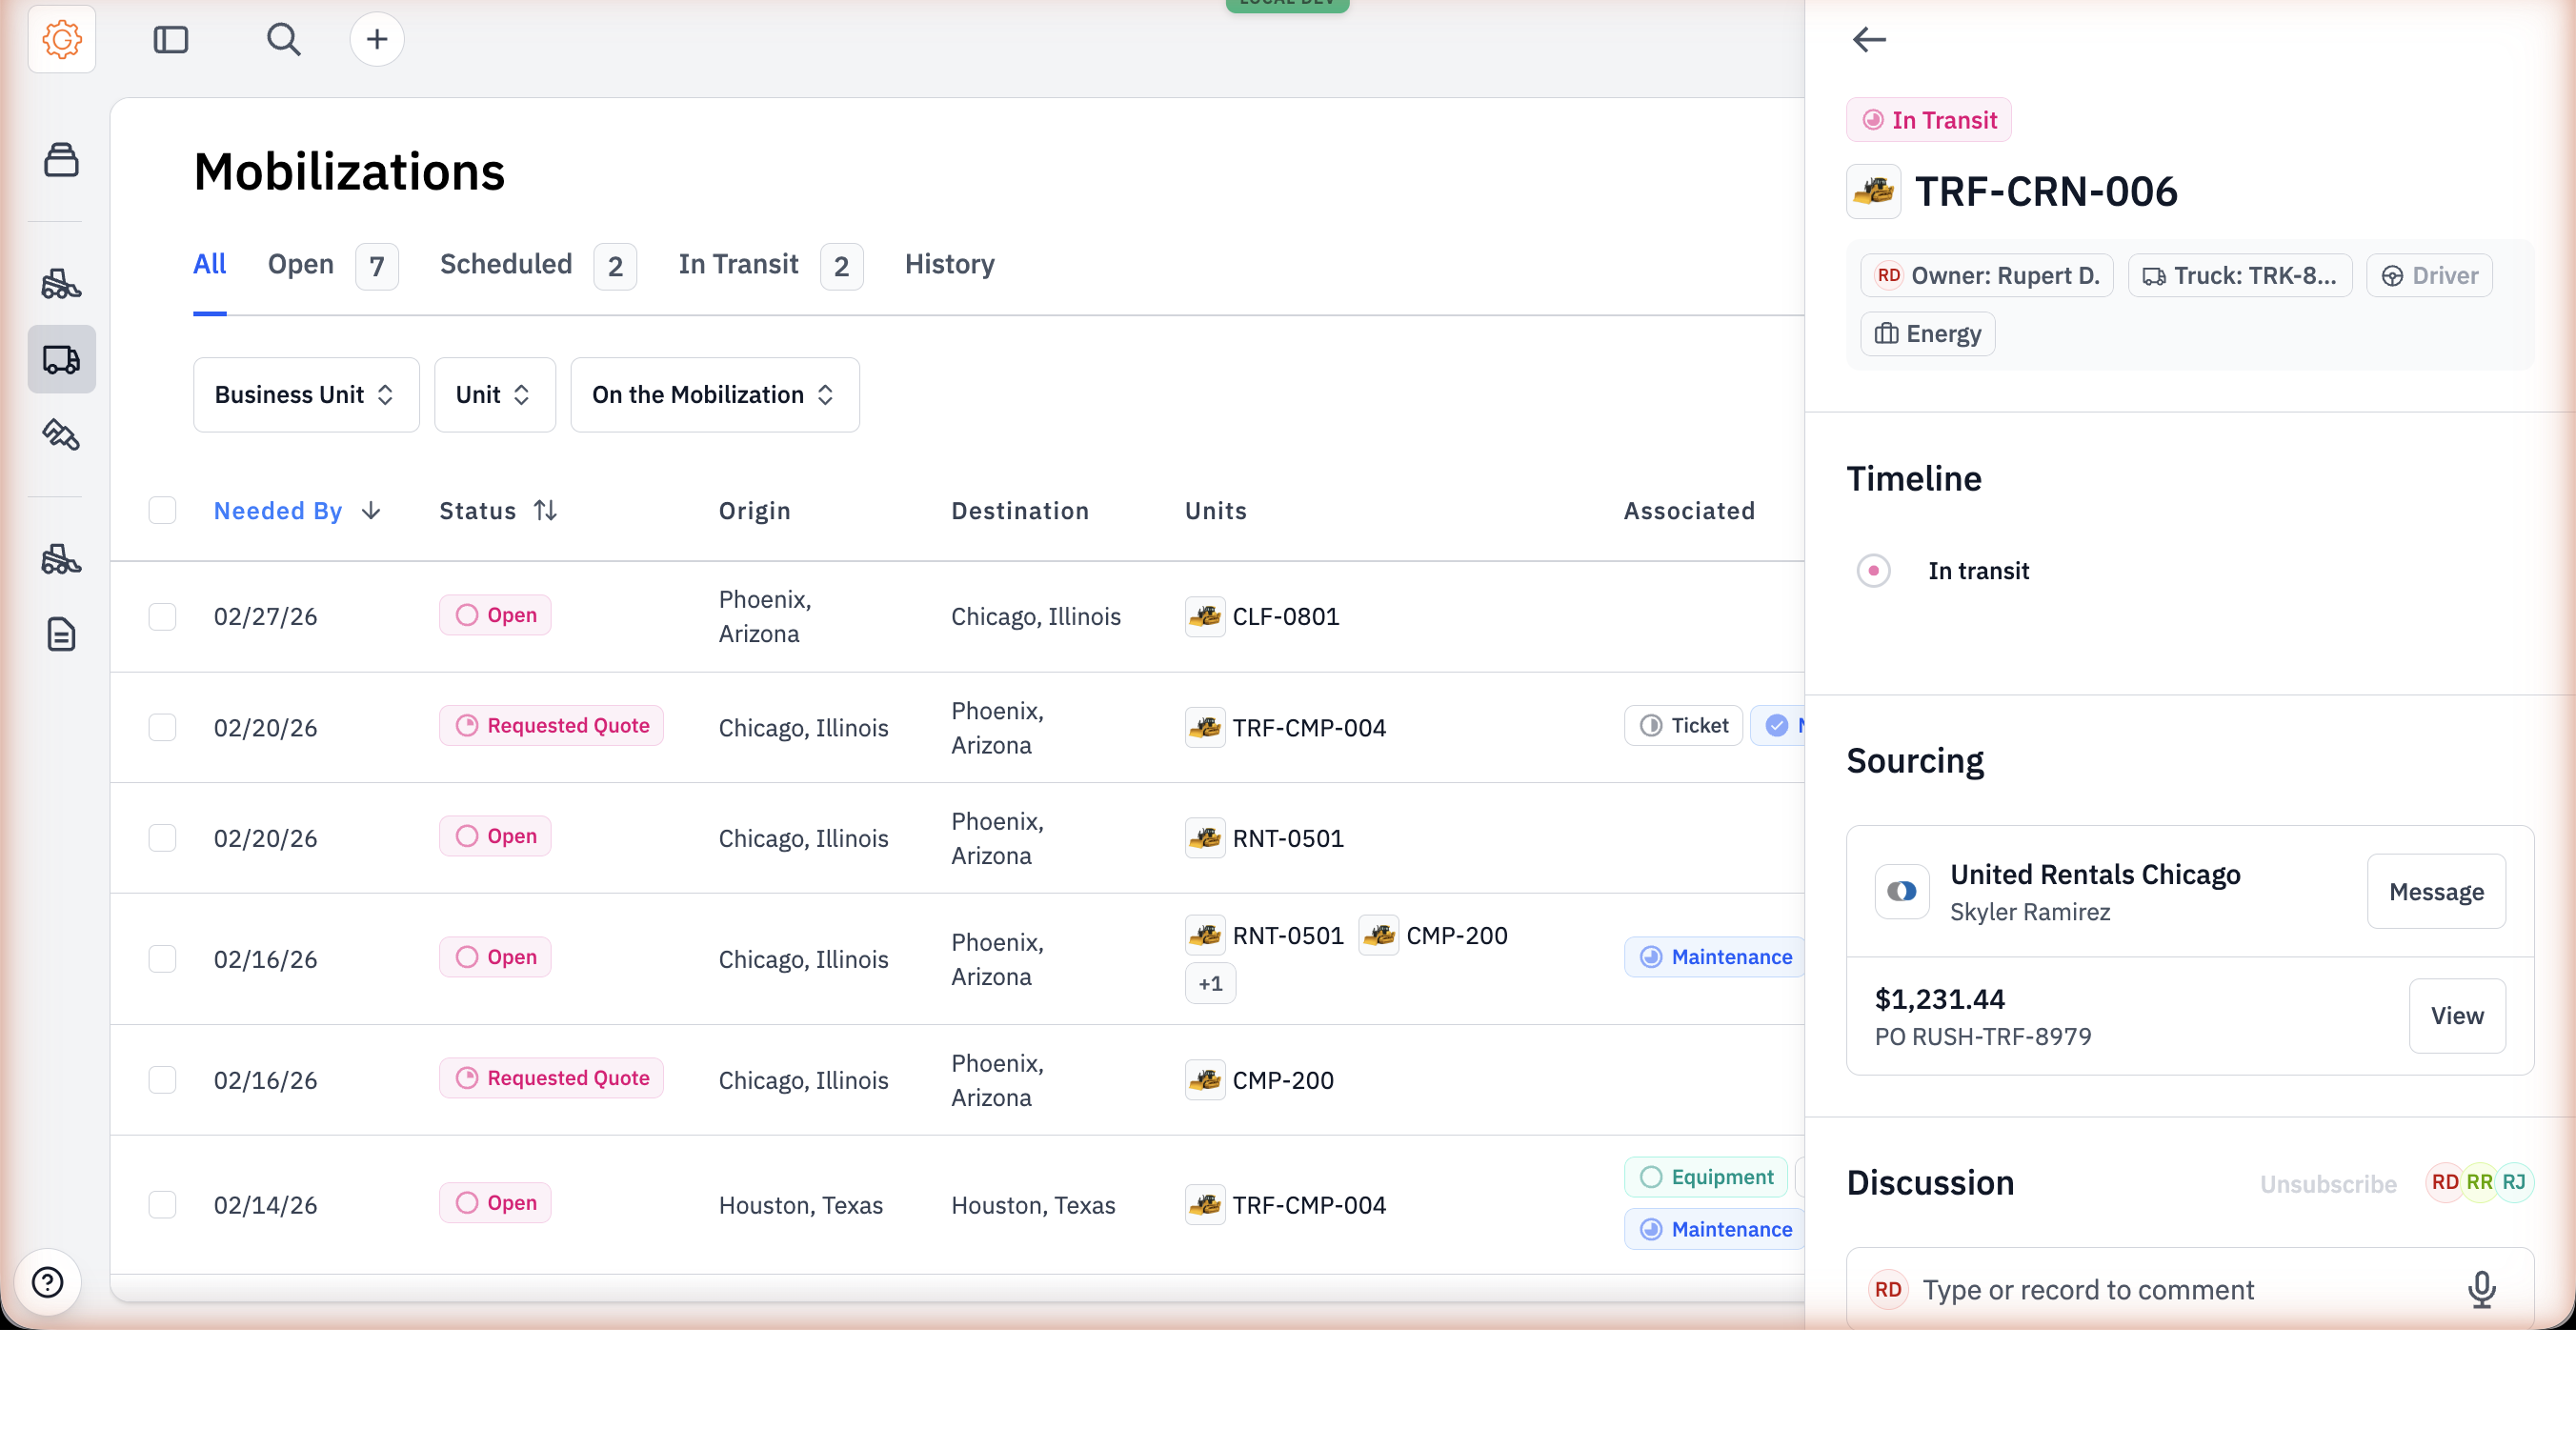
Accepting a quote prompts for a PO number and a message to the hauler. Send, and the mobilization advances to Scheduled. The accepted hauler pins to the top of Sourcing; the others collapse behind a "View all" disclosure.
The total and the PO number stay editable after acceptance — quoted freight prices are often estimates, and the PO sometimes lands later from the ERP. A pencil next to each field on the order opens an inline editor, and every edit writes an entry to the mobilization's timeline ("updated the order total from $950.00 to $1,231.44"), so the record keeps an audit trail of what changed.
#Step 4: Schedule, dispatch, deliver
From Scheduled forward, the work is operational. Dispatch attaches a driver and a truck number to the mobilization (these can be on the customer's own team or the hauler's). When the load leaves origin, dispatch flips status to In Transit. When it arrives, Received.
#Drivers move their own status
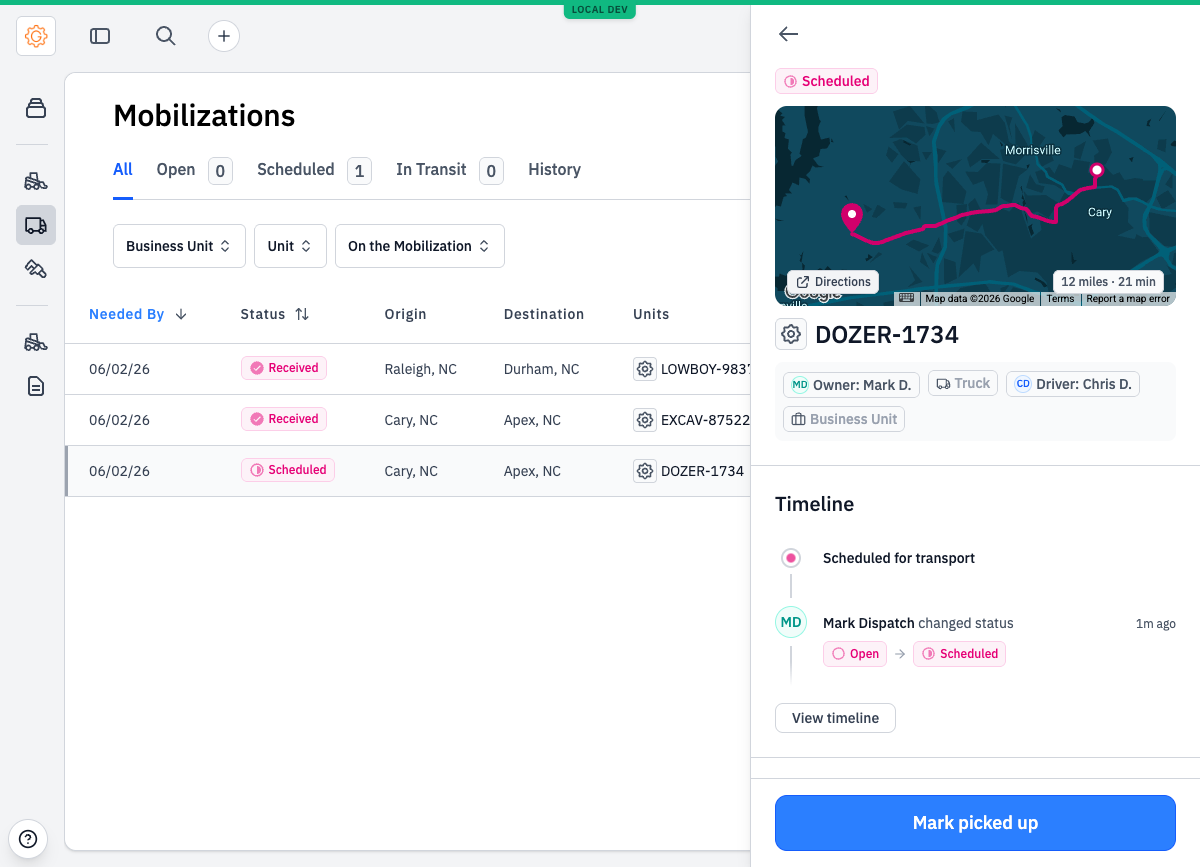
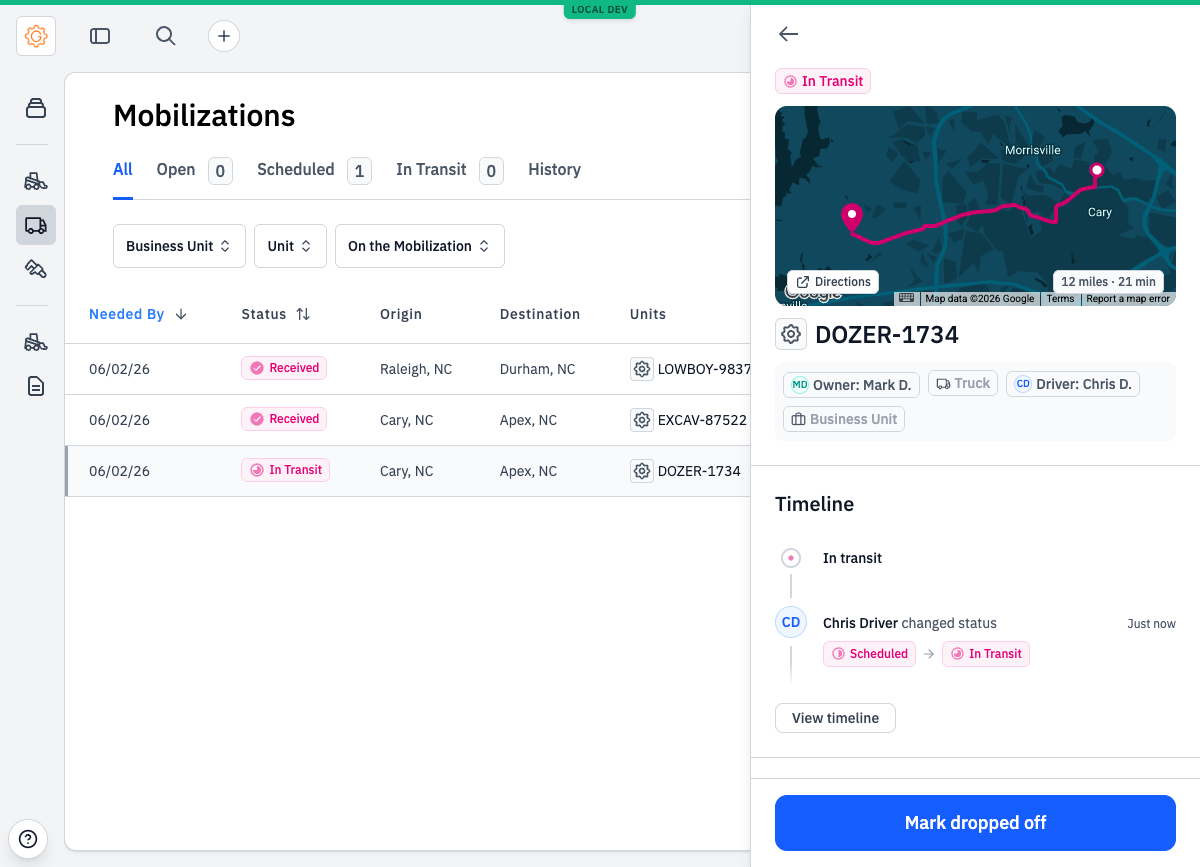
Dispatch no longer has to chase a phone call to advance a move. The assigned driver sees a single action button on their move and presses it as the work happens: Mark picked up takes the move from Scheduled to In Transit, and Mark dropped off takes it from In Transit to Received.
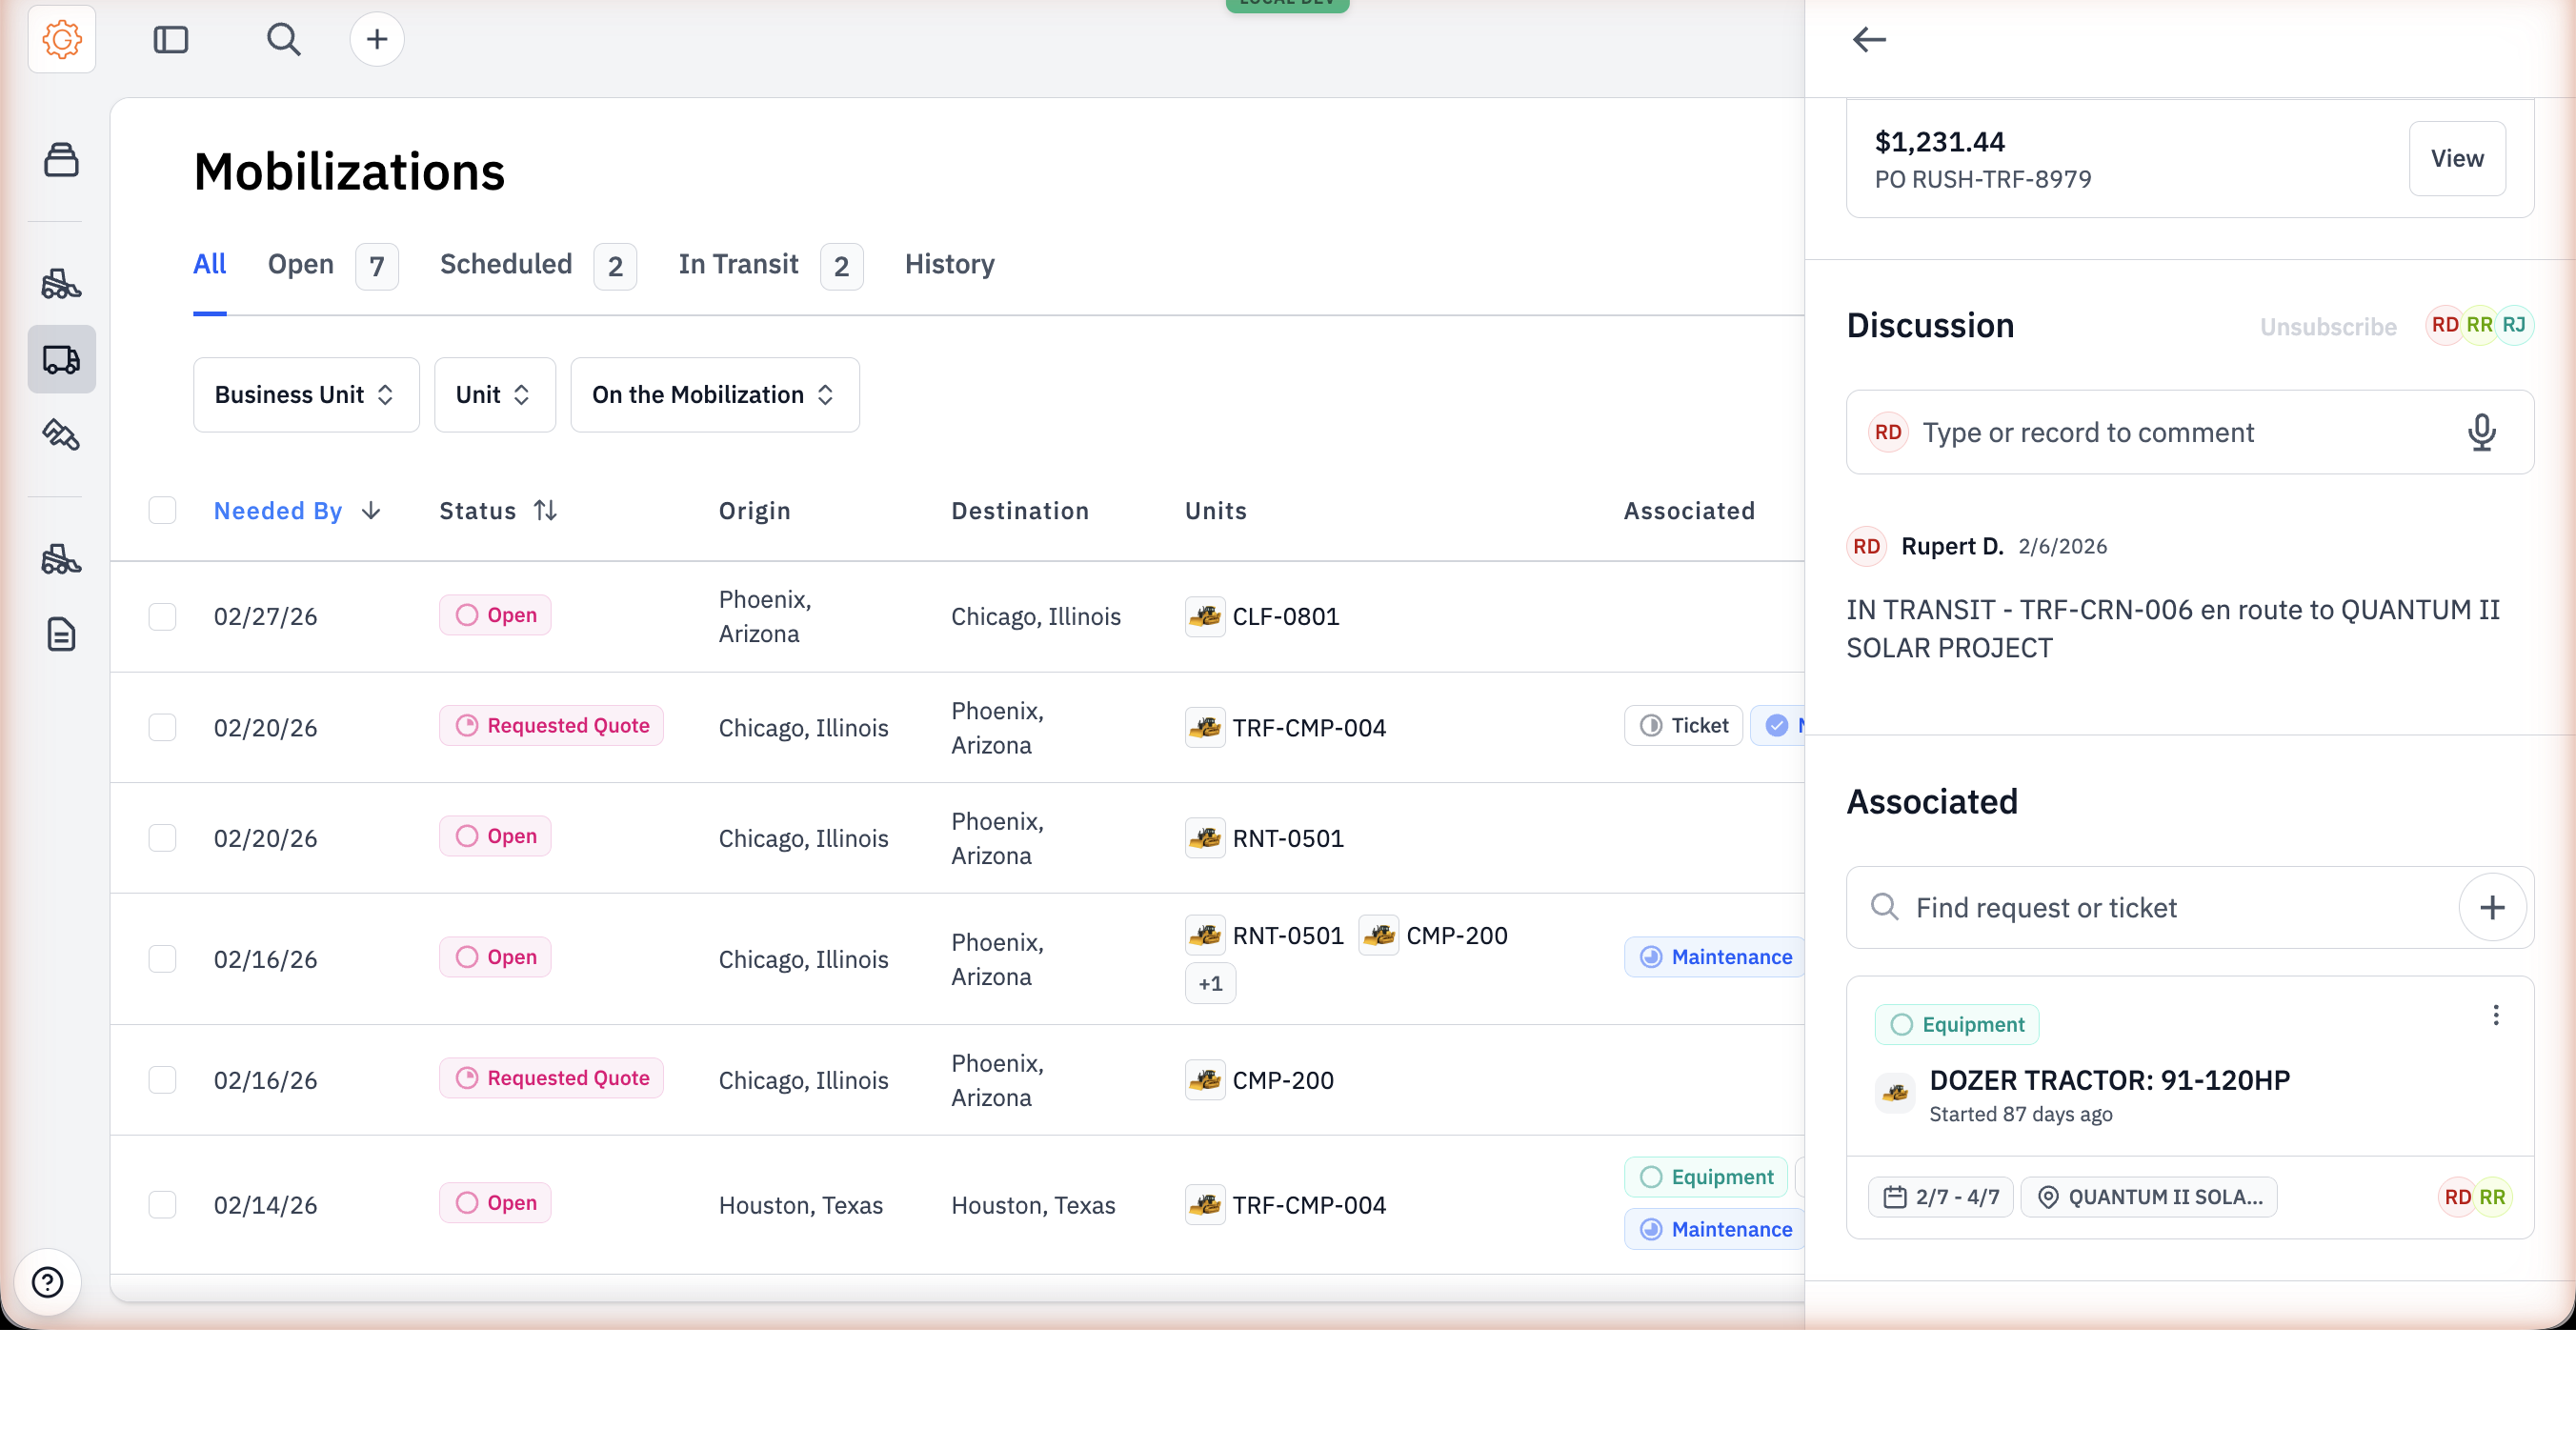
Below the Sourcing section, every mobilization has a Discussion thread. The owner, origin contact, destination contact, and driver are all auto-subscribed; messages here go to all of them. This is where dispatch posts the "load is rolling" or "ETA pushed to 3pm" updates that everyone needs to hear at once.
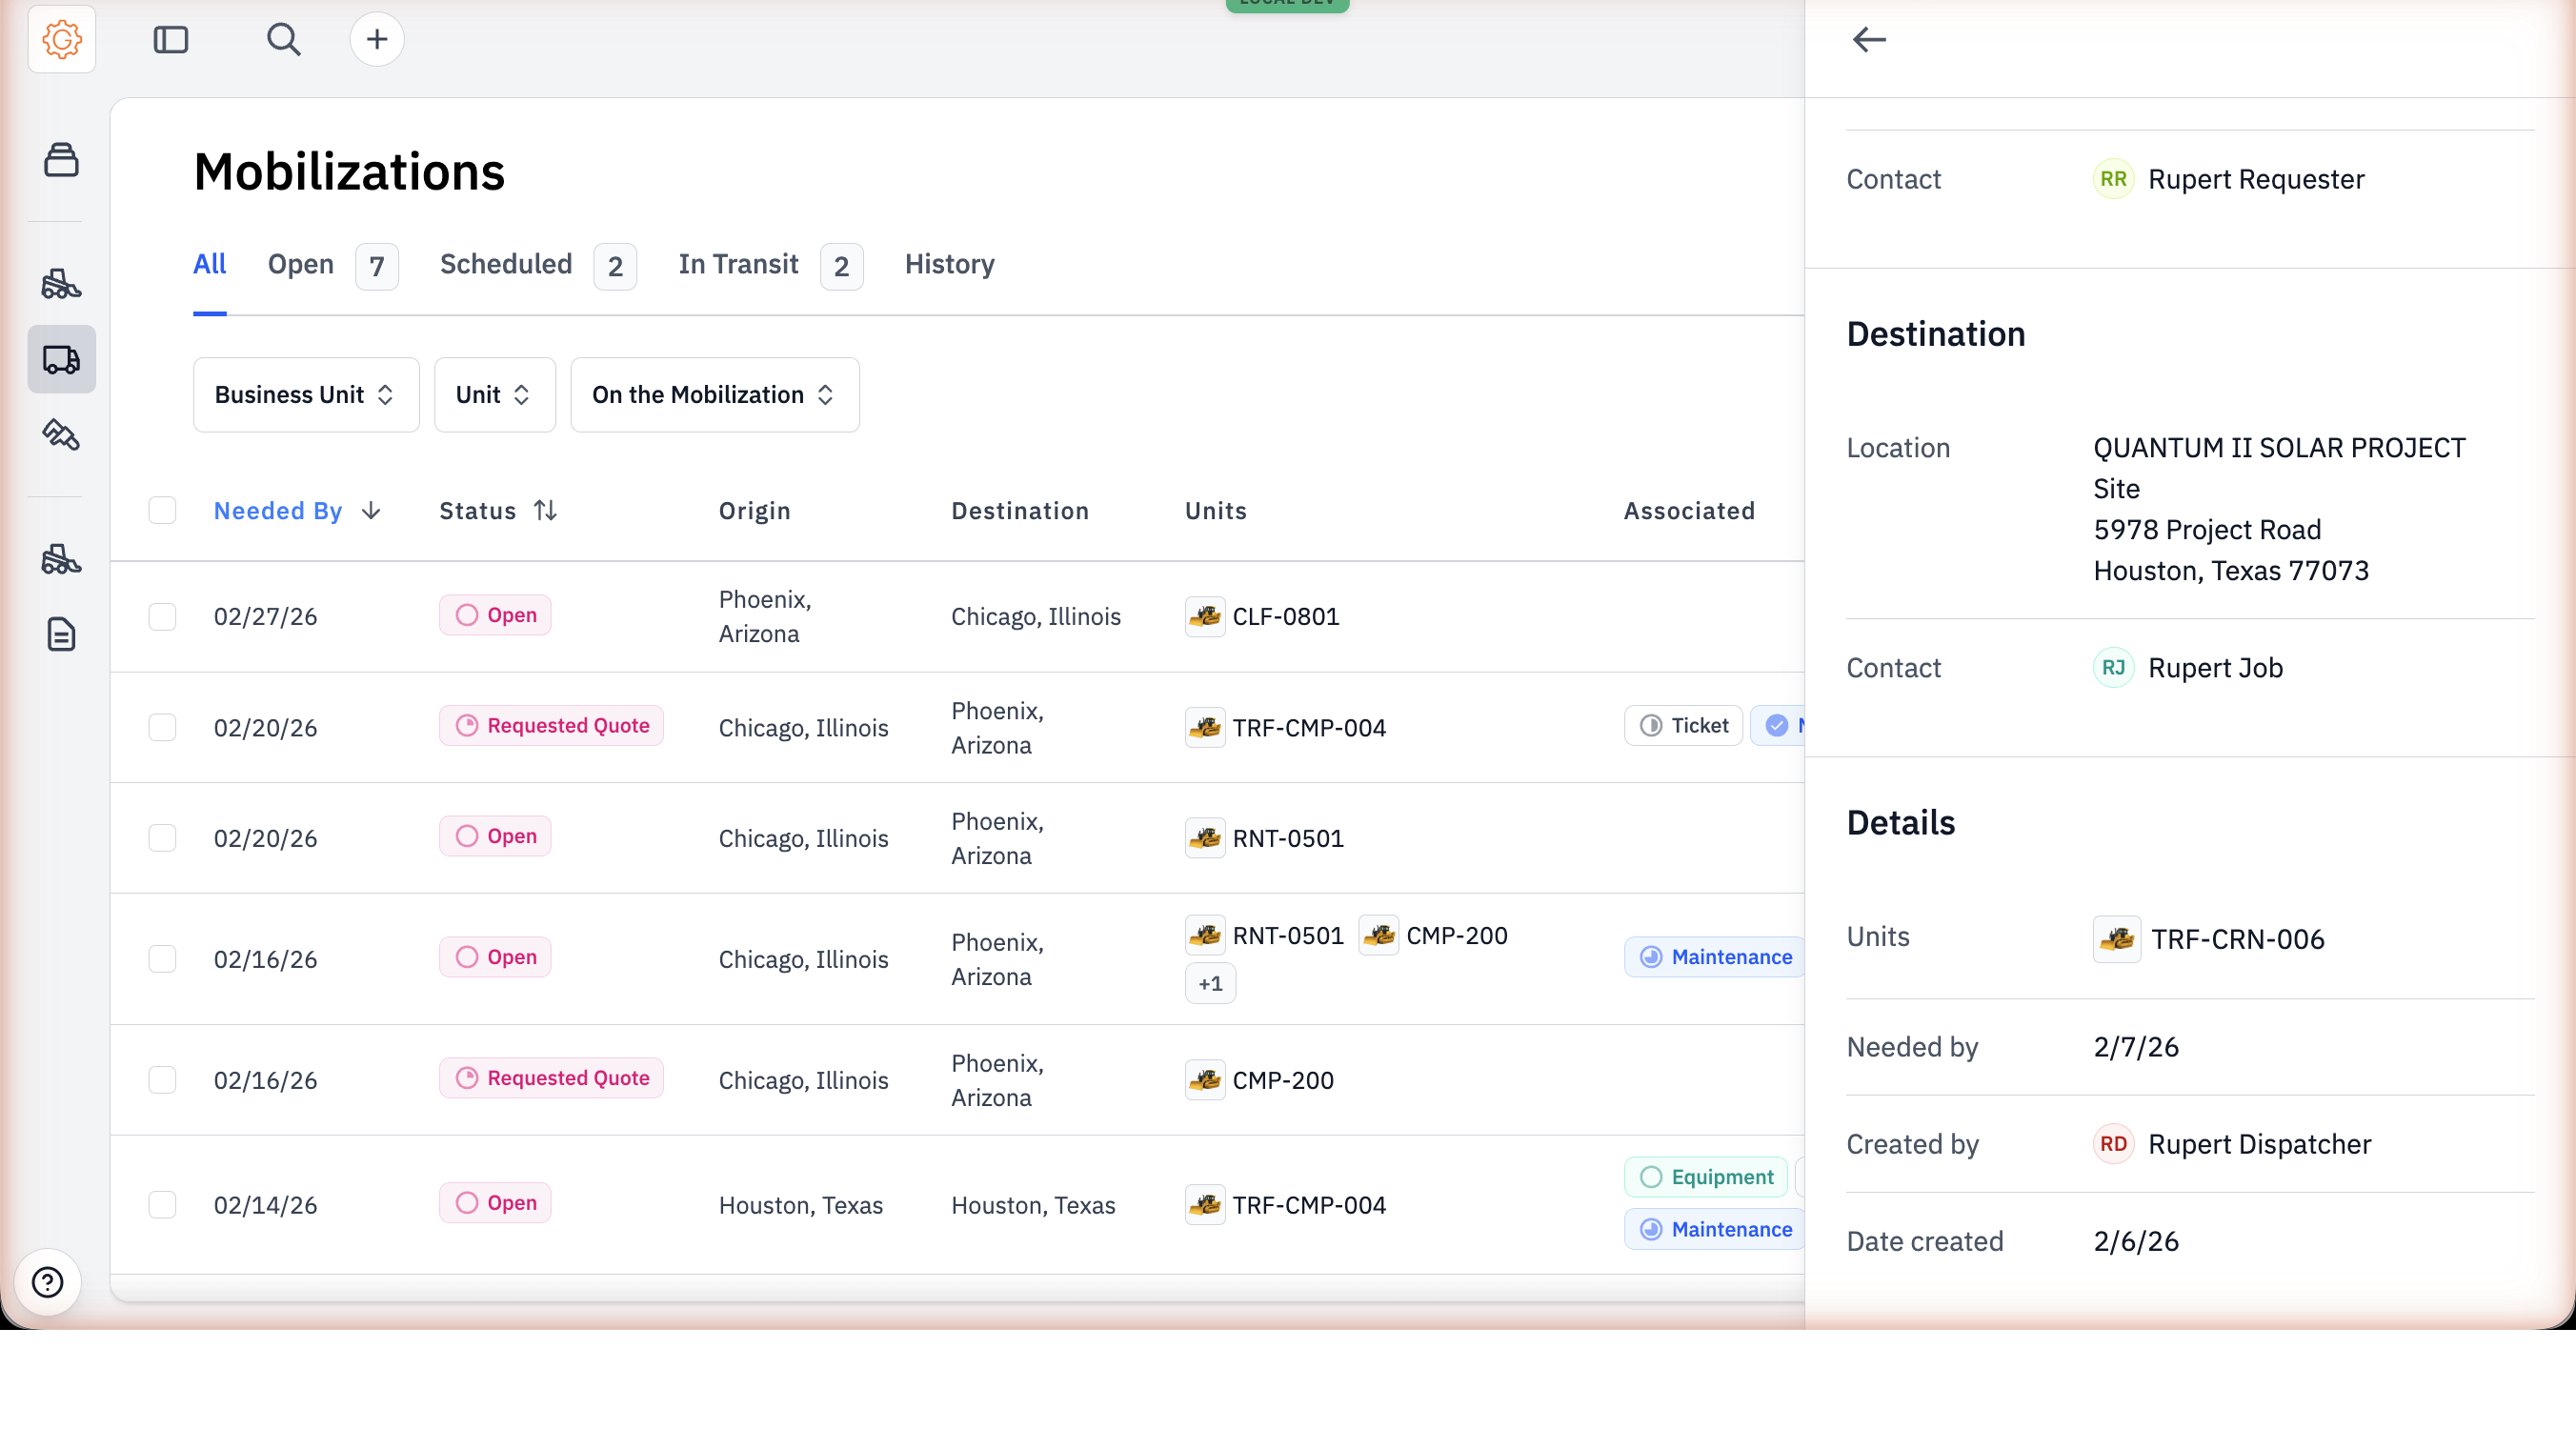
Origin, Destination, and Details sit at the bottom of the panel — the static facts the move was created on.
#The daily driver digest
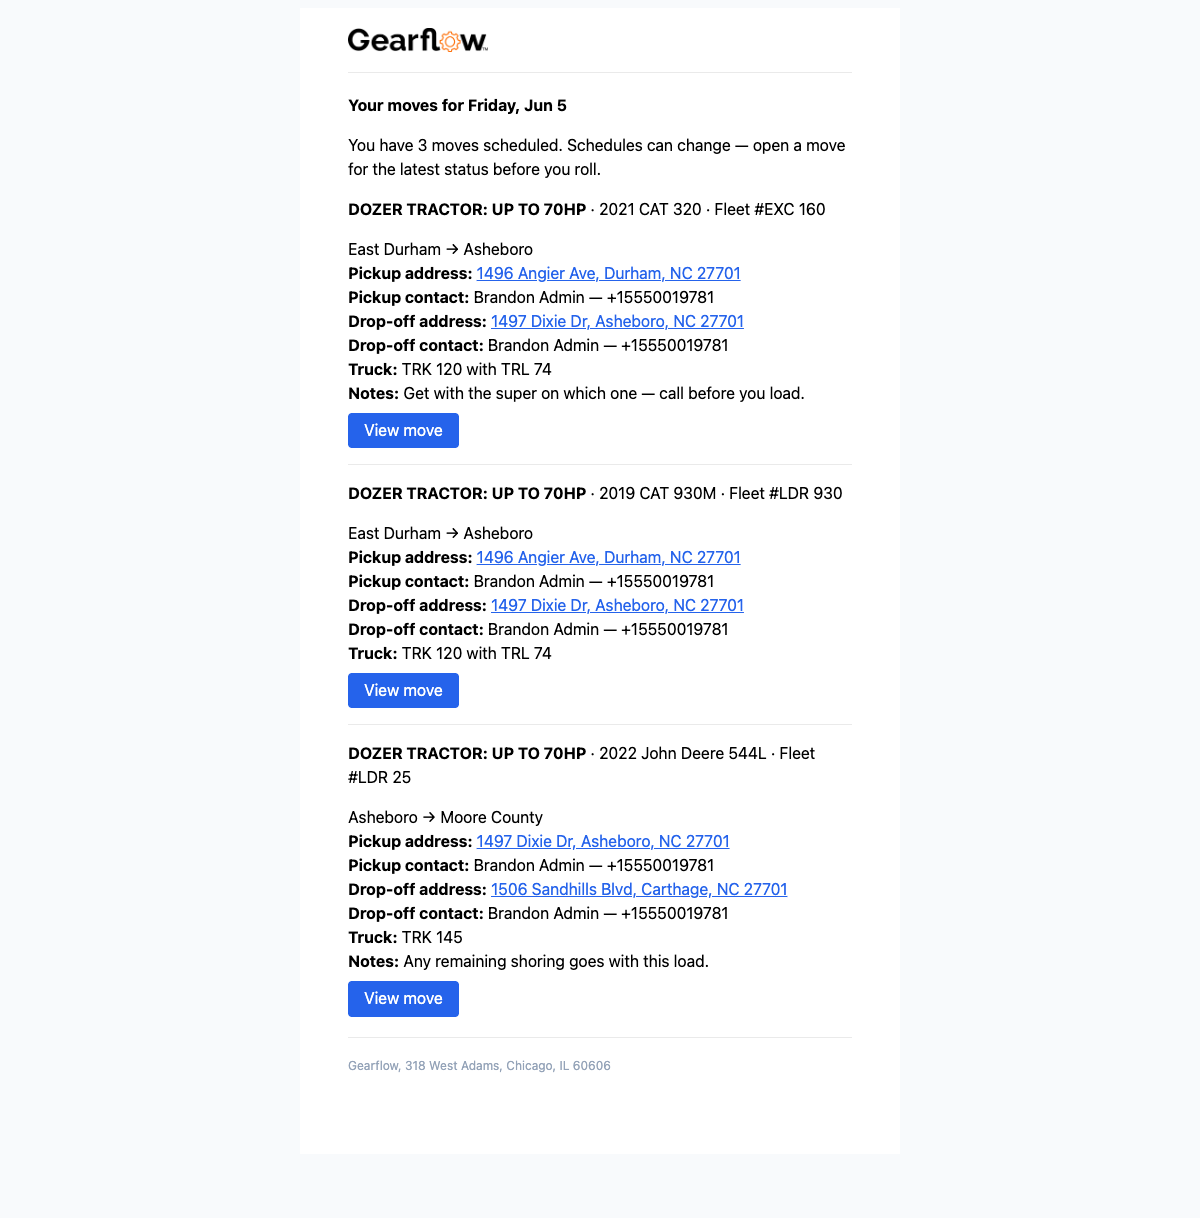
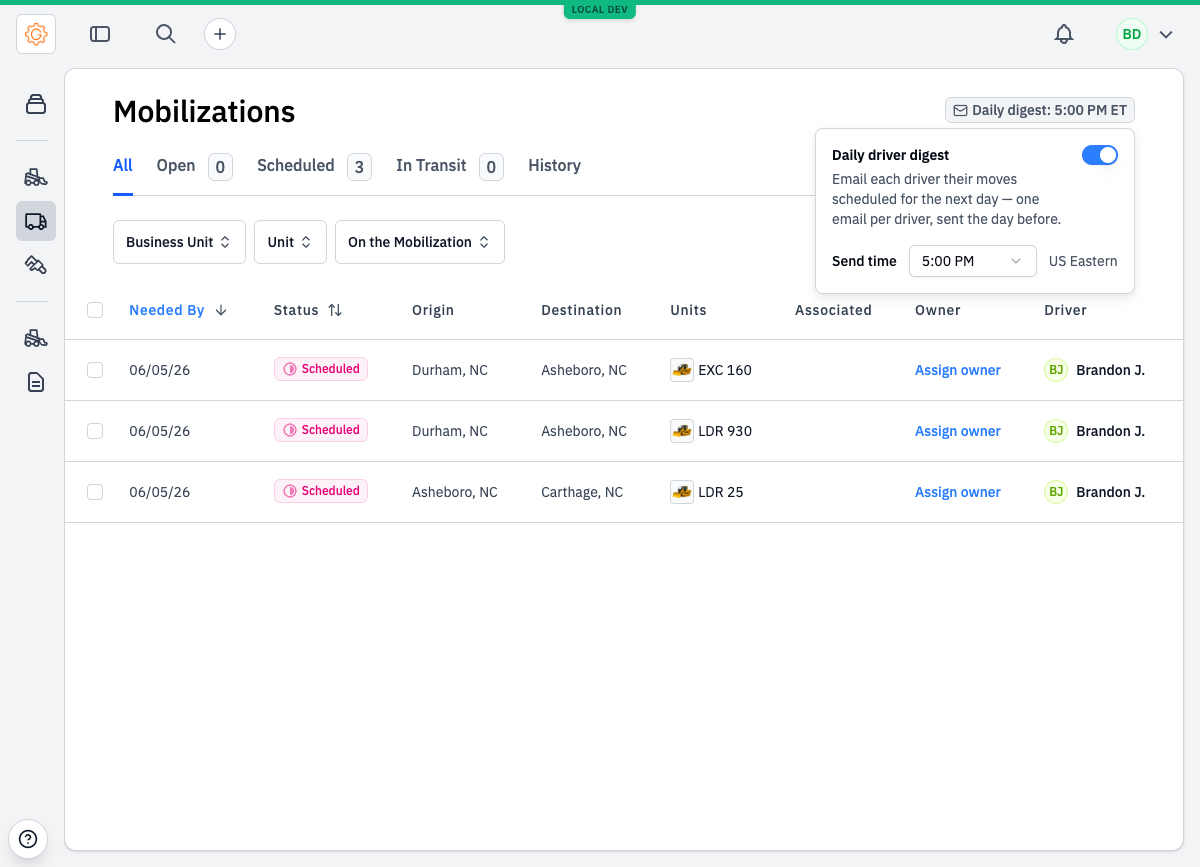
Gearflow builds the next day's drives and emails them out itself.
Turn it on once for the account and, at the hour you choose, every driver gets one email listing the moves scheduled for the next day that they're assigned to — equipment, route, pickup and drop-off address with a contact and phone at each end, truck, and the Details note.
Configuration lives right on the Mobilizations list, not buried in a settings page. A badge shows the current state — Daily digest: off or Daily digest: 5:00 PM ET — to dispatchers and account admins.
#From Ticket to mobilization
#Tips
- Don't conflate this with Equipment requests. Both have multi-vendor RFQ flows. Equipment is for renting / buying. Mobilization is for moving a unit you already own.