Equipment requests
A crew needs a machine — an excavator, a dozer, a loader, a truck — and the office has to source it. Equipment requests collect the rental ask, send a single multi-vendor RFQ, and turn the winning quote into a PO without anyone leaving the platform.
#Why this exists
When a Ticket from the field surfaces an equipment need — say a Cat 982M loader is down and the crew needs a replacement on site by Friday — the office has two choices: mobilize a unit Gearflow already owns, or rent one. This article is about the renting half.
Without Gearflow, that renting half is phone calls and a spreadsheet — the coordination gap, lived one rental at a time. Someone in the office calls three rental yards, jots prices on a notepad, calls the project manager to compare, and emails a PO once the boss says yes. Nothing about that workflow is captured anywhere — no audit trail, no spend reporting, no record of what the losing vendors quoted.
An equipment request replaces that with one structured ask. The buyer enters the machine they need once, picks the vendors to send it to, and the vendors quote back from their inbox. The buyer compares the quotes side by side, accepts one, and Gearflow turns it into a PO.
#What you're looking at
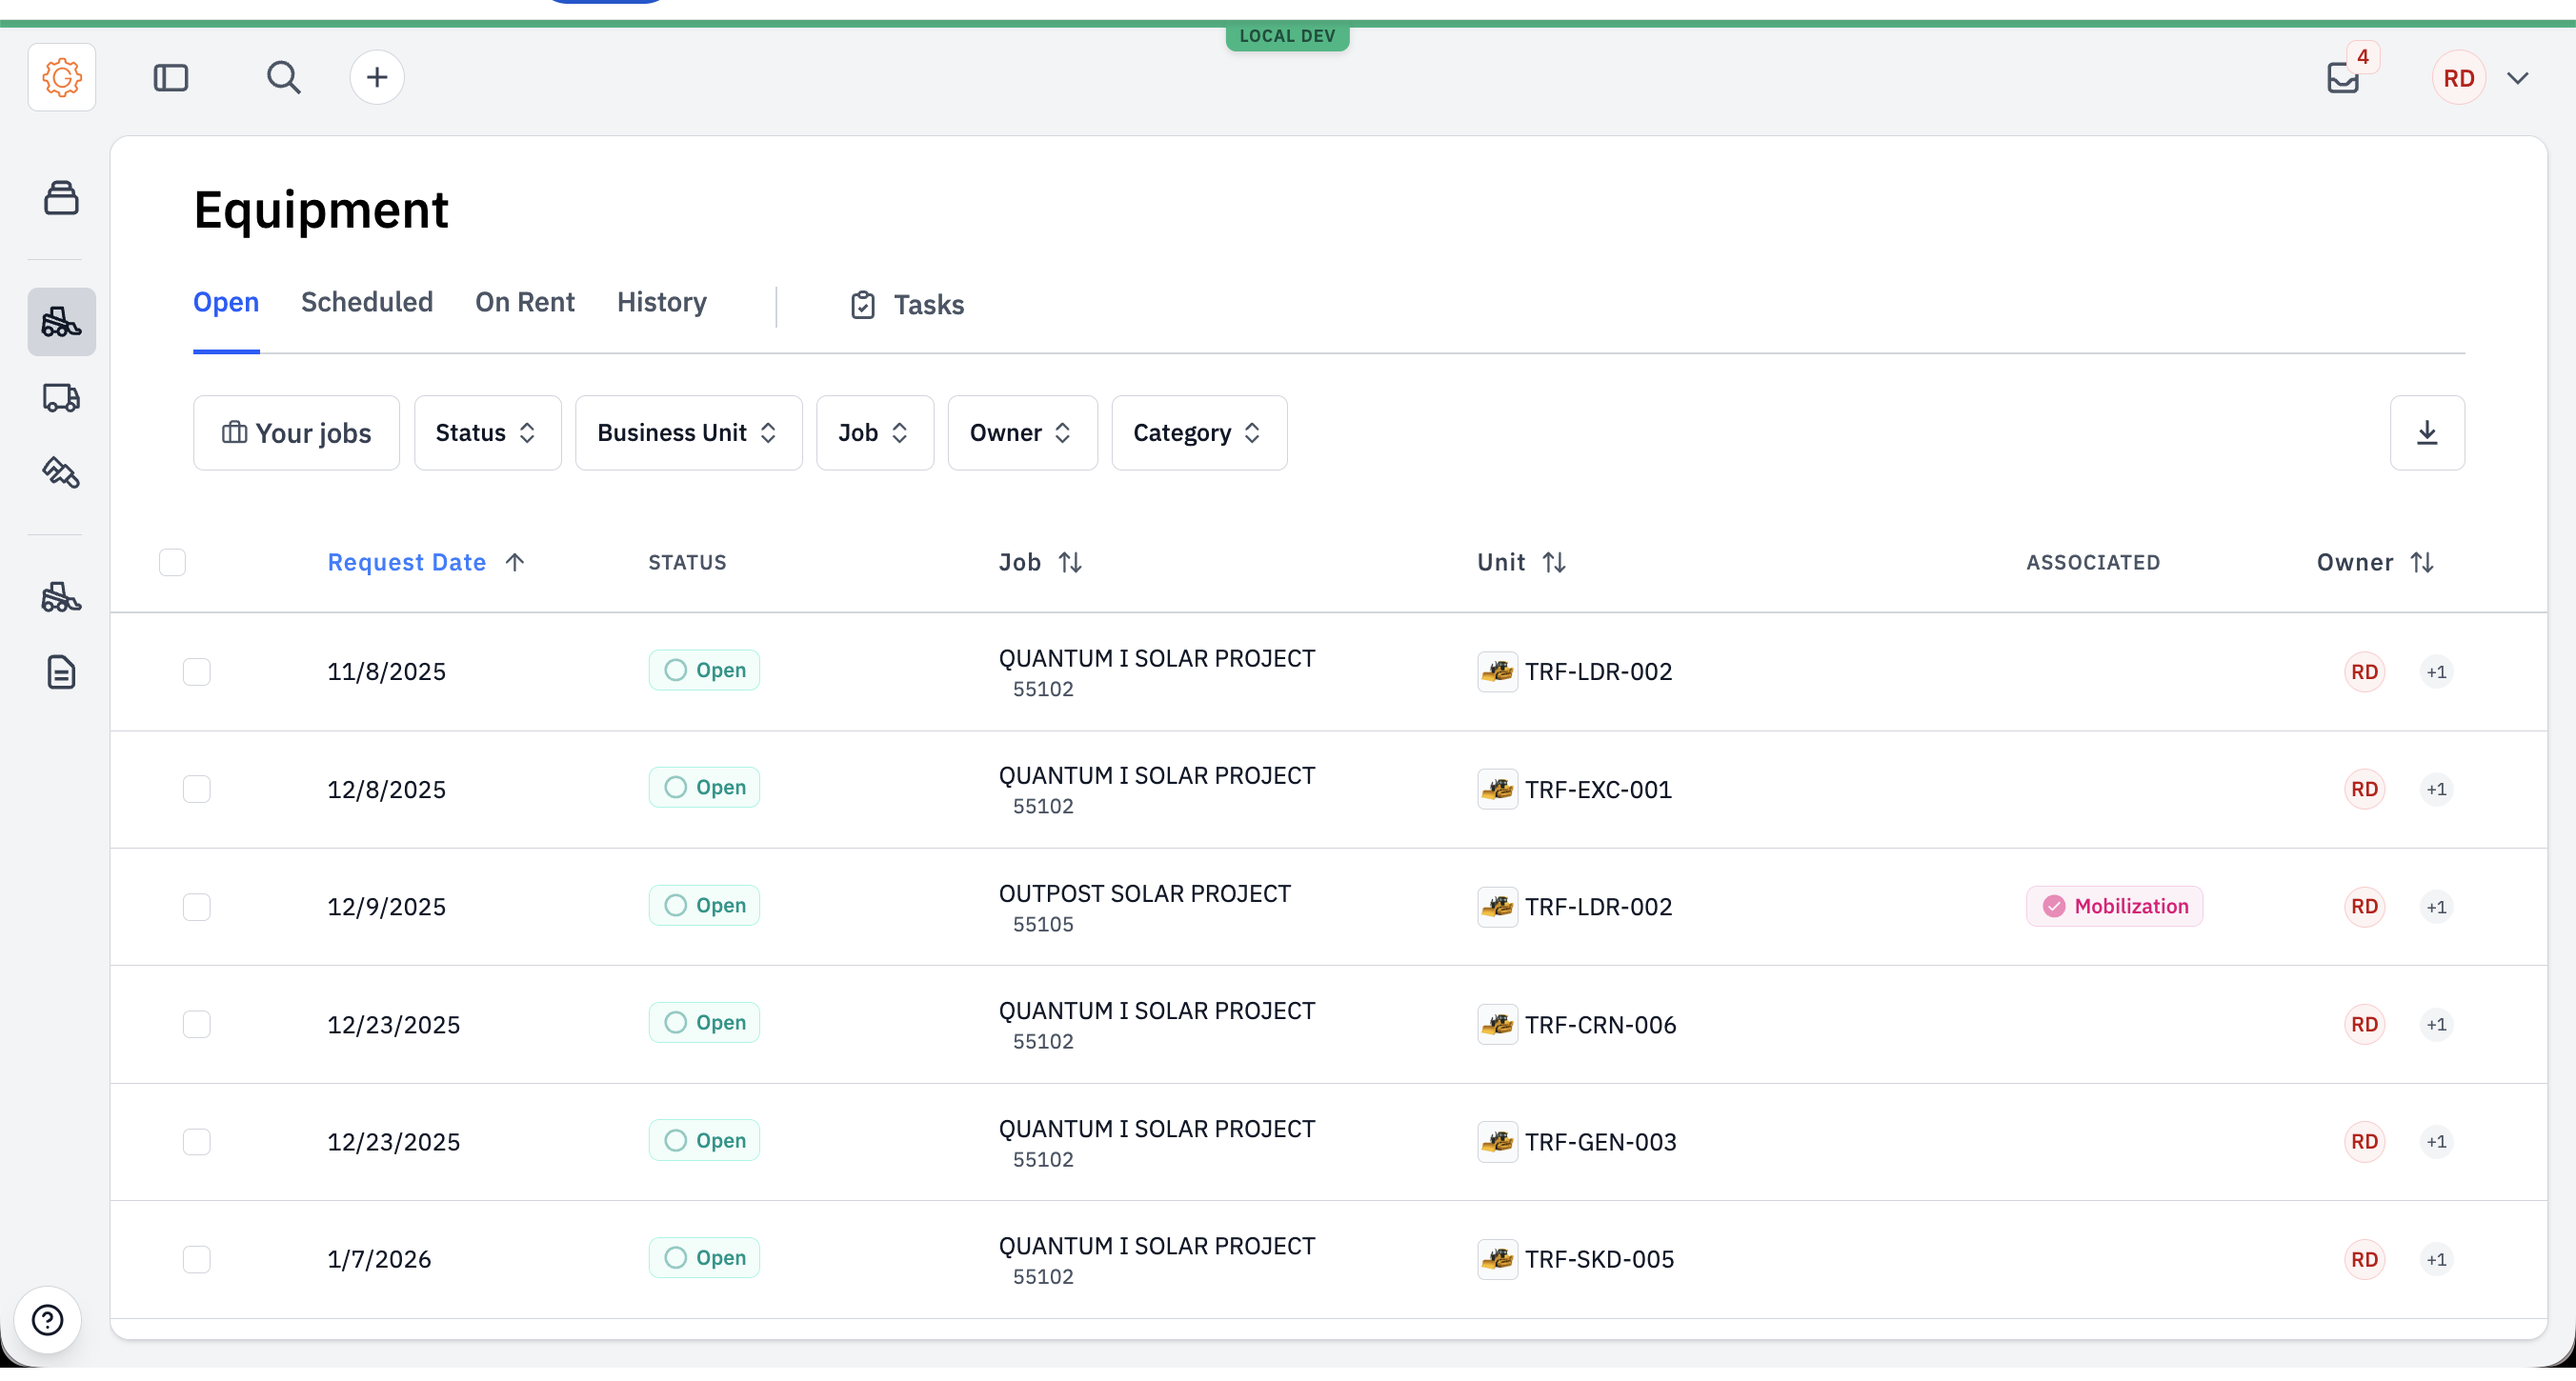
Equipment requests live under the Equipment tab in the left navigation. Each row is one request, with its current status, the asset category, the job, and who's on it.
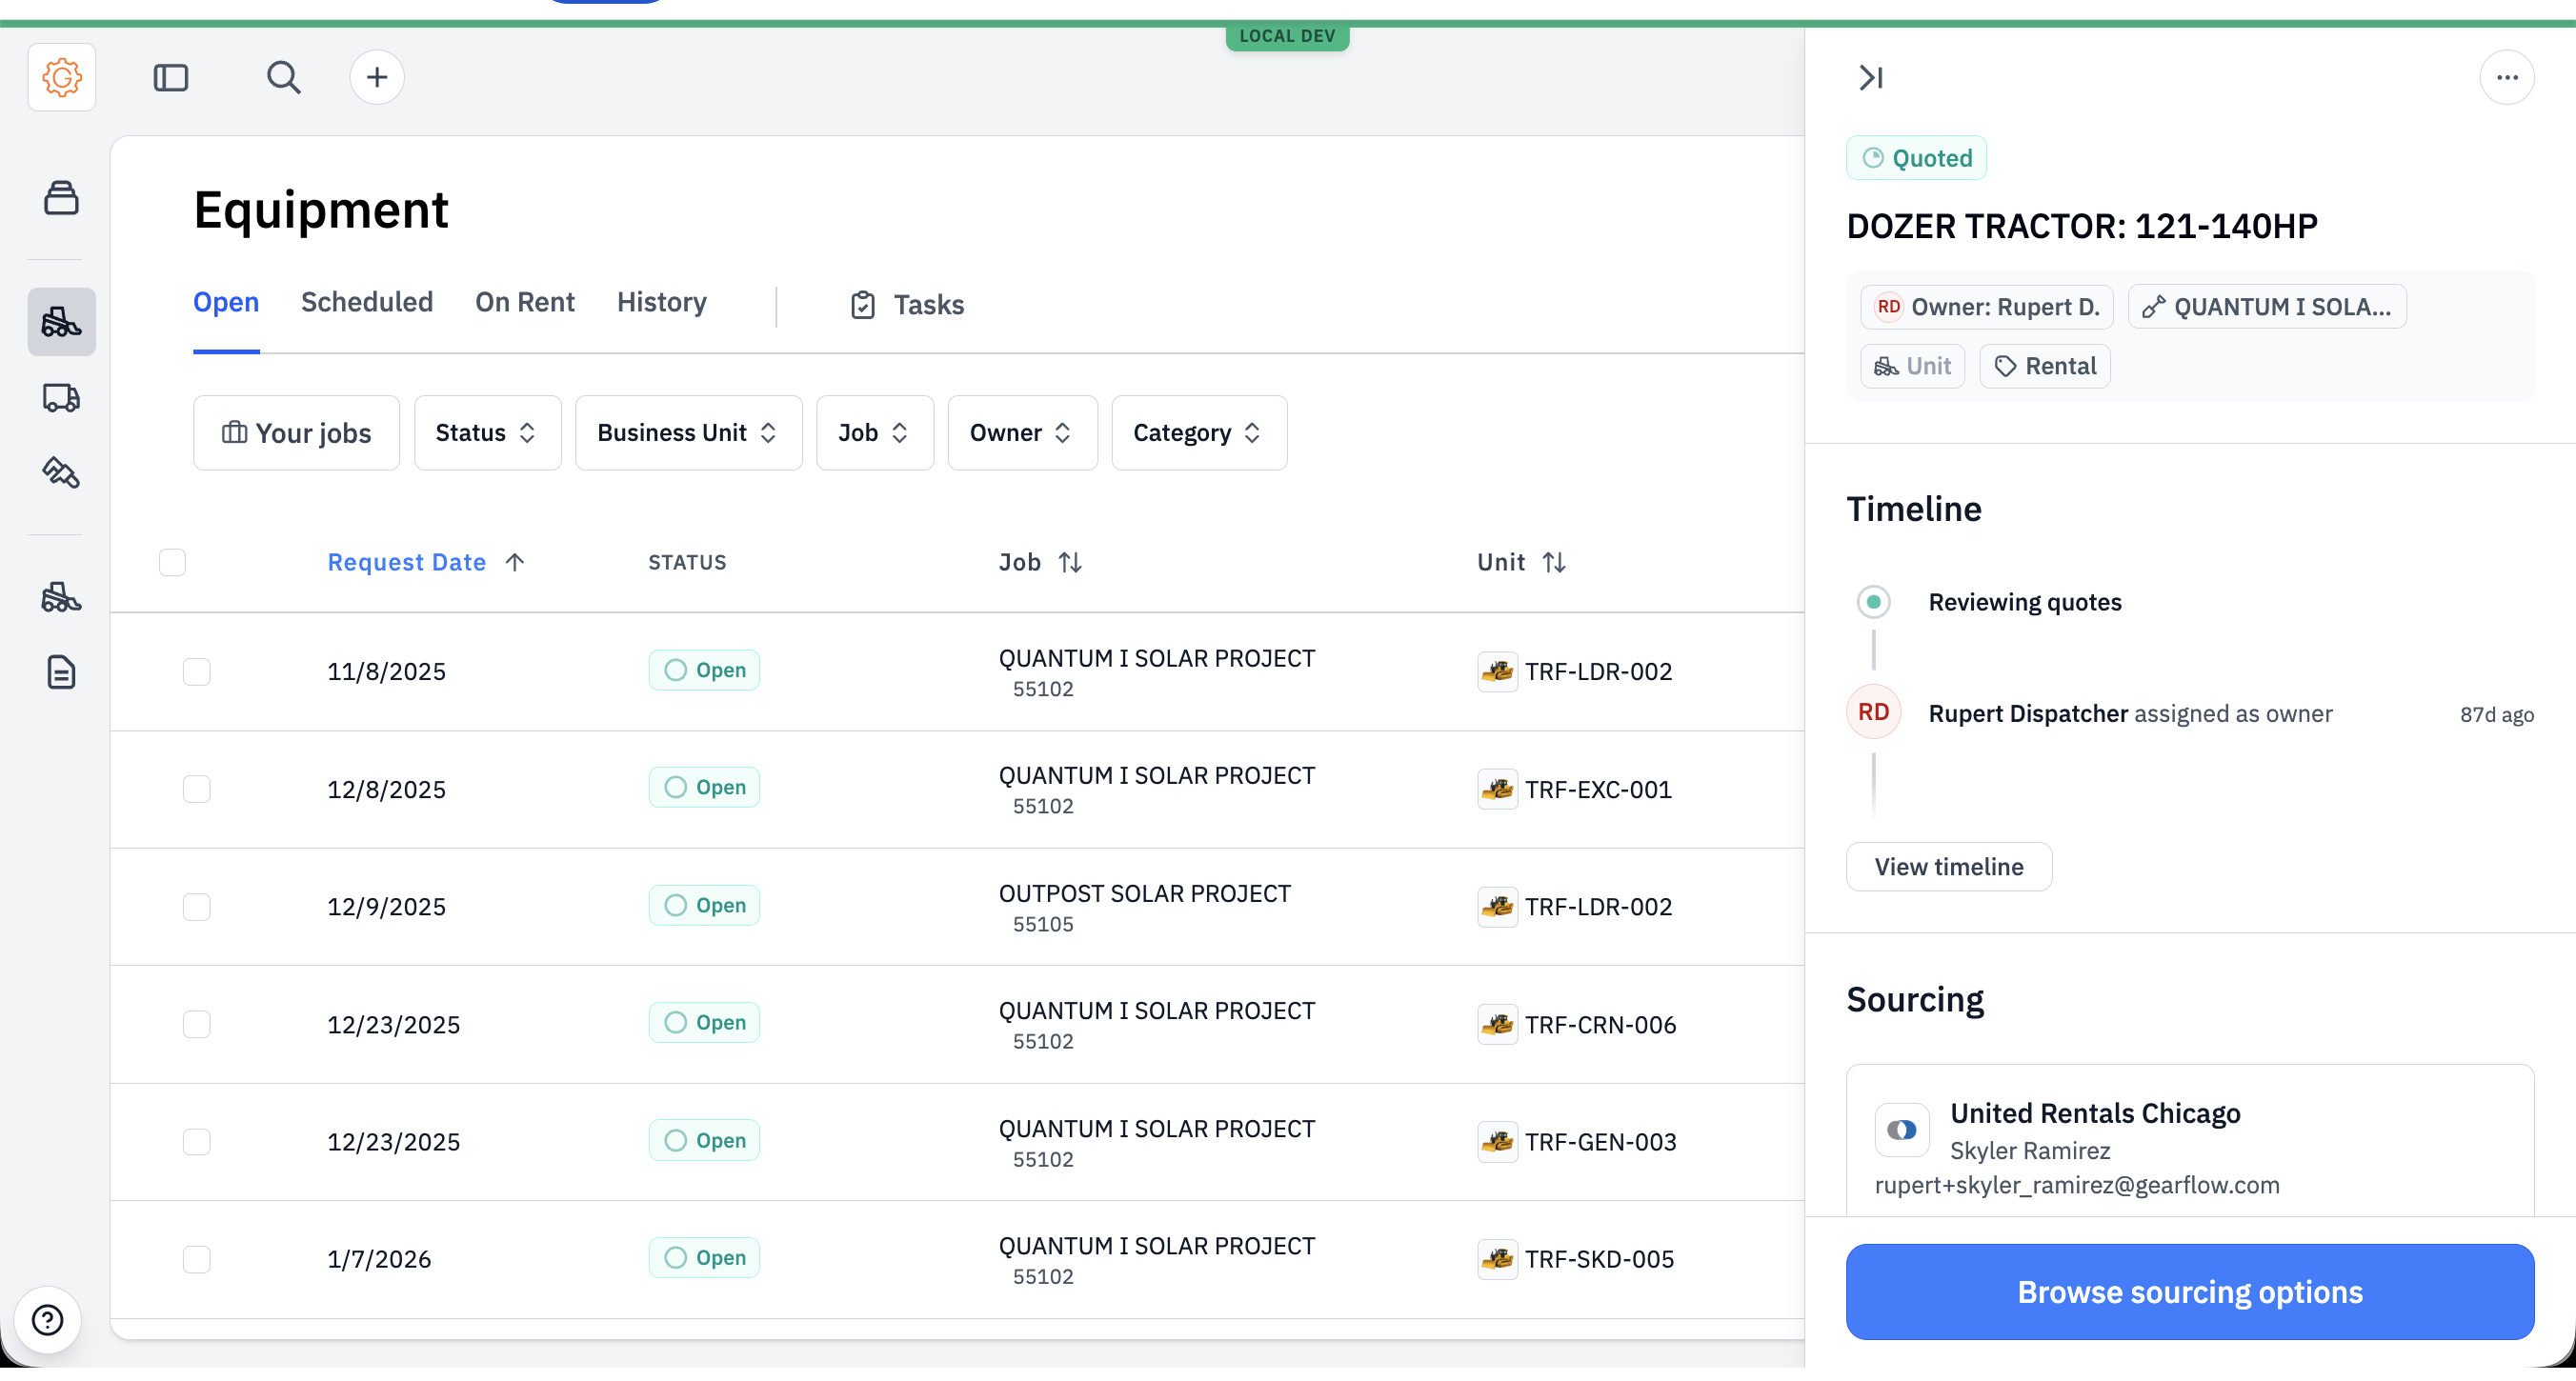
Open a request from the list and a detail panel slides in.
#Lifecycle
Inbound is the moment after a buyer creates the request — the office knows what's needed but hasn't reached out to anyone yet. Quote Requested means the request has been sent to one or more vendors and the office is waiting for prices to come back. Quoted means at least one vendor has responded with a quote — this is the comparison moment. PO Requested is the moment the buyer accepts a quote and sends a PO number to the winning vendor; the request is committed but the unit hasn't shown up yet. Scheduled covers the period between PO and the unit hitting the job. On Rent through Called Off is the rental itself — check-in when it arrives, call-off when the crew is done with it.
#Walkthrough
#Step 1: Buyer creates the request
The buyer either accepts an AI-suggested request from a Ticket, or starts one from scratch with the + menu. Either way, the form collects the same fields:
- The job the equipment is for, the company and department that owns the spend, and the requester and job contact for the unit.
- The delivery location — usually the job's default, but overridable.
- An asset category (e.g. "HYDR SML EXCAVATOR: 24 - 26TN"), quantity, and the rental window — start date and end date.
- Optional preferred make/model, attachments, specifications, and cost code.
- Free-text notes for anything else the vendors should know.
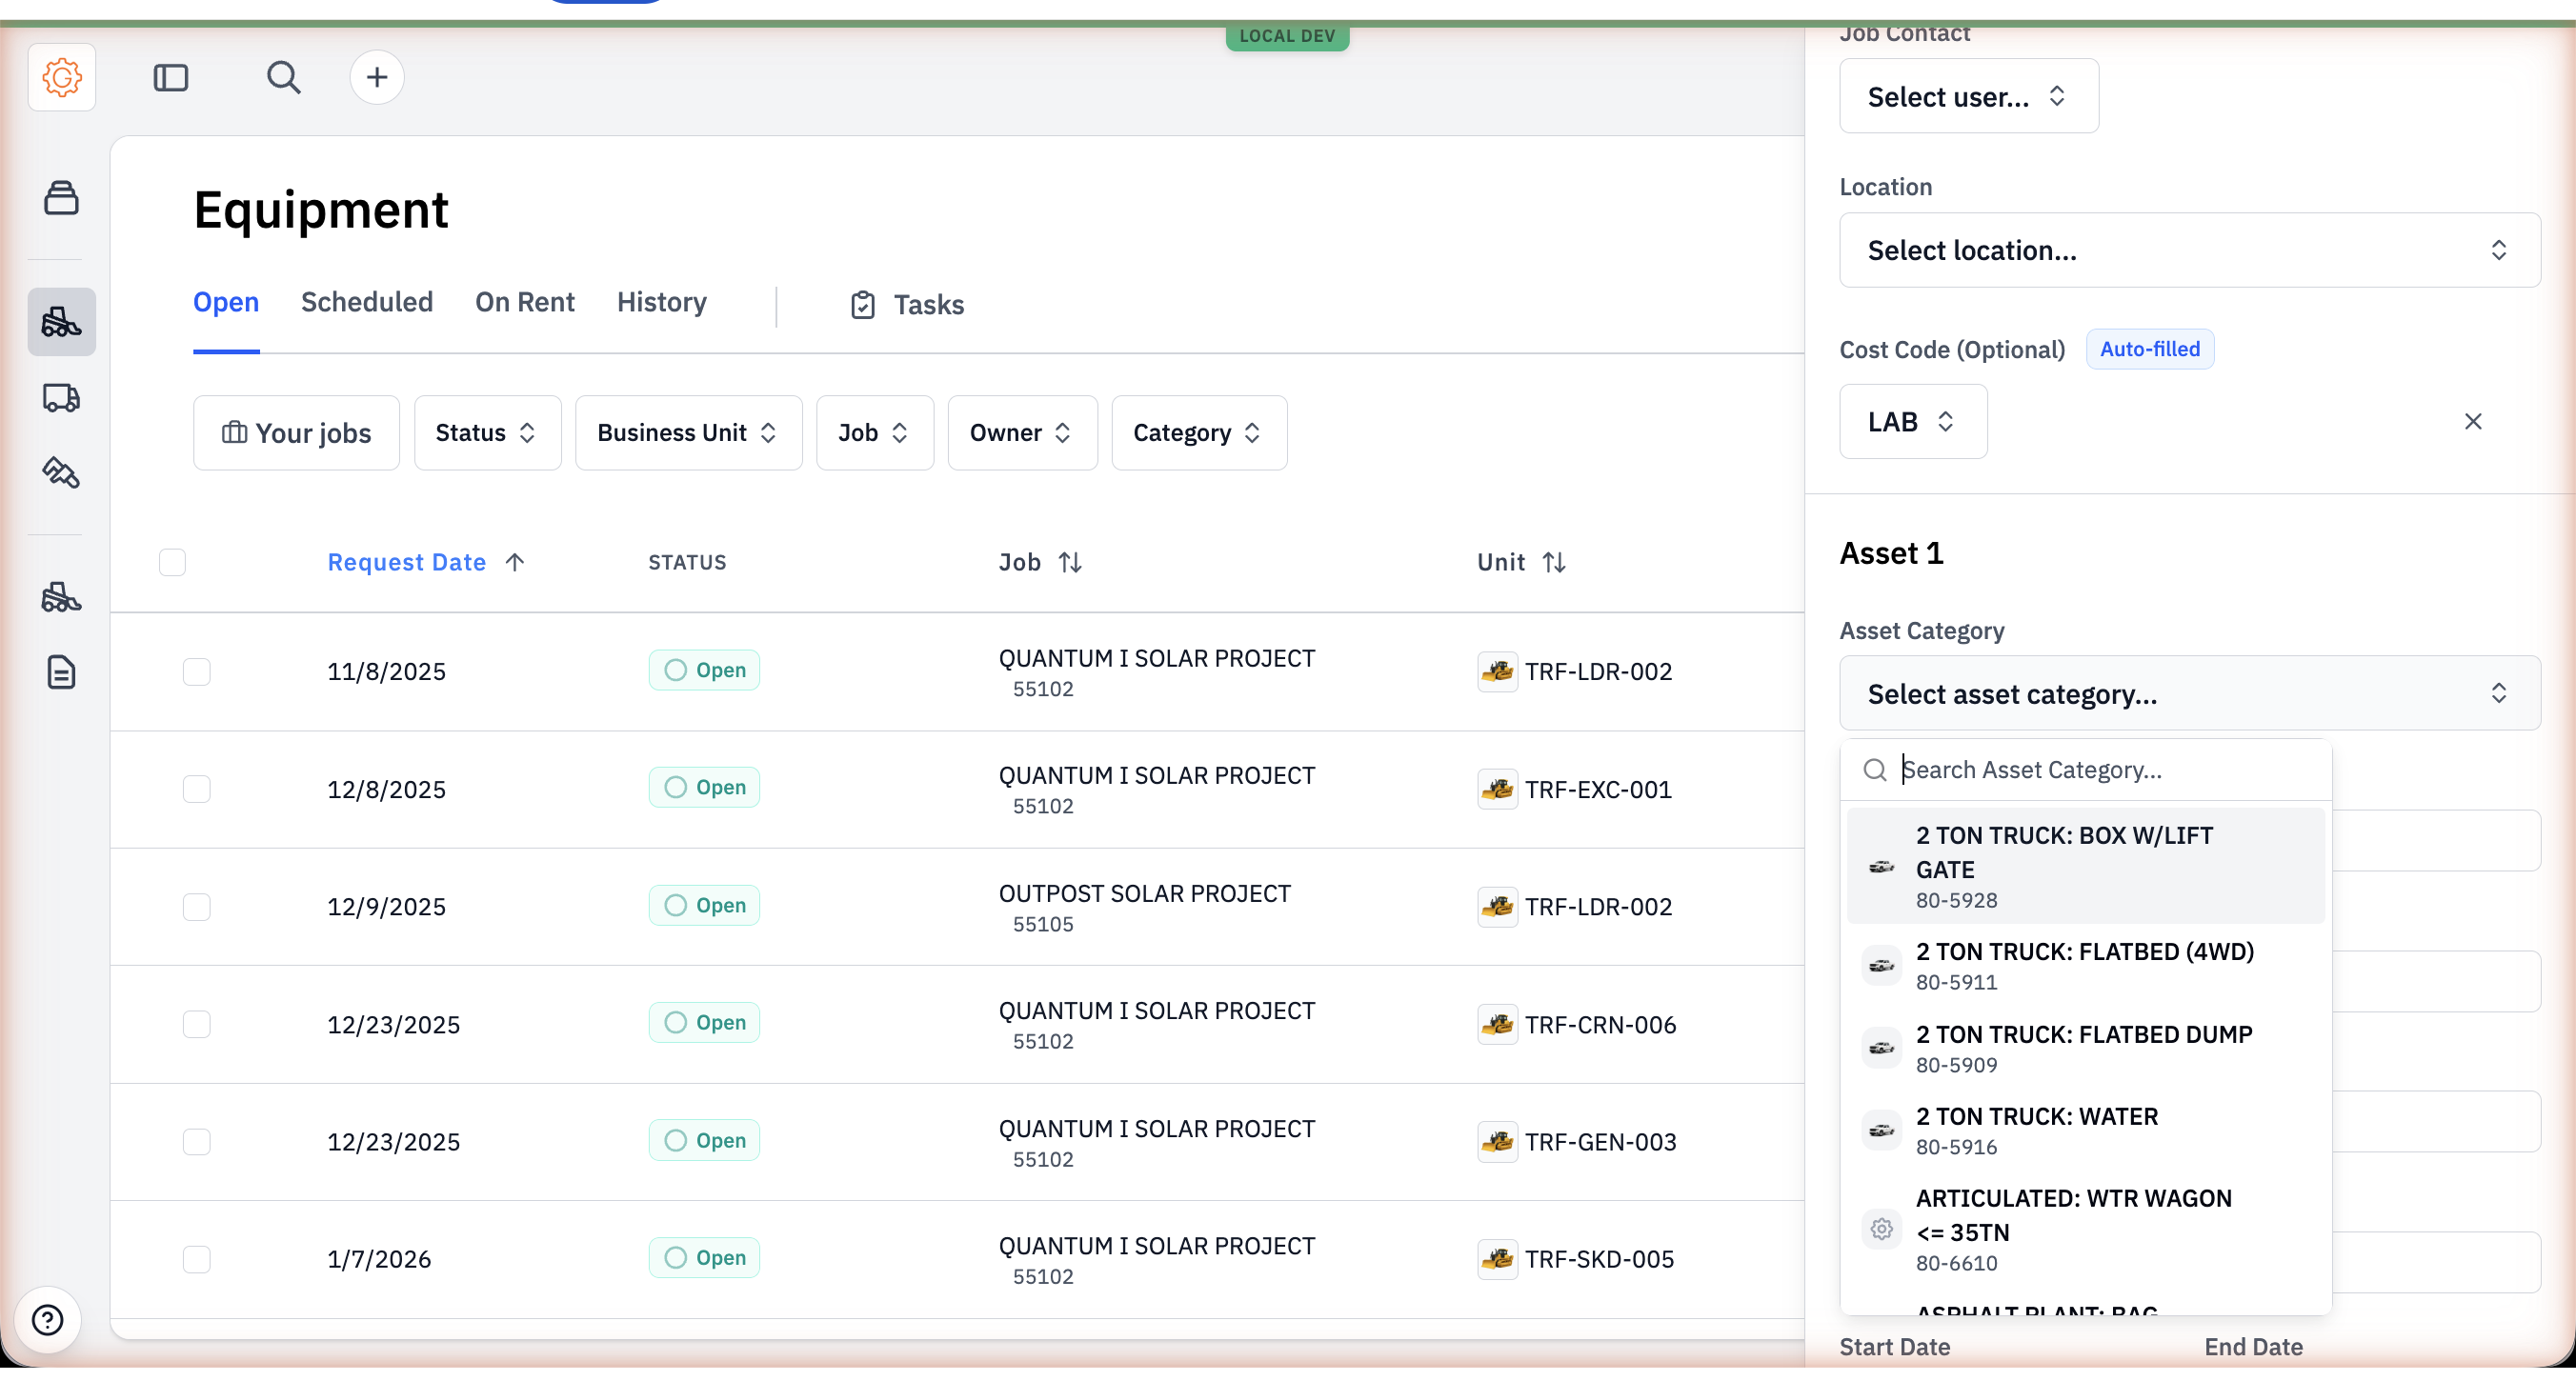
Submit and the request lands in Inbound.
#Step 2: Pick vendors and send the RFQ
From the request detail, the buyer hits Browse sourcing options. Two paths show up: Fleet options (use an owned unit) and Rental options (send to vendors). The rental path opens a vendor list filtered to vendors who provide equipment.
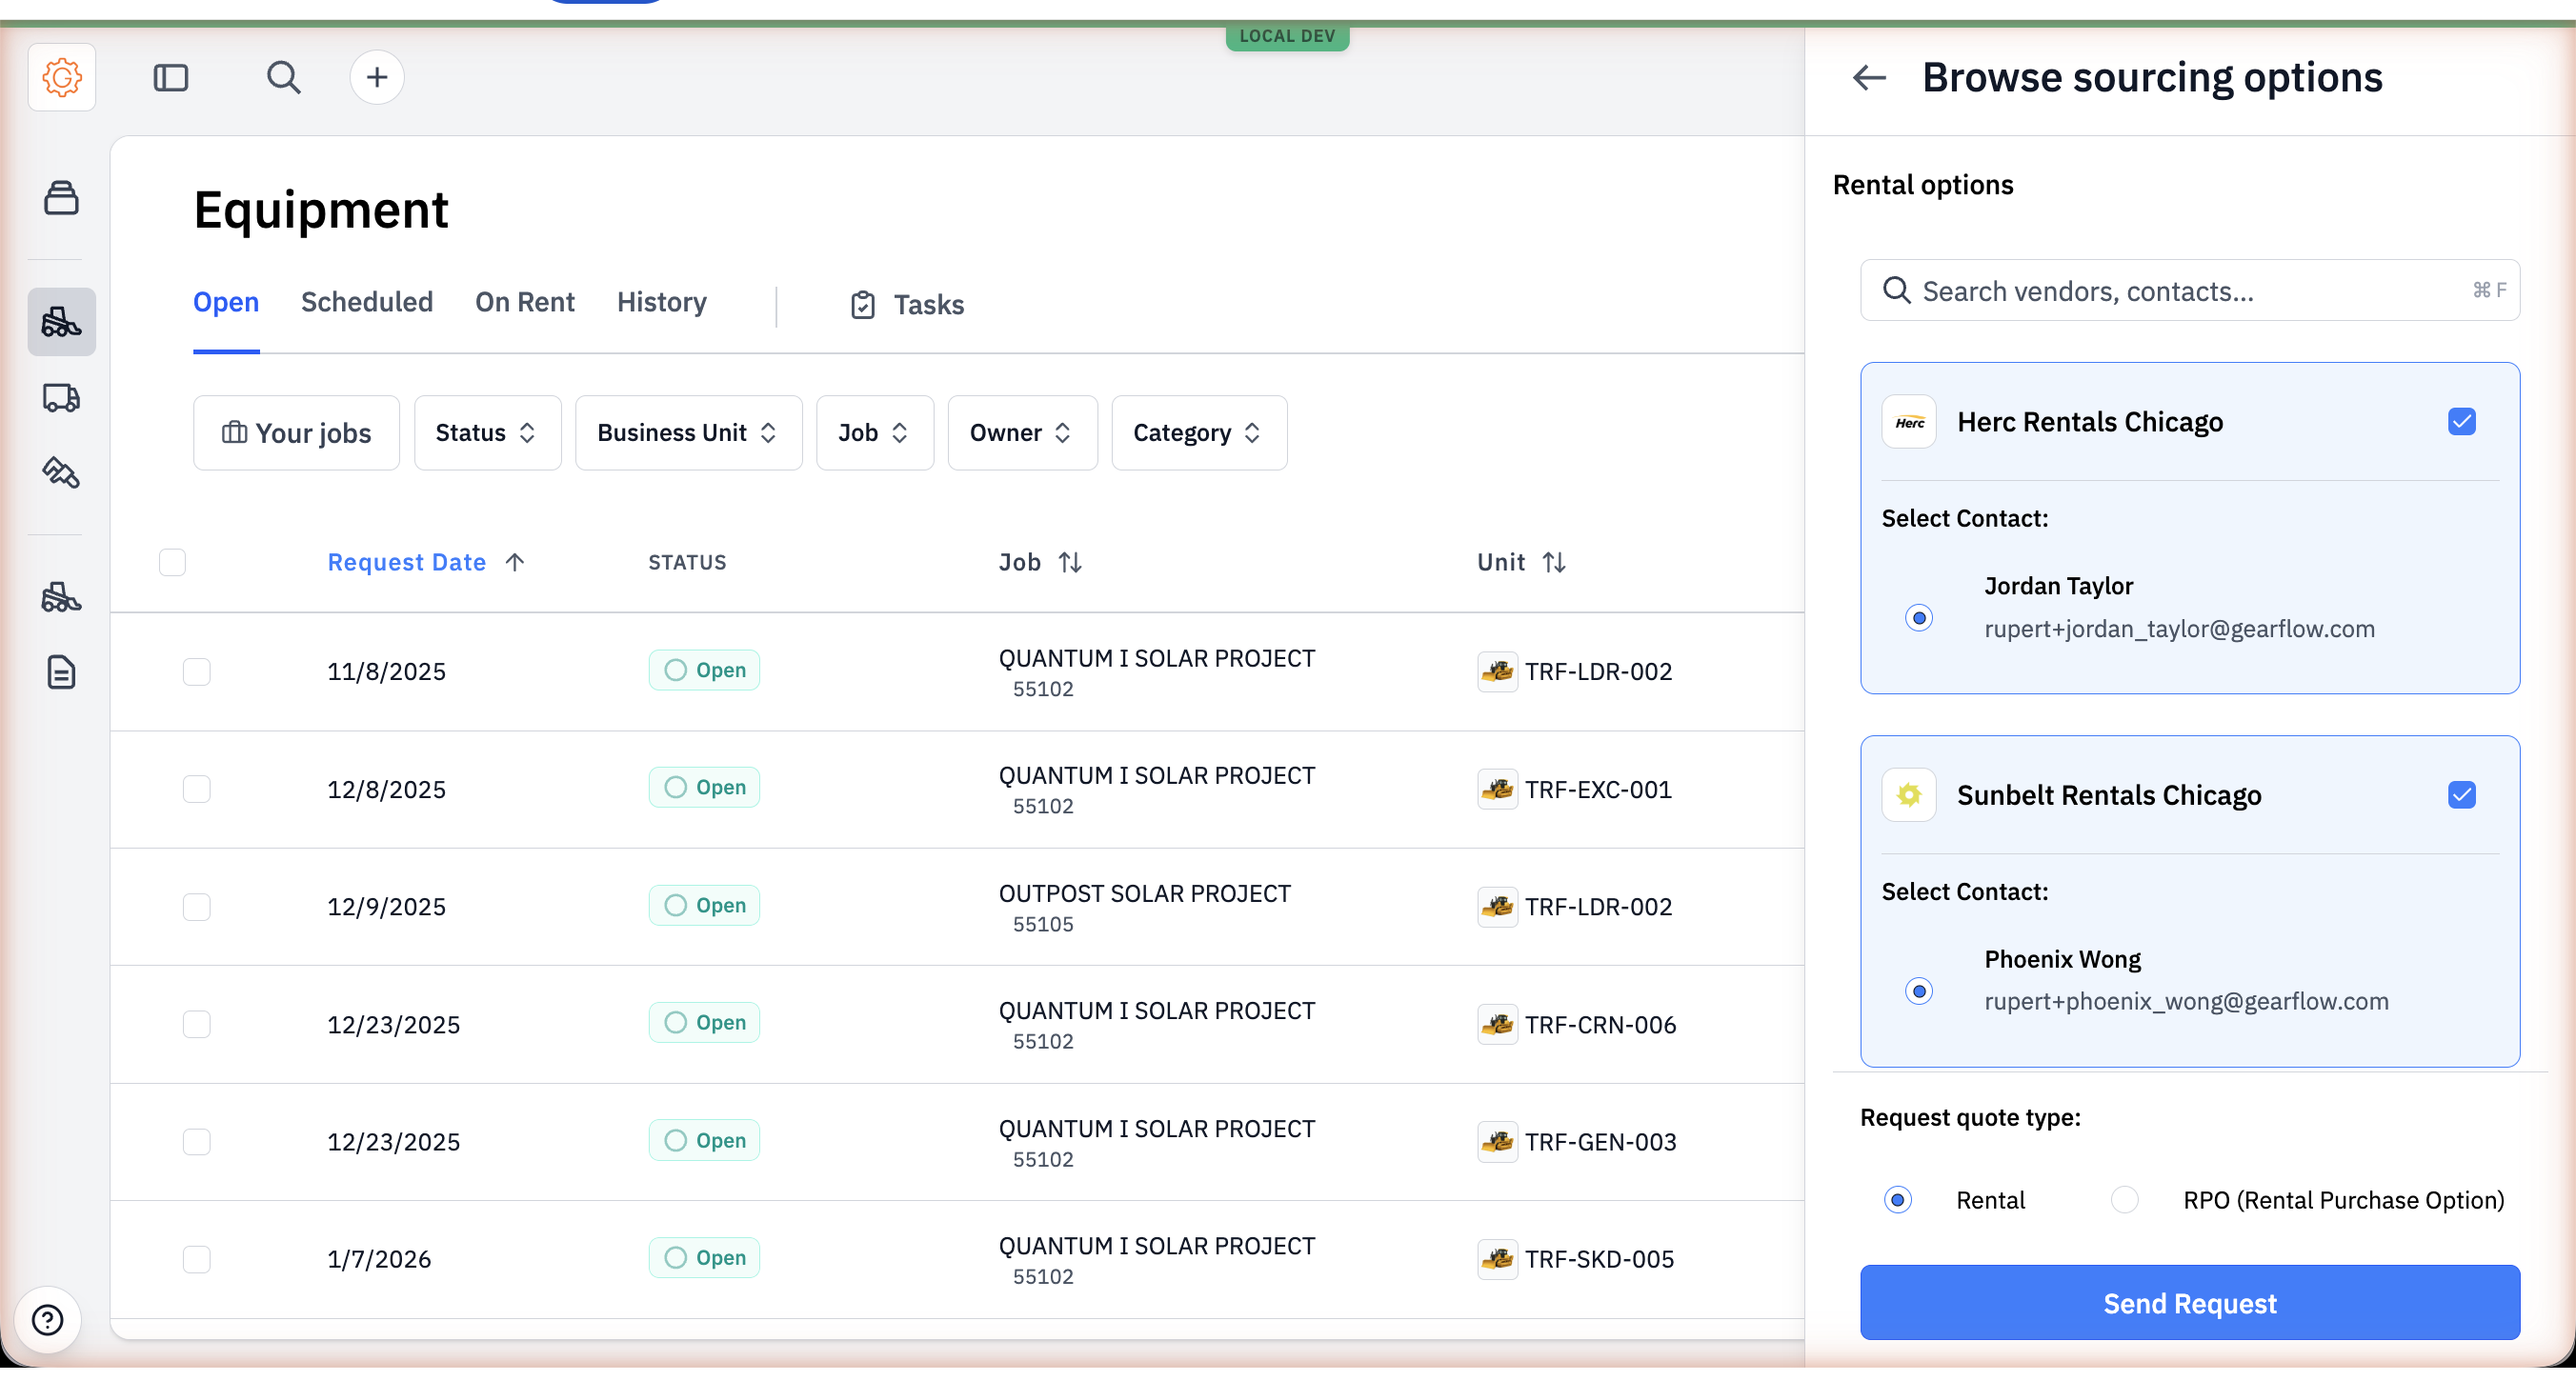
Hit Send Request and the request advances to Quote Requested. Each selected vendor contact gets an email with the request details — asset category, attachments, delivery address, dates, the requester's name and phone — and a thread ID stitched into the headers.
#Step 3: Compare quotes side by side
As replies come in, each vendor's quote shows up as a row in the request's Vendors section. The row collapses to vendor name, contact, and total — enough to compare three or four offers at a glance.
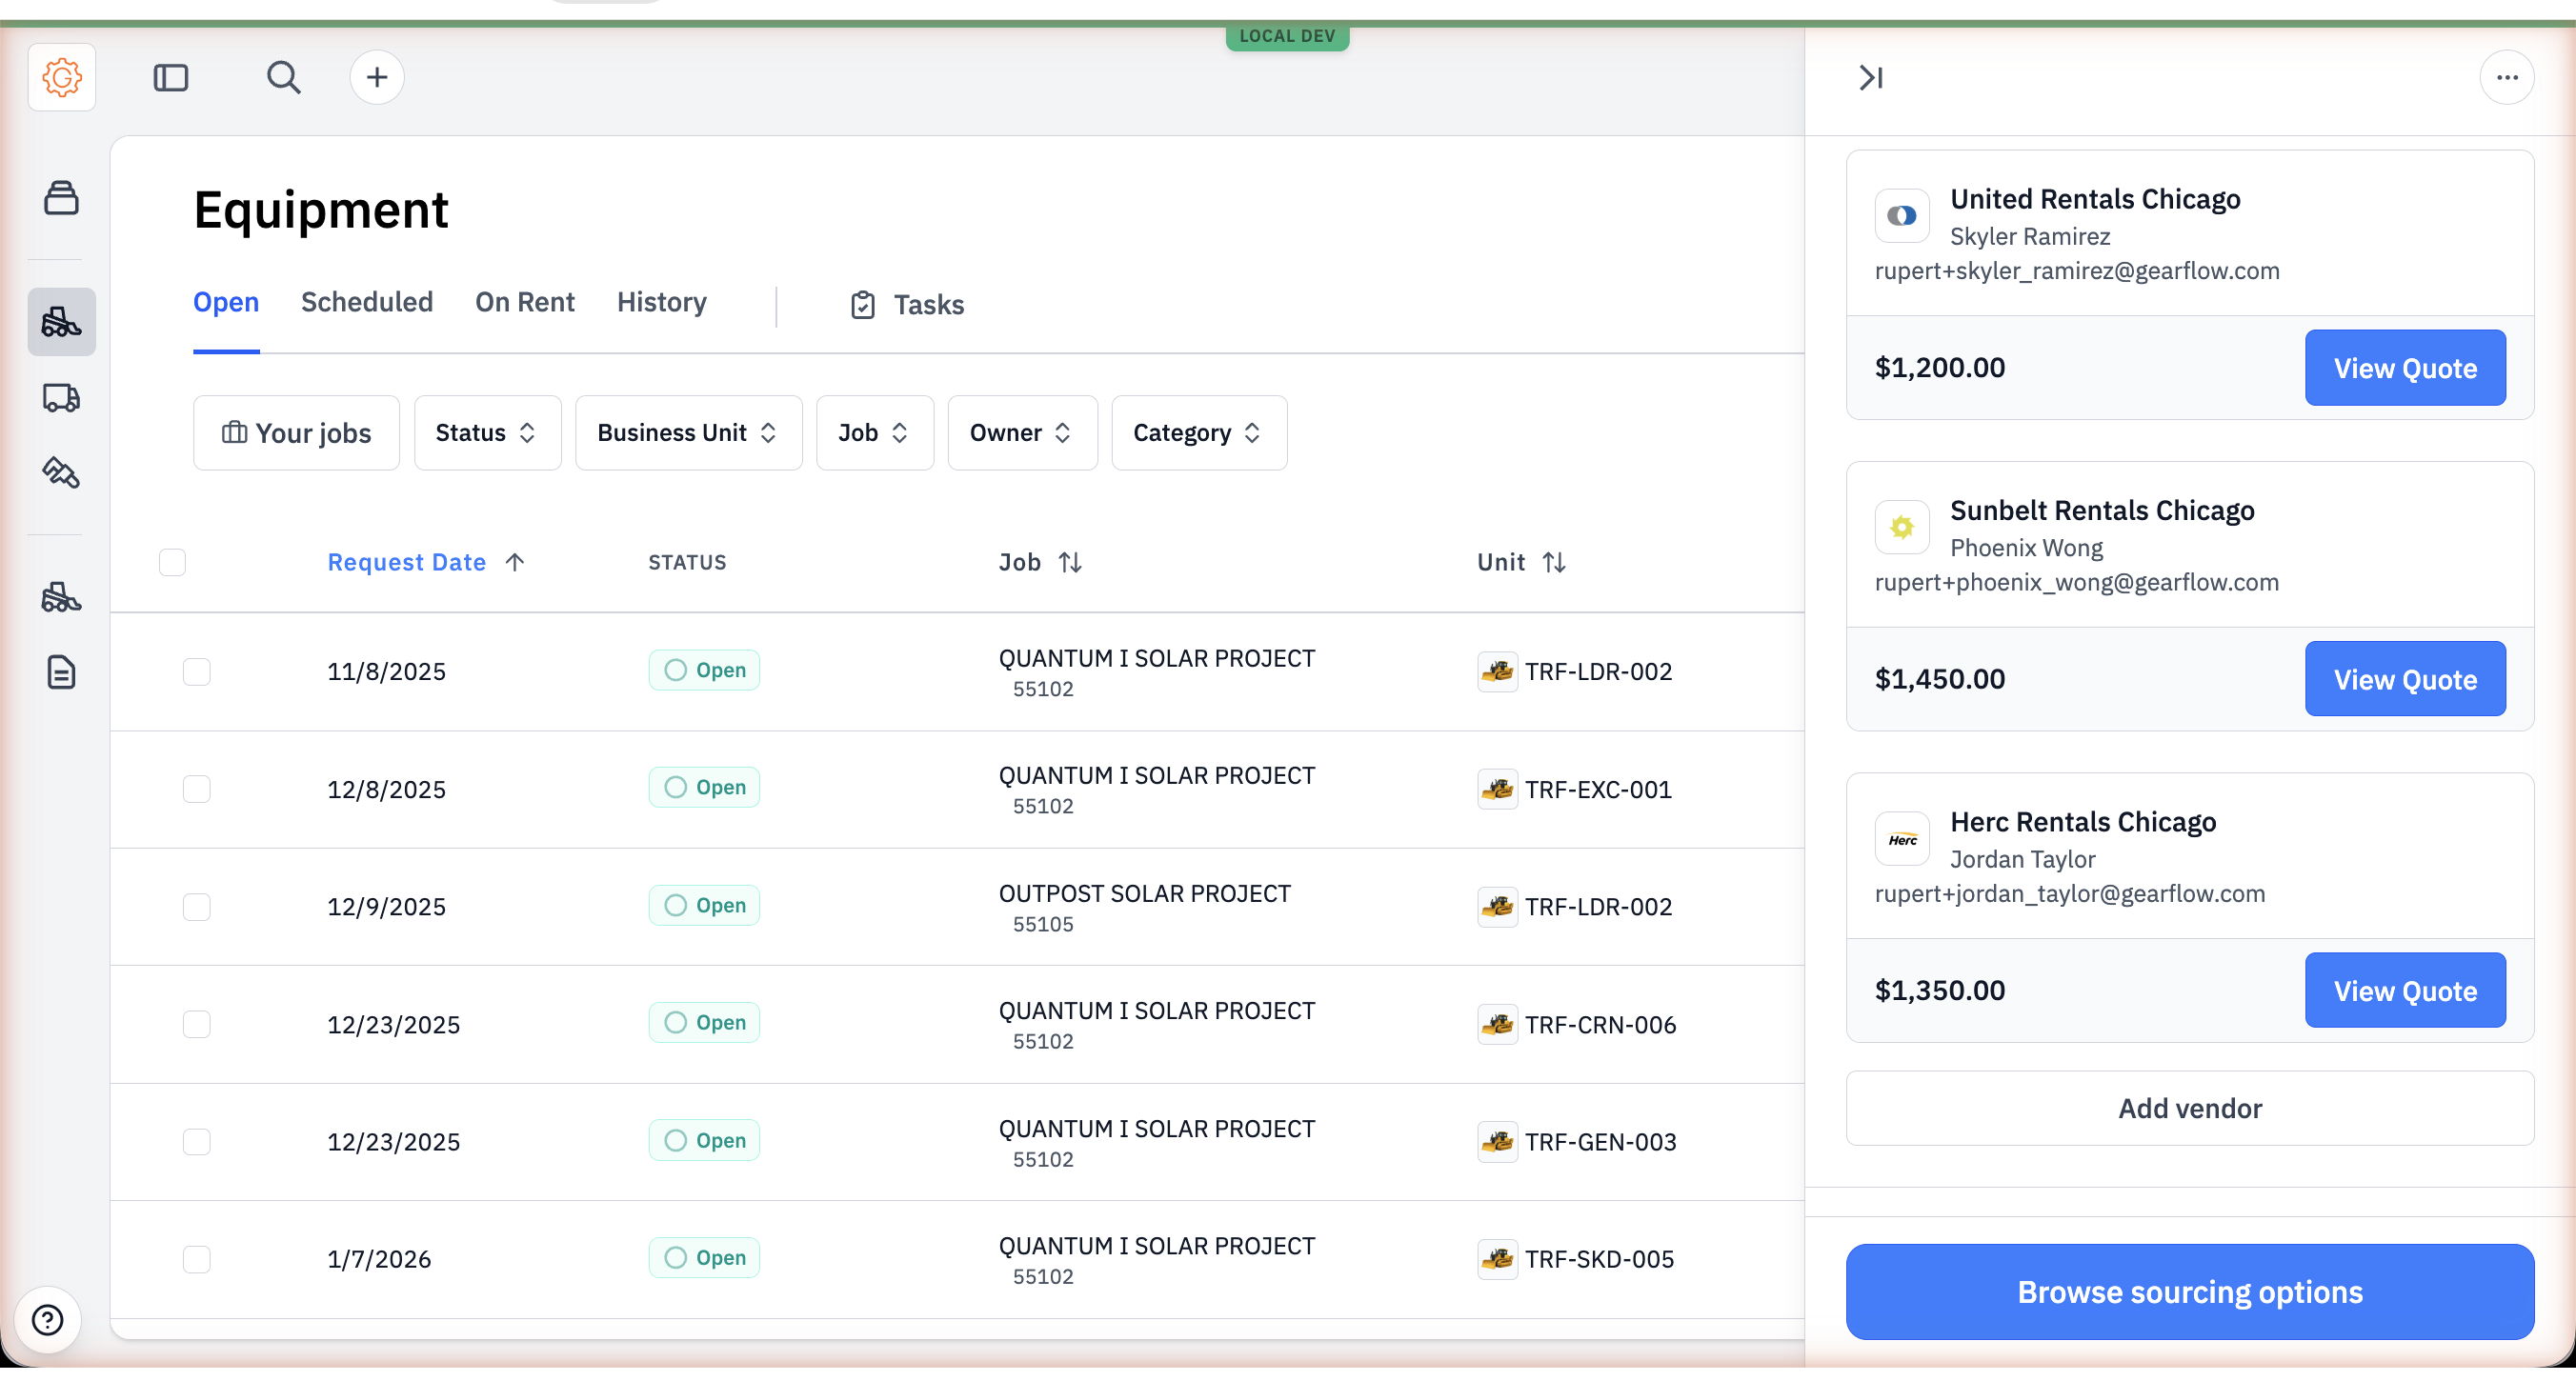
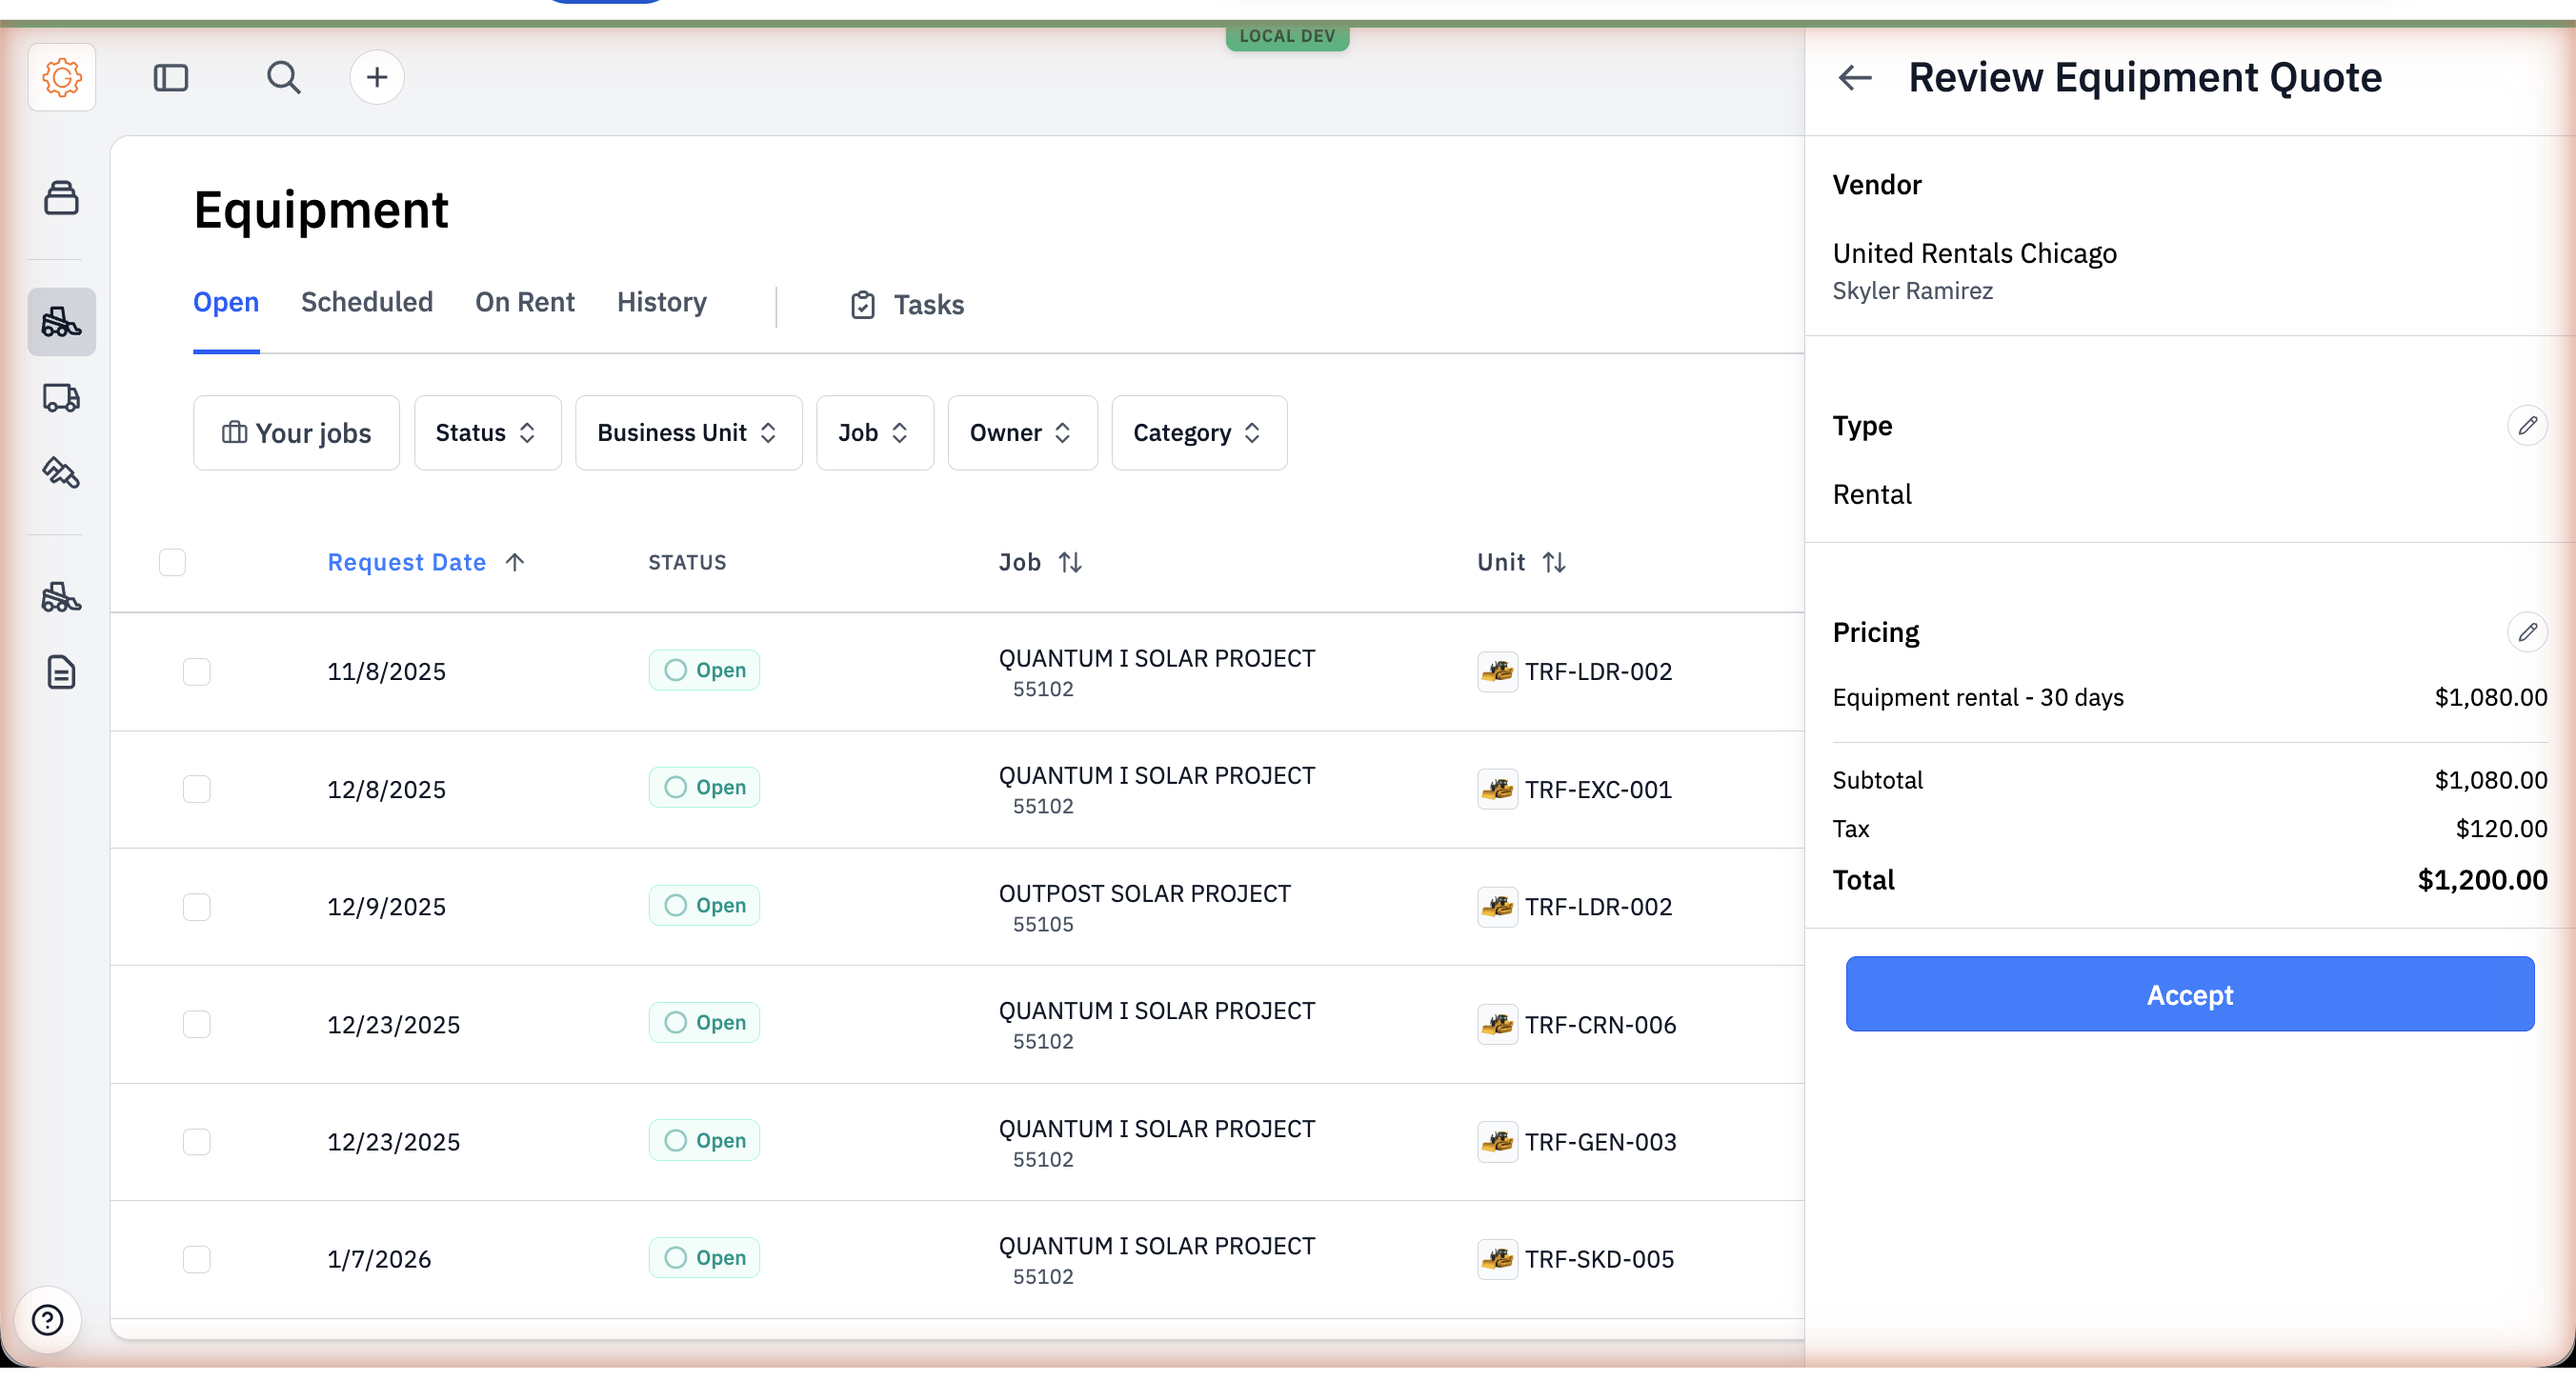
Click View Quote on any row to see the full quote: line items with daily / weekly / monthly rates, pickup & delivery, taxes, and the total. If the vendor sent a PDF, the document viewer shows it inline.
#Step 4: Send the PO
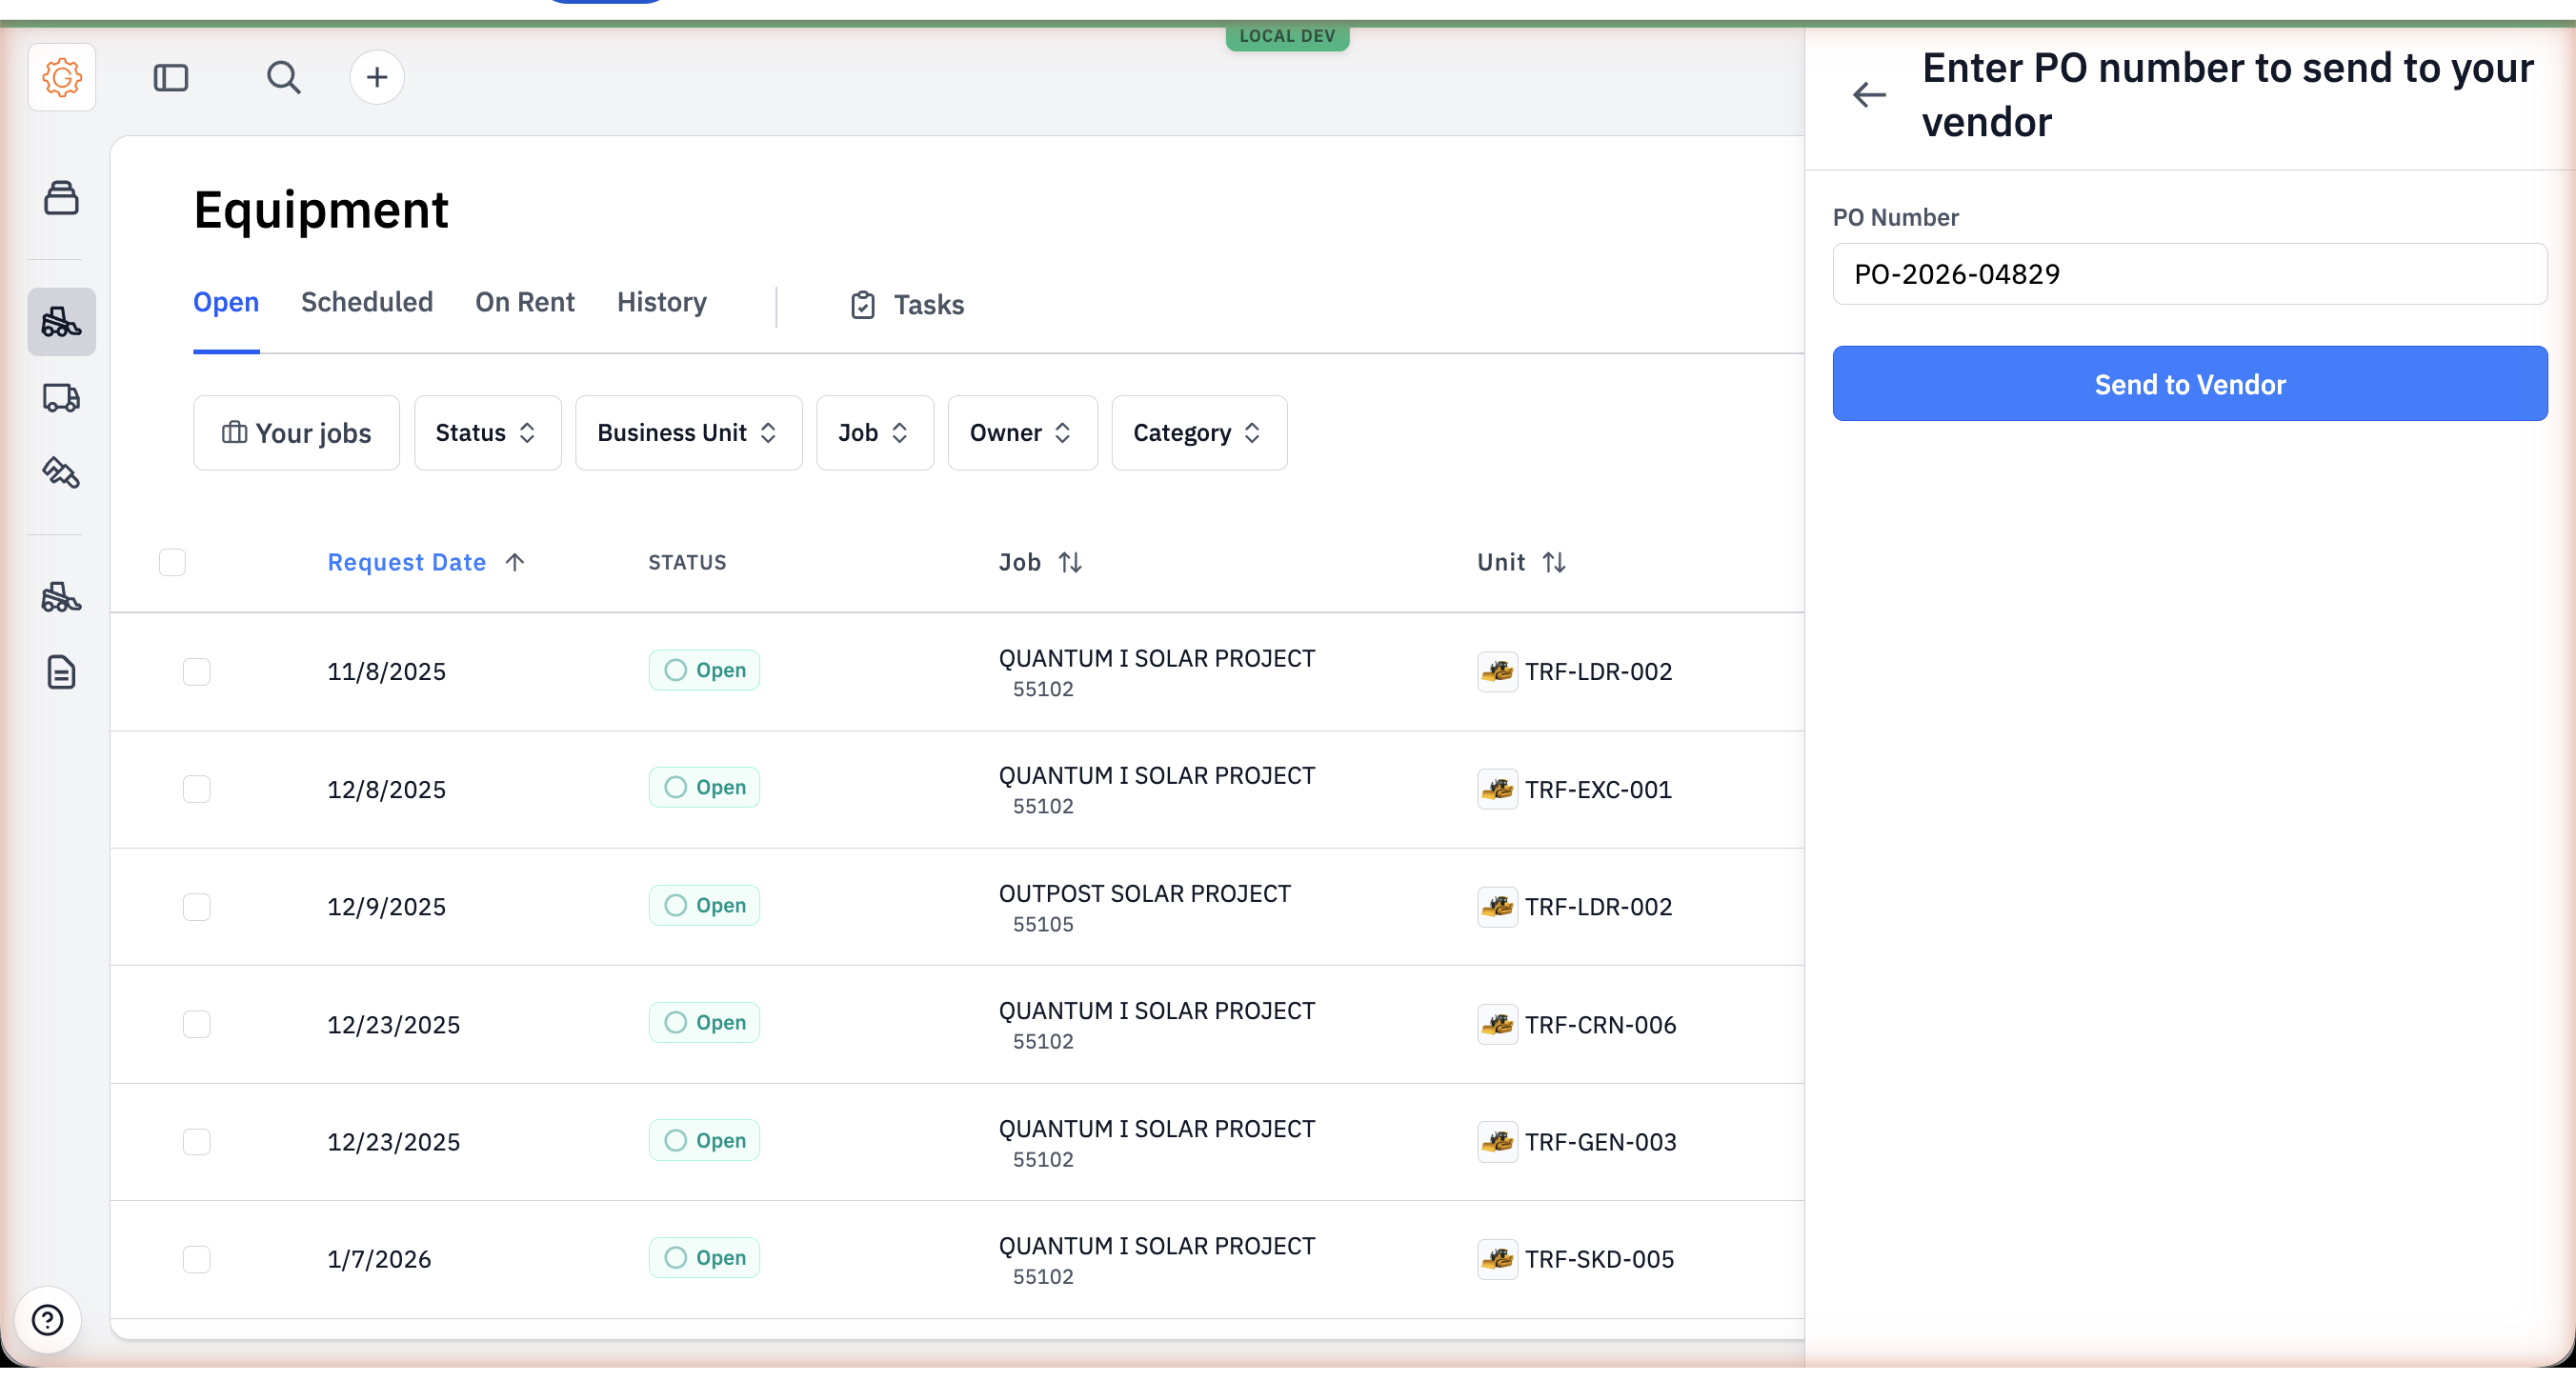
Accepting a quote prompts the buyer for a PO number. They paste it in and hit Send to Vendor; Gearflow emails the PO to the vendor and the request advances to Scheduled.
#Step 5: Check in, run, call off
Once the unit arrives on site, the person on site checks it in from the same request — verification photos, hour meter, condition. The request moves to Checked In. When the crew is done, they call it off: more photos, end meter, return arrangements. The vendor sends an invoice; Gearflow attaches it to the same request.
The whole arc — from the original Ticket through to the invoice — hangs off one record. Spend, vendor, dates, photos, messages, and PDFs all roll up to one row in the Equipment list.
#The Log Vendor escape hatch
#Tips
- Don't conflate this with parts. Equipment requests are for rental units (excavators, dozers, attachments, trucks). Parts requests live in Parts Hub Pro and have their own multi-vendor RFQ flow. Both share the "post once, get competing offers" idea, but the surfaces are different.